masonry是基于UILayoutConstraint封装的第三方布局框架,相比于UILayoutConstraint添加约束的代码量,masonry运用链式编程的思想可谓是极简单和优雅的。
本文所使用的所有代码在这里
文章目录机构结构:
1、不同方式代码添加约束的比较
2、masonry的基本用法(添加/更新/重置约束、动画效果)
3、masonry的使用技巧(多控件相对父控件居中、等间距分布,约束UIScrollView技巧)
4、UITableViewCel自适应高度介绍
一、几种代码添加约束的比较
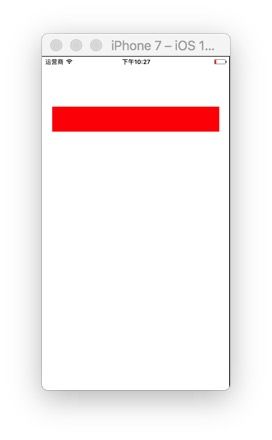
首先先创建一个View视图,并将视图添加到父视图上。
    // 创建一个子视图,添加到父视图上面
    UIView *view= [[UIView alloc] init];
    view.backgroundColor = [UIColor redColor];
    //给视图添加约束之前必须先将该视图添加到俯视图上否则会crash
    [self.view addSubview:view];
接下来我们将通过三种方法给view添加约束,以达到距离self.view的顶部为100、左右各为20,高度为50.
1、系统方法
// 1、禁用autoresizing
    view.translatesAutoresizingMaskIntoConstraints = NO;
// 2、创建约束对象
    //顶部约束(基于父控件)
    NSLayoutConstraint *topCos = [NSLayoutConstraint constraintWithItem:view attribute:NSLayoutAttributeTop relatedBy:NSLayoutRelationEqual toItem:self.view attribute:NSLayoutAttributeTop multiplier:1.0 constant:100];
    // 左边约束(基于父控件)
    NSLayoutConstraint *leftCos = [NSLayoutConstraint constraintWithItem:view attribute:NSLayoutAttributeLeft relatedBy:NSLayoutRelationEqual toItem:self.view attribute:NSLayoutAttributeLeft multiplier:1.0 constant:20];
    // 右边约束(基于父控件)
    NSLayoutConstraint *rightCos = [NSLayoutConstraint constraintWithItem:view attribute:NSLayoutAttributeRight relatedBy:NSLayoutRelationEqual toItem:self.view attribute:NSLayoutAttributeRight multiplier:1.0 constant:-20];
    // 高度约束(自身)
    NSLayoutConstraint *heightCos = [NSLayoutConstraint constraintWithItem:view attribute:NSLayoutAttributeHeight relatedBy:NSLayoutRelationEqual toItem:nil attribute:0 multiplier:1.0 constant:50];
// 3、 添加约束
    [self.view addConstraints:@[topCos,leftCos,rightCos]];
    [view addConstraint:redHeightCos];
2、VFL语言添加约束
//禁用autoresizing
    view.translatesAutoresizingMaskIntoConstraints = NO;
    // 水平方向
    NSArray *hCos = [NSLayoutConstraint constraintsWithVisualFormat:@"H:|-20-[view]-20-|" options:kNilOptions metrics:nil views:NSDictionaryOfVariableBindings(view)];
    [self.view addConstraints:hCos];
    //竖直方向
    NSArray *vCos = [NSLayoutConstraint constraintsWithVisualFormat:@"V:|-100-[view(==50)]" options:kNilOptions metrics:nil views:NSDictionaryOfVariableBindings(view)];
    [self.view addConstraints:vCos];
3、masonry添加约束
    [view mas_makeConstraints:^(MASConstraintMaker *make) {
        // 相对于self.view顶部的约束
        make.top.equalTo(self.view).offset(100);
        make.right.equalTo(self.view).offset(-20);
        make.left.equalTo(@20);//方向上的约束默认相对于俯视图
        make.height.equalTo(@50);
    }];
从给出的三种添加约束的代码中我们可以看出:
系统方法添加约束的代码量很多且相似代码占据绝大部分
VFL语句自我感觉隐晦难懂且使用字符串的方式不符合我们平时编程习惯。
masonry采用链式编程的思想,使用点语法进行方法调用简单且灵活。
接下来我们就看看如何使用masonry
二、Masonry的基本用法
首先masonry有两个宏
MAS_SHORTHAND,只要#define这个宏,就不用带mas_前缀了,但是不建议去掉,比如view.mas_left->view.left,这样容易和工程中其他view的category产生冲突。
MAS_SHORTHAND_GLOBALS,只要#define这个宏,qualTo就等价于mas_equalTo,后面就可以直接使用基本类型,而不需要转换成NSNumber了,建议添加。
- 添加约束
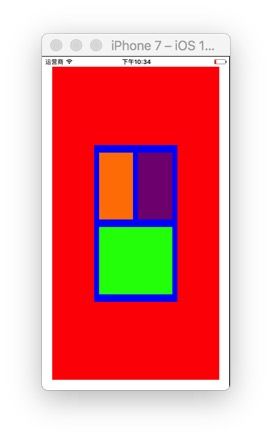
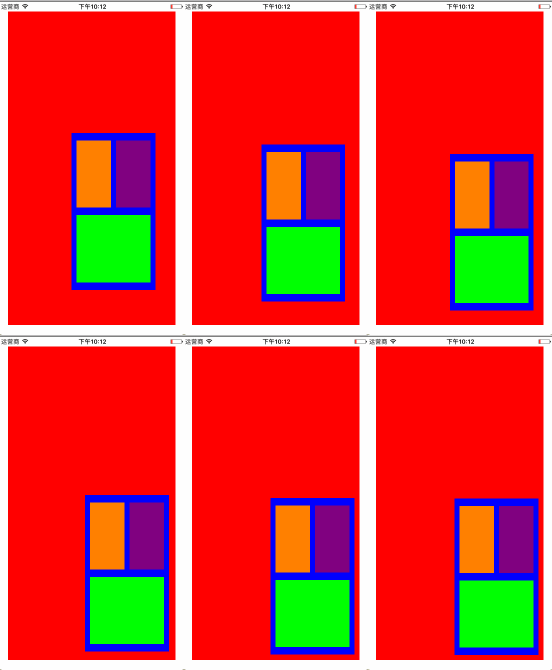
redView是距离父视图上下左右的约束均为20,blueView是redView的姿势图,宽高的redView一半,并且居中。
orangeView、purpleView和greenView是blueView的子视图,它们高度相等,左右间距均为10,上下间距均为15。
    UIView *redView = [UIView new];
    redView.backgroundColor = [UIColor redColor];
    [self.view addSubview:redView];
    UIEdgeInsets padding1 =  UIEdgeInsetsMake(20, 20, 20, 20);
    [redView mas_makeConstraints:^(MASConstraintMaker *make) {
//         方法一
//        make.right.equalTo( self.view.mas_right).offset(-20);
//        make.left.equalTo(self.view).offset(20);//默认相对方向为你想要设置的方向
//        make.top.equalTo(redView.superview).offset(20);
//        make.bottom.equalTo(-20);//默认相对视图为父视图
//         方法二
//        make.top.left.equalTo(20);// 可同时设置多个约束
//        make.right.bottom.equalTo(-20);
//        方法三
//        make.top.left.right.bottom.equalTo(self.view).insets(padding1);
//         方法四
        make.edges.equalTo(padding1);//设置内边距
    }];

    UIView *blueView = [UIView new];
    blueView.backgroundColor = [UIColor blueColor];
    [redView addSubview:blueView];
    [blueView mas_makeConstraints:^(MASConstraintMaker *make) {
        make.center.equalTo(redView);
        make.size.equalTo(redView).multipliedBy(0.5);//父视图宽度的一半
      // 等价于make.size.equalTo(redView).dividedBy(2.0);
    }];

    UIView *orangeView = [UIView new];
    orangeView.backgroundColor = [UIColor orangeColor];
    [blueView addSubview:orangeView];
    UIView *purpleView = [UIView new];
    purpleView.backgroundColor = [UIColor purpleColor];
    [blueView addSubview:purpleView];
    UIView *greenView = [UIView new];
    greenView.backgroundColor = [UIColor greenColor];
    [blueView addSubview:greenView];

    UIEdgeInsets padding2 = UIEdgeInsetsMake(15, 10, 15, 10);
    [orangeView mas_makeConstraints:^(MASConstraintMaker *make) {
        make.top.left.equalTo(blueView).insets(padding2);
        make.right.equalTo(purpleView.mas_left).insets(padding2);
       //上面写法等价于make.right.equalTo(purpleView.mas_left).offset(-10);
        make.width.equalTo(purpleView.mas_width);
        make.height.equalTo(@[purpleView,greenView]);//多个视图同一类型约束相等可传数组
        make.bottom.equalTo(greenView.mas_top).insets(padding2);
    }];
    [purpleView mas_makeConstraints:^(MASConstraintMaker *make) {
        make.top.right.equalTo(blueView).insets(padding2);
    }];
    [greenView mas_makeConstraints:^(MASConstraintMaker *make) {
        make.left.right.bottom.equalTo(blueView).insets(padding2);
    }];
- 更新约束、重置约束
更新约束:修改视图已有约束,如果该视图没有该约束则会添加这个约束。
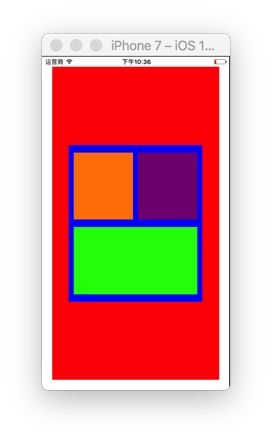
给上面的blueVIew添加一个手势方法,当被点击时blueView的宽度变成父视图的0.8倍,如下代码:
[blueView addGestureRecognizer:[[UITapGestureRecognizer alloc] initWithTarget:self action:@selector(updateConstraints:)]];
-(void)updateConstraints:(UITapGestureRecognizer *)tap{
    UIView *blueView = tap.view;
 [blueView mas_updateConstraints:^(MASConstraintMaker *make) {
    make.width.equalTo(blueView.superview).multipliedBy(0.8);
    }];
}
重置约束:当我们想要通过更新现有约束无法满足需求时,需要重新设置约束。
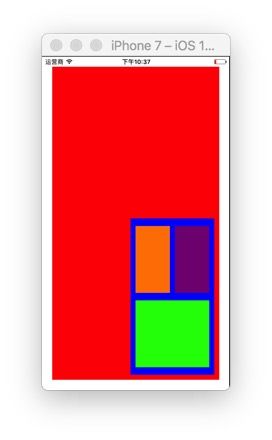
给原来的blueVIew重新添加一个手势方法,当被点击是blueView的位置距离底部和右边为10,如下代码:
[blueView addGestureRecognizer:[[UITapGestureRecognizer alloc] initWithTarget:self action:@selector(remarkConstraints:)]];
- (void)remarkConstraints:(UITapGestureRecognizer *)tap{
    UIView *blueView = tap.view;
    [blueView mas_updateConstraints:^(MASConstraintMaker *make) {
        make.right.bottom.equalTo(blueView.superview).offset(-10);
        make.width.equalTo(blueView.superview).multipliedBy(0.5);
    }];
}
- 动画效果约束
masonry动画效果很简单,只需在动画的block里view的父视图调用layoutIfNeeded即可,但是在之前我们必须调用setNeedsUpdateConstraints和updateConstraintsIfNeeded告诉视图需要更新约束。在上面代码中添加如下代码:
    // 告诉约束需要更新,但不会立即更新,
    [blueView.superview setNeedsUpdateConstraints];
    // 检测当前视图及其子视图是否需要更新约束
    [blueView.superview updateConstraintsIfNeeded];
    [UIView animateWithDuration:3 animations:^{
        // 立即更新约束
        [blueView.superview layoutIfNeeded];
    }]
三、Masonry的使用技巧
- 多个控件相对于父控件居中
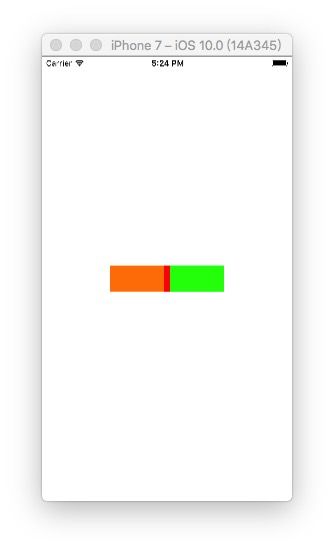
思路:首先让父控件居中,再根据子控件的size和间距拉伸父控件。水平居中分布代码如下:(垂直居中可自己尝试)
   UIView *supView = [UIView new];
  supView.backgroundColor = [UIColor redColor];
   [self.view addSubview:supView];

   UIView *leftView = [UIView new];
   leftView.backgroundColor = [UIColor orangeColor];
   [supView addSubview:leftView];

  UIView *rightView = [UIView new];
    rightView.backgroundColor = [UIColor greenColor];
    [supView addSubview:rightView];

    [supView mas_makeConstraints:^(MASConstraintMaker *make) {
        make.center.equalTo(self.view);//设置父视图居中
    }];

    [leftView mas_makeConstraints:^(MASConstraintMaker *make) {
        make.left.top.bottom.equalTo(supView);//设置上左下对齐父视图
        make.size.equalTo(CGSizeMake(80, 40));//设置尺寸
        make.right.equalTo(rightView.mas_left).offset(-10);//设置间距
    }];
    [rightView mas_makeConstraints:^(MASConstraintMaker *make) {
        make.right.top.bottom.equalTo(supView);//设置右上下对齐父视图 (配合leftView就可以确定superView的宽高了)
        make.size.equalTo(leftView);
    }];
-
等间距view布局(view的宽度也是相同的)
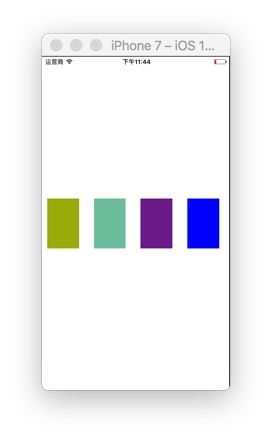
masonry给array扩展一些方法,可以对数组里的多个view同时设置约束,其中mas_distributeViewsAlongAxis就可以设置数组里view的间距问题,一种方法是指定间距拉伸view的宽度,另一种方法是指定view的宽度等分间距。
给出代码及注释如下:
- UIScrollView约束
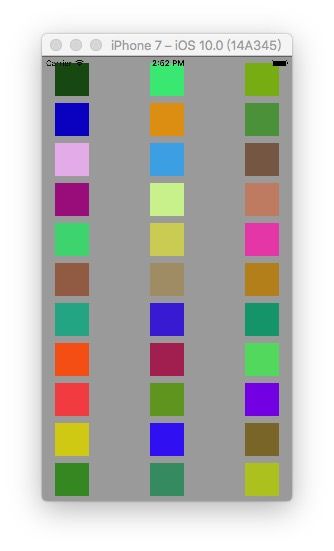
思路:给scrollView添加唯一的子视图contentView,通过拉伸子视图的size来确定scrollView的contentSize,代码和实现见下方代码和注释:
-(void)scrollViewTest{
    UIScrollView *scrollView = [UIScrollView new];
    scrollView.backgroundColor = [UIColor redColor];
    [self.view addSubview:scrollView];
    [scrollView mas_makeConstraints:^(MASConstraintMaker *make) {
        make.edges.equalTo(self.view);
    }];

    UIView *contentView = [UIView new];
    contentView.backgroundColor = [UIColor lightGrayColor];
    [scrollView addSubview:contentView];

    [contentView mas_makeConstraints:^(MASConstraintMaker *make) {
        //设置边距相对于scrollView的约束
        //(自己的见解:contentView的edges相对scrollView的edges的约束  contentView实际上被拉伸的宽高是相对于scrollView的contentSize的)
        make.edges.equalTo(scrollView);
        //因为上面的宽高是相对于contentSize的  所以为0  这里需要设置contentView的宽度约束后  scrollView的contentSize.width就会拉伸
        make.width.equalTo(scrollView);
    }];

    NSMutableArray *lastArray;
    NSMutableArray *array = [NSMutableArray array];
    for (NSInteger i = 0; i<99; i++) {
        UIView *view = [UIView new];
        view.backgroundColor = [UIColor colorWithRed:(arc4random()%255)/255.0 green:(arc4random()%255)/255.0 blue:(arc4random()%255)/255.0 alpha:1];
        [contentView addSubview:view];
        [array addObject:view];

        if ((i+1)%3 == 0) { //一行分三个  最后一行如果不足三个则忽略
            [array mas_distributeViewsAlongAxis:MASAxisTypeHorizontal withFixedItemLength:50 leadSpacing:20 tailSpacing:20];
            [array mas_makeConstraints:^(MASConstraintMaker *make) {
                make.height.equalTo(50);
                make.top.equalTo(lastArray.count?((UIView *)lastArray[0]).mas_bottom:contentView).offset(10);
            }];
            lastArray = array.mutableCopy;
            array = [NSMutableArray array];
        }
    }

    [contentView mas_makeConstraints:^(MASConstraintMaker *make) {
        // 这里设置contentView的底部约束等于最后一排视图底部约束后  contentView的高度就确定了  scrollView的contentSize.height就会拉伸
        make.bottom.equalTo(((UIView *)lastArray[0]).mas_bottom);
    }];
}
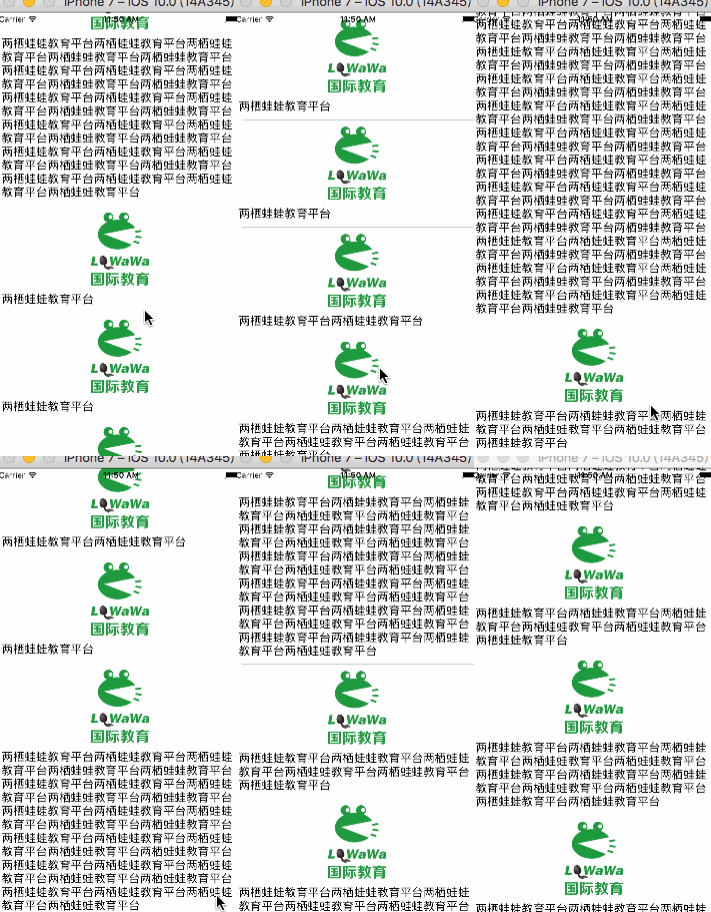
四、UITableViewCell自适应高度
UITableView算是我们开发中使用频率最多的控件了,但是cell的高度的计算确实一直是我们头疼的问题。我们最理想的状态:cell的高度自己决定,而不需要我们进行计算。下面就介绍autoLayout是如何实现的自适应高度的
- 系统方法。self-sizing cell,顾名思义,cell的高度自己决定,这正是我们想要的。
如果约束正确,所有contentView的子视图的约束可以撑开contentVIew,那么只需要设置:
   tableView.estimatedRowHeight = 100;//一个估算值
   tableView.rowHeight = UITableViewAutomaticDimension;//可以不设置,ios8之后默认值
只适用于iOS8及以上,且在数据量超大的时候,进行插入和删除,都是很不流畅的,并且在调用scrollToRowAtIndexPath:方法时,甚至会出现白屏情况。当然这种方法针对一些常用场景,比如新闻列表、商品列表什么的,数据量没那么大且不涉及到新增、删除数据的时候,这种方法,还是蛮不错的,写起来很简便。
- UITableView+FDTemplateLayoutCell
这是一个三方框架,同样简单的api,就可以达到自适应cell高度的效果。作者通过RunLoop进行缓存、预缓存,使tableView的滑动十分流畅。如果想要了解更多的可以看作者博客,写的十分详尽。
!注意:使用这个框架时,cell的创建必须要以-registerClass:forCellReuseIdentifier: 或 -registerNib:forCellReuseIdentifier:其中之一的注册方法创建的。具体使用方法见代码:
-(UITableViewCell *)tableView:(UITableView *)tableView cellForRowAtIndexPath:(NSIndexPath *)indexPath{
    TestCell *cell = [tableView dequeueReusableCellWithIdentifier:@"TestCell"];
    [cell configCellWithImageStr:@"logo" contentStr:_dataArray[indexPath.row]];
    return cell;
}
-(CGFloat)tableView:(UITableView *)tableView heightForRowAtIndexPath:(NSIndexPath *)indexPath{
    return  [tableView fd_heightForCellWithIdentifier:@"TestCell" cacheByIndexPath:indexPath configuration:^(TestCell *cell) {
        // 这里调用cell子视图赋值的方法
        [cell configCellWithImageStr:@"logo" contentStr:_dataArray[indexPath.row]];
    }];
}
-(void)configCellWithImageStr:(NSString *)imageStr contentStr:(NSString *)content{
    self.logoIv.image = [UIImage imageNamed:imageStr];
    self.contentLb.text = content;
}
