springboot+整合ssm
1. SpringBoot介绍
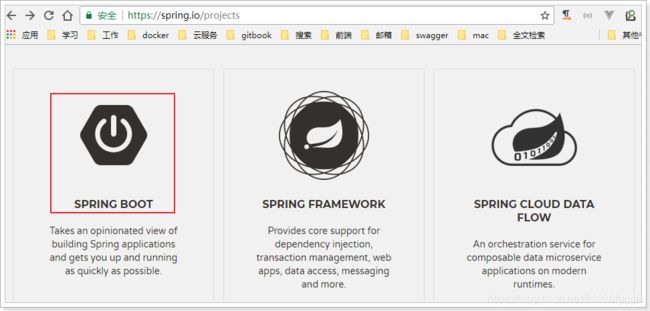
SpringBoot是Spring项目中的一个子工程,与我们所熟知的Spring-framework 同属于spring的产品:
其实人们把Spring Boot 称为搭建程序的
脚手架。其最主要作用就是帮我们快速的构建庞大的spring项目,并且尽可能的减少一切xml配置,做到开箱即用,迅速上手,让我们关注与业务而非配置。
国内学习网站:http://412887952-qq-com.iteye.com/
2.快速入门
接下来,我们就来利用SpringBoot搭建一个web工程,体会一下SpringBoot的魅力所在!
2.1.创建工程
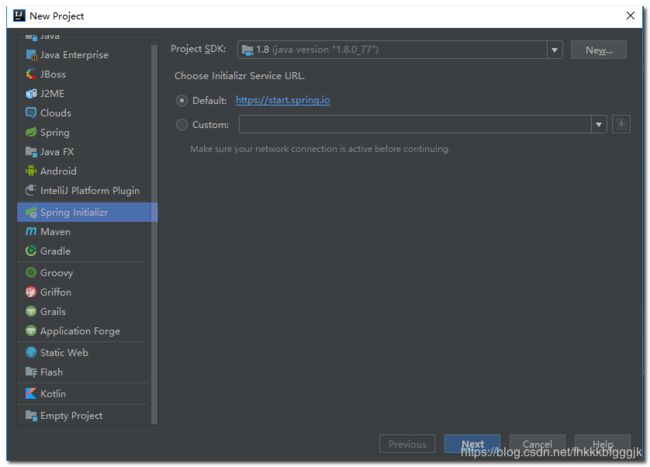
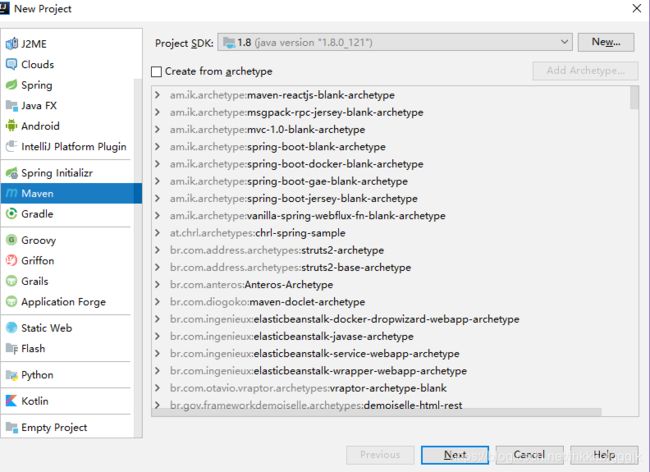
方式一: 使用脚手架来构建:
选择项目依赖
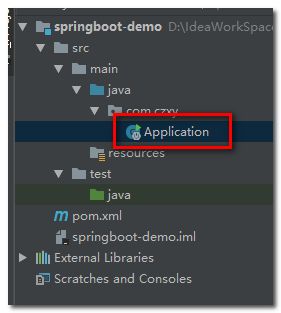
项目结构:
2.2.方式二: 不联网的方式创建项目
2.2.1.添加父工程坐标
所有的SpringBoot项目在pom.xml中必须添加父工程坐标:
<parent>
    <groupId>org.springframework.boot</groupId>
    <artifactId>spring-boot-starter-parent</artifactId>
    <version>2.0.0.RELEASE</version>
</parent>
2.2.2.添加web启动器
为了让SpringBoot帮我们完成各种自动配置,我们必须引入SpringBoot提供的自动配置依赖,我们称为启动器。因为我们是web项目,这里我们引入web启动器:
    <dependencies>
        <dependency>
            <groupId>org.springframework.boot</groupId>
            <artifactId>spring-boot-starter-web</artifactId>
        </dependency>
    </dependencies>
需要注意的是,我们并没有在这里指定版本信息。因为SpringBoot的父工程已经对版本进行了管理了。
这个时候,我们会发现项目中多出了大量的依赖:
这些都是SpringBoot根据spring-boot-starter-web这个依赖自动引入的,而且所有的版本都已经管理好,不会出现冲突。
2.2.3.管理jdk版本
默认情况下,maven工程的jdk版本是1.5,而我们开发使用的是1.8,因此这里我们需要修改jdk版本,只需要简单的添加以下属性即可:
<properties>
    <java.version>1.8java.version>
properties>
2.2.4.完整pom
<project xmlns="http://maven.apache.org/POM/4.0.0"
         xmlns:xsi="http://www.w3.org/2001/XMLSchema-instance"
         xsi:schemaLocation="http://maven.apache.org/POM/4.0.0 http://maven.apache.org/xsd/maven-4.0.0.xsd">
    <modelVersion>4.0.0modelVersion>
    <parent>
        <groupId>org.springframework.bootgroupId>
        <artifactId>spring-boot-starter-parentartifactId>
        <version>2.0.0.RELEASEversion>
    parent>
    <groupId>com.czxygroupId>
    <artifactId>springboot-demoartifactId>
    <version>1.0-SNAPSHOTversion>

    <properties>
        <java.version>1.8java.version>
    properties>

    <dependencies>
        <dependency>
            <groupId>org.springframework.bootgroupId>
            <artifactId>spring-boot-starter-webartifactId>
        dependency>
    dependencies>

project>
2.3.启动类
Spring Boot项目通过main函数即可启动,我们需要创建一个启动类:
然后编写main函数:
@SpringBootApplication
public class Application {
    public static void main(String[] args) {
        SpringApplication.run(Application.class, args);
    }
}
2.4.编写controller
接下来,我们就可以像以前那样开发SpringMVC的项目了!
我们编写一个controller:
代码:
@Controller
public class HelloController {

    @RequestMapping("/hello")
    @ResponseBody // 返回json字符串的时候,采用这个注解
    public String hello(){
        return "JAVA1班,牛逼!!!";
    }
}
2.5.启动测试
接下来,我们运行main函数,查看控制台:
并且可以看到监听的端口信息:
- 1)监听的端口是8080
- 2)SpringMVC的映射路径是:/
- 3)
/hello路径已经映射到了HelloController中的hello()方法
打开页面访问:http://localhost:8080/hello

测试成功了!
3.SpringBoot实践-整合SSM
需求:实现一个用户管理系统,对用户进行CRUD操作
前端:easyUI
后端:SpringBoot+ssm+通用Mapper+druid+mysql
接下来,我们来看看如何用SpringBoot来玩转以前的SSM,我们用到的数据库tb_user和实体类User如下:
tb_user:
CREATE TABLE `tb_user` (
  `id` bigint(20) NOT NULL,
  `username` varchar(50) DEFAULT NULL,
  `password` varchar(50) DEFAULT NULL,
  `name` varchar(50) DEFAULT NULL,
  `age` int(11) DEFAULT NULL,
  `sex` int(11) DEFAULT NULL,
  `birthday` date DEFAULT NULL,
  `created` date DEFAULT NULL,
  `updated` date DEFAULT NULL,
  `note` varchar(50) DEFAULT NULL
) ENGINE=InnoDB DEFAULT CHARSET=utf8;

INSERT INTO `tb_user` VALUES ('1', 'ly', '123456', '柳岩', '18', null, '2000-12-06', null, null, null);
User:
public class User implements Serializable {
    private static final long serialVersionUID = 1L;
    private Long id;
    // 用户名
    private String userName;
    // 密码
    private String password;
    // 姓名
    private String name;
    // 年龄
    private Integer age;
    // 性别,1男性,2女性
    private Integer sex;
    // 出生日期
    private Date birthday;
    // 创建时间
    private Date created;
    // 更新时间
    private Date updated;
    // 备注
    private String note;
    public Long getId() {
        return id;
    }
   // getter 和 setter方法
   // ...
    @Override
    public String toString() {
        return "User [id=" + id + ", userName=" + userName + ", password="
                + password + ", name=" + name + ", age=" + age + ", sex=" + sex
                + ", birthday=" + birthday + ", created=" + created
                + ", updated=" + updated + ", note=" + note + "]";
    }
}
3.1.整合启动器
3.1.1 整合SpringMVC启动器
<dependency>
    <groupId>org.springframework.bootgroupId>
    <artifactId>spring-boot-starter-webartifactId>
dependency>
3.1.2 整合JDBC和事务启动器
<dependency>
    <groupId>org.springframework.bootgroupId>
    <artifactId>spring-boot-starter-jdbcartifactId>
dependency>
3.1.3 整合mysql驱动包
<dependency>
    <groupId>mysqlgroupId>
    <artifactId>mysql-connector-javaartifactId>
dependency>
3.1.4 整合druid启动器
<dependency>
    <groupId>com.alibabagroupId>
    <artifactId>druid-spring-boot-starterartifactId>
    <version>1.1.10version>
dependency>
3.1.5 整合mybatis启动器
<dependency>
    <groupId>org.mybatis.spring.bootgroupId>
    <artifactId>mybatis-spring-boot-starterartifactId>
    <version>1.3.2version>
dependency>
3.1.6 整合通用Mapper启动器
<dependency>
    <groupId>tk.mybatisgroupId>
    <artifactId>mapper-spring-boot-starterartifactId>
    <version>2.0.2version>
dependency>
3.2 编写代码
3.2.1 dao
@org.apache.ibatis.annotations.Mapper // mybatis
public interface UserMapper extends Mapper<User> {
}
3.2.2 controller
@Controller
@RequestMapping("/user")
public class UserController {

    @Autowired
    private UserService userService;

    @RequestMapping("/findAll")
    @ResponseBody// 结果返回json
    public List<User> findAll(){
        List<User> list = userService.findAll();
        return list;
    }

}
3.2.3 service
/**
 * Service中实现业务
 *  用户的CRUD操作,在此类中需要提供 增、删、改、查 4个方法
 */
@Service
@Transactional// 注解
public class UserService {
    @Resource
    private UserMapper userMapper;


    public List<User> findAll() {
        return userMapper.selectAll();
    }
}
3.2.4 pojo
@Table(name = "tb_user")
public class User {
    @Id
    // @GeneratedValue(strategy = GenerationType.IDENTITY)//对应mysql的自增长主键策略
    private Integer id;
    private String userName;
    private String password;
    private String name;
    private Integer age;
    private Integer sex;
    private Date birthday;
    private String note;// 说明,备注
    private Date created;// 创建时间
    private Date updated;// 更新时间
}
3.3 properties属性文件
3.3.1 连接数据库四大金刚
# 连接四大金刚 等号前面是key,是固定写法,等号后面是根据自己的数据库来定义
spring.datasource.url=jdbc:mysql://localhost:3306/ssm_user
spring.datasource.username=root
spring.datasource.password=123456
# 可省略,SpringBoot自动推断 驱动
spring.datasource.driverClassName=com.mysql.jdbc.Driver
3.3.2 数据库连接池druid
# druid连接池
#初始化连接数
spring.datasource.druid.initial-size=1
#最小空闲连接
spring.datasource.druid.min-idle=1
#最大活动连接
spring.datasource.druid.max-active=20
#获取连接时测试是否可用
spring.datasource.druid.test-on-borrow=true
#监控页面启动
spring.datasource.druid.stat-view-servlet.allow=true
3.4 测试访问
3.6 查找单个用户
3.6.1 dao
略。
3.6.2 controller
@RequestMapping("/findUserById")
@ResponseBody
public User findUserById(Integer id){
    User user = userService.findUserById(id);
    return user;
}
3.6.3 service
public User findUserById(Integer id){
    return userMapper.selectByPrimaryKey(id);
}
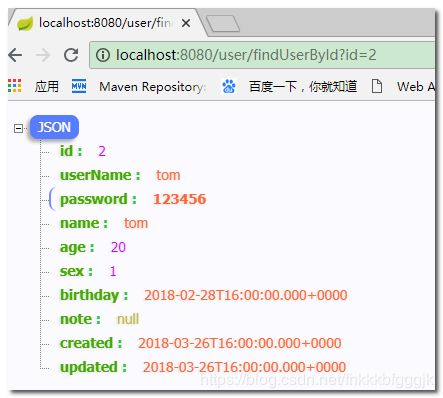
3.6.4 测试
3.5 进阶使用
3.5.1.修改端口
查看SpringBoot的全局属性可知,端口通过以下方式配置:
# 映射端口
server.port=80
重启服务后测试:
3.5.2.访问静态资源
现在,我们的项目是一个jar工程,那么就没有webapp,我们的静态资源该放哪里呢?
默认的静态资源路径为:
- classpath:/META-INF/resources/
- classpath:/resources/
- classpath:/static/
- classpath:/public
只要静态资源放在这些目录中任何一个,SpringMVC都会帮我们处理。
我们习惯会把静态资源放在classpath:/static/目录下。我们创建目录,并且添加一些静态资源:
3.6 EasyUI+SpringBoot分页查找用户信息
3.6.1 PageHelper启动器
<dependency>
    <groupId>com.github.pagehelpergroupId>
    <artifactId>pagehelper-spring-boot-starterartifactId>
    <version>1.2.5version>
dependency>
3.6.2 dao
略。
3.6.3 service
public PageResult queryUserByPage(Integer page,Integer rows){
    // 分页
    PageHelper.startPage(page,rows);
    // 查找数据
    List<User> users = userMapper.select(null);
    // 封装分页信息
    PageInfo<User> info = new PageInfo<>(users);
    // 组装PageResult
    PageResult pageResult = new PageResult();
    // 填充total
    pageResult.setTotal(info.getTotal());
    // 数据
    pageResult.setRows(info.getList());

    return pageResult;
}
3.6.4 controller
/**
 *
 * @param page 页码
 * @param rows 条数
 * @return
 */
@RequestMapping("/queryUserByPage")
@ResponseBody
public PageResult queryUserByPage(Integer page,Integer rows){
    PageResult pageResult = userService.queryUserByPage(page, rows);
    return pageResult;
}
3.6.5 vo
public class PageResult {
    private Long total;
    private List rows;
}
3.6.6 页面
<html lang="en">
<head>
    <meta charset="UTF-8">
    <title>Titletitle>

    <link type="text/css" href="easyui/css/easyui.css">
    <link type="text/css" href="easyui/css/icon.css">


    <script type="text/javascript" src="easyui/js/jquery-1.8.0.min.js">script>
    <script type="text/javascript" src="easyui/js/jquery.easyui.min.js">script>
    <script type="text/javascript" src="easyui/js/easyui-lang-zh_CN.js">script>

head>
<body>
    <table id="userList">table>
    <script>
        // 先定义好datagrid需要的列
        var columns=[[
            // field:对应数据中的字段,
            // title:表格的列标题
            // width: 列的宽度
            {field:'id',title:'编号',width:50},
            {field:'userName',title:'登录名',width:50},
            {field:'password',title:'密码',width:50},
            {field:'name',title:'姓名',width:50},
            {field:'age',title:'年龄',width:50},
            {field:'sex',title:'性别',width:50},
            {field:'birthday',title:'生日',width:100},
            {field:'note',title:'简介',width:50},
            {field:'created',title:'创建时间',width:100},
            {field:'updated',title:'更新时间',width:100},
            {field:'修改',title:'edit',width:50,formatter: function(value,row,index){
                    return "修改"
                }
            },{
            field:'删除',title:'delete',width:50,formatter: function(value,row,index){
                return "删除"
                }
            }
        ]];

        var toolbar = [{
                text:'新增', // 显示文本
                iconCls:'icon-add',
                handler:function () {
                    alert("新增")
                }
          }
        ];

        $(function () {
            $("#userList").datagrid({
                columns:columns,
                url:"/user/queryUserByPage",
                method:"get",
                toolbar:toolbar,
                pagination:true,
                pageSize:3,
                pageList:[3,5,9,20],
                striped:true,
                idField:"id"
            })

        })
    script>
body>
html>
3.6.7 测试
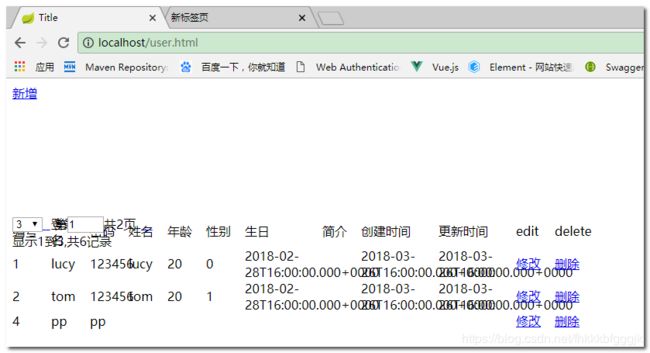
1、结果,css样式丢失
2、bug:导入css样式的时候添加 rel=“stylesheet”
<link  rel="stylesheet"  type="text/css" href="easyui/css/easyui.css">
<link  rel="stylesheet"  type="text/css" href="easyui/css/icon.css">
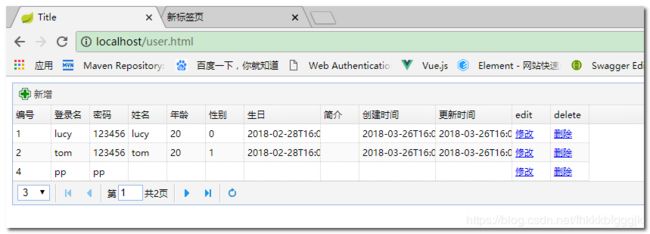
修改之后,测试ok,效果如下
