版本记录
| 版本号 | 时间 |
|---|---|
| V1.0 | 2017.03.29 星期三 |
前言
很多APP都是标签控制器和导航控制器嵌套在一起,这样的架构是APP的经典架构。下面就说一下这个框架的实现,让我们一起看一下在Tabbar上我们都可以玩什么。
计划目标
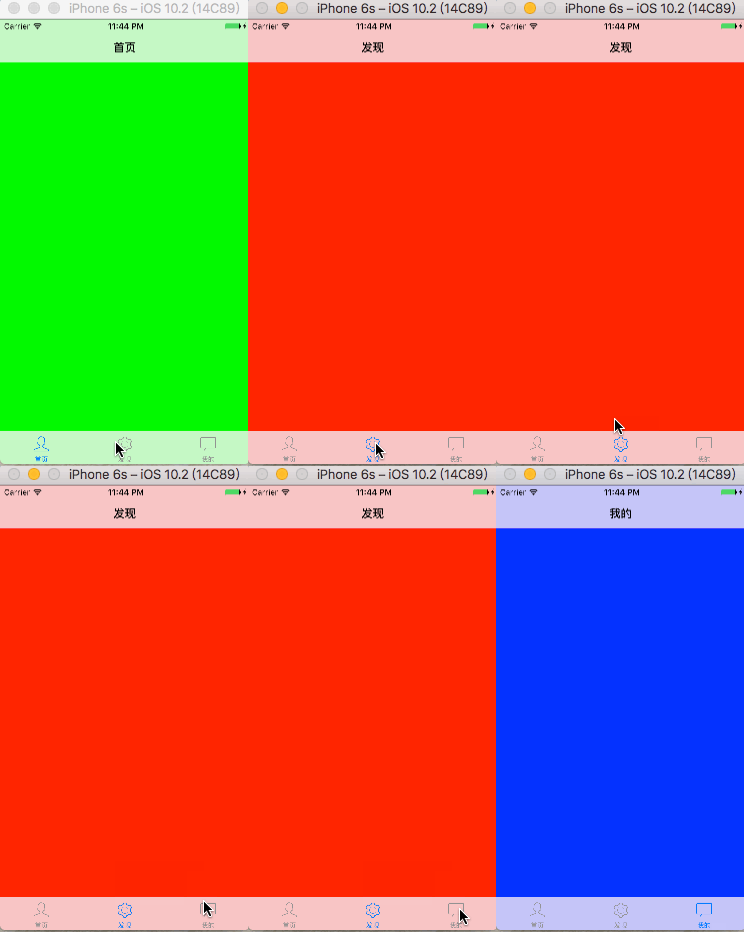
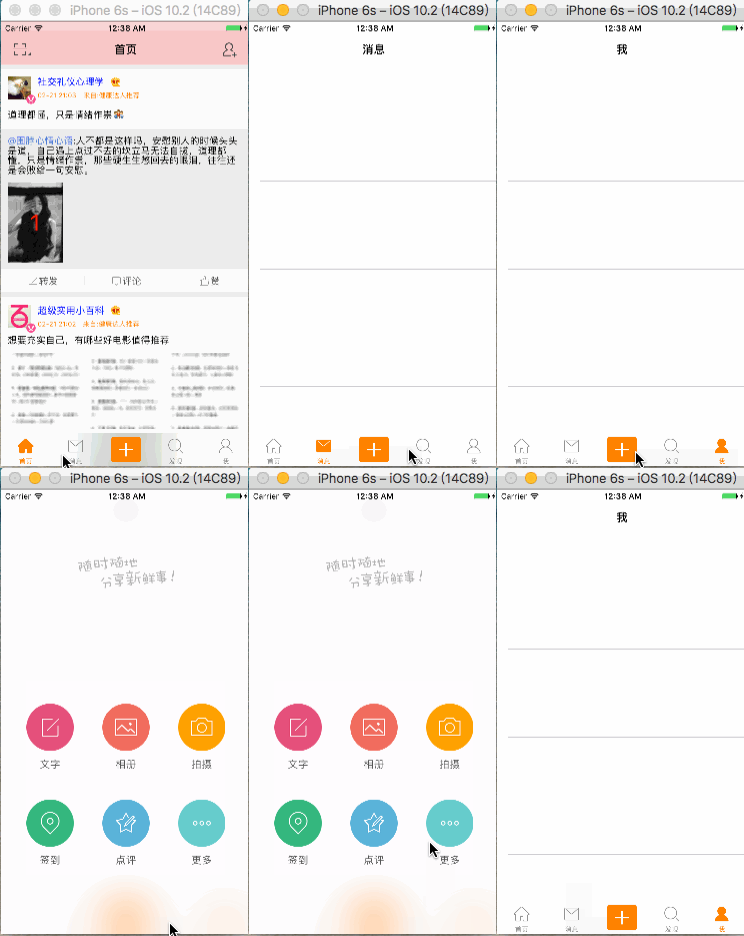
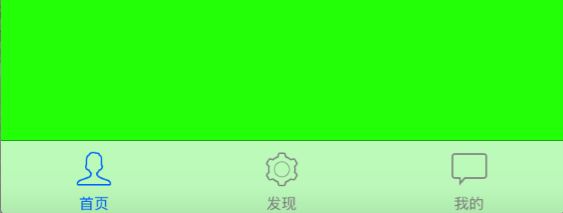
标签控制器嵌套导航控制器实现APP基本架构。这里我写了两种,一种是经典的标签控制器,另外一种是自定义标签控制器。
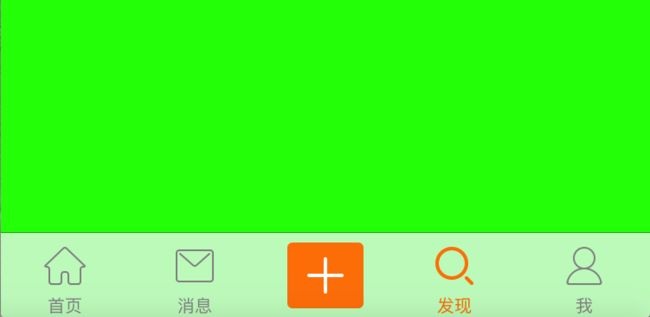
和下面这个自定义tabBar
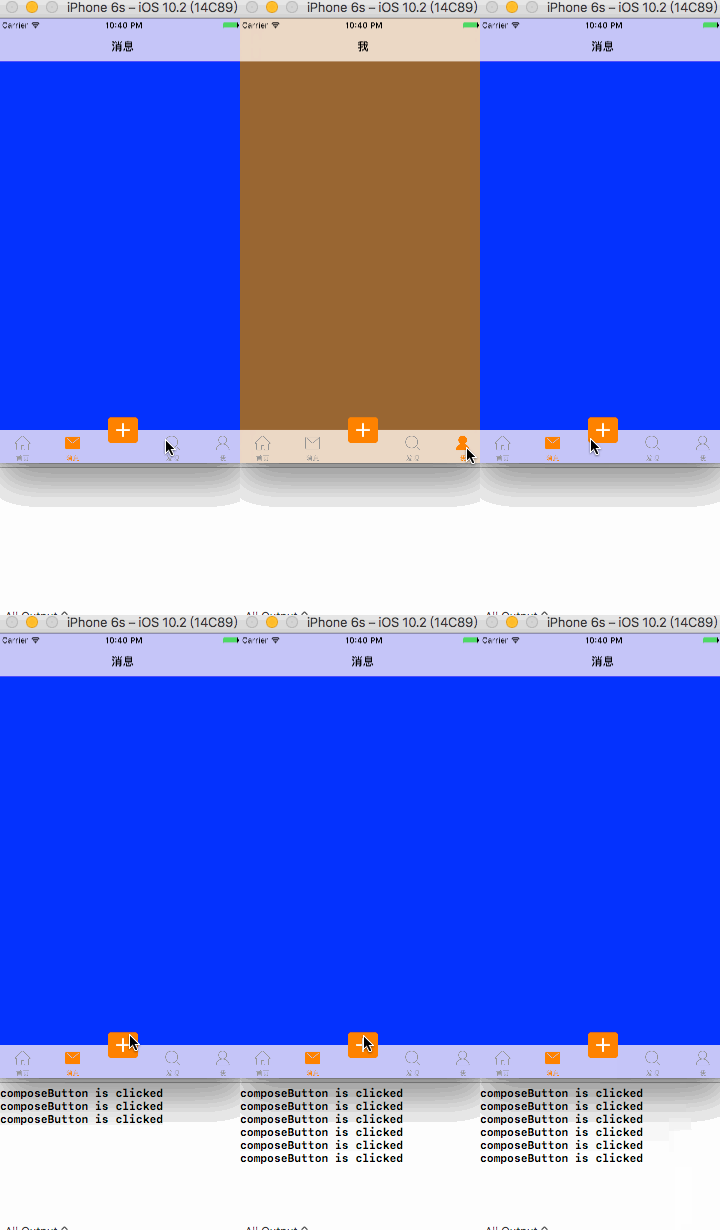
以及下面这个自定义按钮超过tabBar高度的特殊情况
目标实现
1、类QQ框架实现
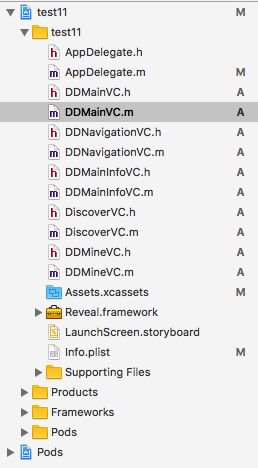
我们先看一下都写了哪些类,这里只是写的一个demo,并没有按照正常的项目那样组织代码结构,先看一下。
这里标签分了三部分,分别是主页(DDMainInfoVC),发现(DiscoverVC),我的(DDMineVC)。
不多说了,我就直接上代码了。
AppDelegate.m文件
#import "AppDelegate.h"
#import "DDMainVC.h"

@interface AppDelegate ()

@end

@implementation AppDelegate


- (BOOL)application:(UIApplication *)application didFinishLaunchingWithOptions:(NSDictionary *)launchOptions {

    self.window = [[UIWindow alloc] initWithFrame:[UIScreen mainScreen].bounds];
    DDMainVC *mainVC = [[DDMainVC alloc] init];
    self.window.rootViewController = mainVC;
    [self.window makeKeyAndVisible];

    return YES;
}
DDMainVC.h文件
#import

@interface DDMainVC : UITabBarController

@end
DDMainVC.m文件
#import "DDMainVC.h"
#import "DDNavigationVC.h"
#import "DDMainInfoVC.h"
#import "DiscoverVC.h"
#import "DDMineVC.h"

@interface DDMainVC ()

@end

@implementation DDMainVC

#pragma mark - Override Base Function

- (void)viewDidLoad
{
    [super viewDidLoad];


    UIViewController *mainVC = [self getClassName:@"DDMainInfoVC" nameTitle:@"首页" imageName:@"home_line"];
    UIViewController *discoverVC = [self getClassName:@"DiscoverVC" nameTitle:@"发现" imageName:@"discover_line"];
    UIViewController *mineVC = [self getClassName:@"DDMineVC" nameTitle:@"我的" imageName:@"my_line"];

    self.viewControllers = @[mainVC, discoverVC, mineVC];
}


#pragma mark - Object Proivate Function

- (UIViewController *)getClassName: (NSString *)classStr nameTitle: (NSString *)nameTitle imageName: (NSString *)imageName
{
    Class cls = NSClassFromString(classStr);
    UIViewController *vc = [[cls alloc] init];
    NSAssert([vc isKindOfClass:[UIViewController class]], @"%@类名写错了",classStr);
    vc.title = nameTitle;
    vc.tabBarItem.image = [UIImage imageNamed:imageName];
    UINavigationController *nav = [[UINavigationController alloc] initWithRootViewController:vc];

    return nav;
}

@end
其他的几个控制器就没什么写的了,我只是在里面不同的控制器的View设置成了不同的颜色。如下图所示。
ps:这里图标寓意对应的不是很好,大家凑合着看吧。
2、类WeiBo框架实现
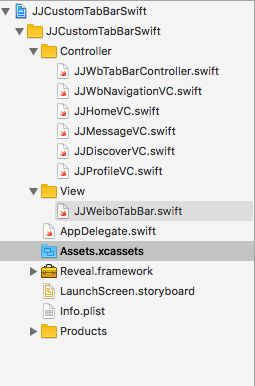
- 先看一下Swift实现代码组织结构
直接看代码
JJWbTabBarController.swift文件
import UIKit

class JJWbTabBarController: UITabBarController {

    //MARK - Override Base Function

    override func viewDidLoad() {
        super.viewDidLoad()

        let tabBar = JJWeiboTabBar()
        setValue(tabBar, forKey: "tabBar")

        addChildViewController(viewController: JJHomeVC(), title: "首页", imageName: "tabbar_home")
        addChildViewController(viewController: JJMessageVC(), title: "消息", imageName: "tabbar_message_center")
        addChildViewController(viewController: JJDiscoverVC(), title: "发现", imageName:  "tabbar_discover")
        addChildViewController(viewController: JJProfileVC(), title: "我", imageName: "tabbar_profile")
    }

    //MARK - Object Private Function

    private func addChildViewController(viewController: UIViewController, title: String, imageName: String){

        viewController.title = title
        viewController.tabBarItem.image = UIImage(named: imageName);
        viewController.tabBarItem.selectedImage = UIImage(named: "\(imageName)_selected")?.withRenderingMode(UIImageRenderingMode.alwaysOriginal)
        viewController.tabBarItem .setTitleTextAttributes([NSForegroundColorAttributeName : UIColor.orange], for: UIControlState.selected)
        let vcNav = JJWbNavigationVC(rootViewController: viewController)
        addChildViewController(vcNav)

    }

}
AppDelegate.swift文件
import UIKit

@UIApplicationMain
class AppDelegate: UIResponder, UIApplicationDelegate {

    var window: UIWindow?

    func application(_ application: UIApplication, didFinishLaunchingWithOptions launchOptions: [UIApplicationLaunchOptionsKey: Any]?) -> Bool {

        window = UIWindow(frame: UIScreen.main.bounds)
        window?.rootViewController = JJWbTabBarController()
        window?.makeKeyAndVisible()

        return true
    }
}
JJWeiboTabBar.swift文件
import UIKit

class JJWeiboTabBar: UITabBar {

    //重写父类方法初始化
    override init(frame: CGRect){
        super.init(frame: frame)
        setupUI()
    }

    required init?(coder aDecoder: NSCoder) {
        fatalError("init(coder:) has not been implemented")
    }

    override func layoutSubviews() {
        super.layoutSubviews()

        let tabBarButtonWidth = UIScreen.main.bounds.size.width * 0.2
        var index : CGFloat = 0.0

        for value in subviews {
            if value.isKind(of: NSClassFromString("UITabBarButton")!){
                value.frame.size.width = tabBarButtonWidth;
                value.frame.origin.x = index * tabBarButtonWidth
                index += 1
            if index == 2 {
                index += 1
            }
          }
        }

        composeButton.center.x = UIScreen.main.bounds.size.width * 0.5
        composeButton.center.y = self.bounds.size.height * 0.5
    }

    // Object Private Function

    private func setupUI(){

        addSubview(composeButton)
    }

    @objc private func composeButtonDidClick(){

        print("composeButton is clicked")
    }

    // lazy load

    lazy var composeButton : UIButton = {
        let button = UIButton()
        button.setImage(UIImage(named:"tabbar_compose_icon_add"), for: UIControlState.normal)
        button.setImage(UIImage(named:"tabbar_compose_icon_add_highlighted"), for: UIControlState.highlighted)
        button.setBackgroundImage(UIImage(named:"tabbar_compose_button"), for: UIControlState.normal)
        button.setBackgroundImage(UIImage(named:"tabbar_compose_button_highlighted"), for: UIControlState.highlighted)
        button.addTarget(self, action: #selector(composeButtonDidClick), for: UIControlEvents.touchUpInside)
        button.sizeToFit()
        return button;
    }()

}
直接运行,可见效果如目标一样,这里只贴出一张特写图片。
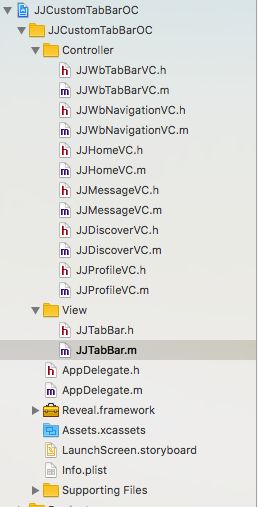
- 再看一下OC代码的实现
先看组织结构
直接看代码
AppDelegate.m文件
#import "AppDelegate.h"
#import "JJWbTabBarVC.h"

@interface AppDelegate ()

@end

@implementation AppDelegate


- (BOOL)application:(UIApplication *)application didFinishLaunchingWithOptions:(NSDictionary *)launchOptions {

    self.window = [[UIWindow alloc] initWithFrame:[UIScreen mainScreen].bounds];
    JJWbTabBarVC *tabBarVC = [[JJWbTabBarVC alloc] init];
    self.window.rootViewController = tabBarVC;
    [self.window makeKeyAndVisible];
    return YES;
}
JJTabBar.m 文件
#import "JJTabBar.h"

@interface JJTabBar ()

@property (nonatomic, strong) UIButton *composeButton;

@end


@implementation JJTabBar

#pragma mark - Override Base Function

- (instancetype)initWithFrame:(CGRect)frame
{
    if (self = [super initWithFrame:frame]) {
        [self setupUI];
    }
    return self;
}

- (void)layoutSubviews
{
    [super layoutSubviews];

    NSInteger tabBarButtonWidth = [UIScreen mainScreen].bounds.size.width * 0.2;
    NSInteger index = 0;

    for (UIView *value in self.subviews) {
        if ([value isKindOfClass:[NSClassFromString(@"UITabBarButton") class]]) {

            CGRect tabBarButtonFrame = value.frame;

            tabBarButtonFrame.origin.x = tabBarButtonWidth * index;
            tabBarButtonFrame.size.width = tabBarButtonWidth;
            value.frame = tabBarButtonFrame;
            index++;
            if (index == 2) {
                index++;
            }

        }
    }

    CGPoint composeButtonCenter = self.composeButton.center;
    composeButtonCenter.x = [UIScreen mainScreen].bounds.size.width * 0.5;
    composeButtonCenter.y = self.bounds.size.height * 0.5;
    self.composeButton.center = composeButtonCenter;

}


#pragma mark - Object Base Function

- (void)setupUI
{
    UIButton *button = [[UIButton alloc] init];
    [button setImage:[UIImage imageNamed:@"tabbar_compose_icon_add"] forState:UIControlStateNormal];
    [button setImage:[UIImage imageNamed:@"tabbar_compose_icon_add_highlighted"] forState:UIControlStateSelected];
    [button setBackgroundImage:[UIImage imageNamed:@"tabbar_compose_button"] forState:UIControlStateNormal];
    [button setBackgroundImage:[UIImage imageNamed:@"tabbar_compose_button_highlighted"] forState:UIControlStateSelected];
    [button addTarget:self action: @selector(composeButtonDidCompose) forControlEvents:UIControlEventTouchUpInside];
    [button sizeToFit];
    self.composeButton = button;
    [self addSubview:self.composeButton];
}

- (void)composeButtonDidCompose
{
    NSLog(@"compose Button did clicked");
}

@end
JJWbTabBarVC.m文件
#import "JJWbTabBarVC.h"
#import "JJWbNavigationVC.h"
#import "JJHomeVC.h"
#import "JJMessageVC.h"
#import "JJDiscoverVC.h"
#import "JJProfileVC.h"
#import "JJTabBar.h"

@interface JJWbTabBarVC ()

@property (nonatomic, strong) JJTabBar *customTabBar;

@end

@implementation JJWbTabBarVC


#pragma mark - Override Base Function

- (void)viewDidLoad {
    [super viewDidLoad];

    [self setupUI];

}


#pragma mark - Object Private Function

- (void)setupUI
{
    self.customTabBar = [[JJTabBar alloc] init];
    [self setValue:self.customTabBar forKey:@"tabBar"];

    [self addChildVCWithController:@"JJHomeVC" title:@"首页" imageName:@"tabbar_home"];
    [self addChildVCWithController:@"JJMessageVC" title:@"消息" imageName:@"tabbar_message_center"];
    [self addChildVCWithController:@"JJDiscoverVC" title:@"发现" imageName:@"tabbar_discover"];
    [self addChildVCWithController:@"JJProfileVC" title:@"我" imageName:@"tabbar_profile"];

}

- (void)addChildVCWithController: (NSString *)vcName title: (NSString *)title imageName: (NSString *)imageName
{
    Class cls = NSClassFromString(vcName);
    UIViewController *vc = [[cls alloc] init];
    JJWbNavigationVC *nav = [[JJWbNavigationVC alloc] initWithRootViewController:vc];
    if ([vc isKindOfClass:[UIViewController class]]) {
        vc.title = title;
        vc.tabBarItem.image = [UIImage imageNamed:imageName];
        vc.tabBarItem.selectedImage = [[UIImage imageNamed:[NSString stringWithFormat:@"%@_selected",imageName]] imageWithRenderingMode:UIImageRenderingModeAlwaysOriginal];
        [vc.tabBarItem setTitleTextAttributes:[NSDictionary dictionaryWithObjectsAndKeys:[UIColor orangeColor],NSForegroundColorAttributeName, nil] forState:UIControlStateSelected];
    }
    [self addChildViewController:nav];
}


@end
具体结果同上这里就不贴出来了。
3、具有特殊按钮的自定义tabBar
我这里说的特殊,是因为其中有的按钮的高度超过了tabBar的高度,一旦超过了其高度,就不是视图那样简单了,超过了父控件的大小,就要处理响应的问题,都需要进行hitTest测试。我们只要在上面类QQ框架上进行修改即可。
- swift的实现
JJWeiboTabBar.swift 修改文件
    @objc private func composeButtonDidClick(){

        print("composeButton is clicked")
    }

    override func hitTest(_ point: CGPoint, with event: UIEvent?) -> UIView? {

        if self.isUserInteractionEnabled == false || self.isHidden == true || self.alpha == 0{
            return nil;
        }

        if point.y >= self.composeButton.frame.origin.y && point.y <= self.composeButton.frame.origin.y + self.composeButton.bounds.height && point.x >= self.composeButton.frame.origin.x && point.x <= self.composeButton.frame.origin.x + self.composeButton.bounds.width{
            return self.composeButton
        }

        else {
            return super.hitTest(point, with: event)
        }
    }
实现结果如目标中所示,就不贴图了。
- OC的实现
还是看代码
JJTabBar.m 修改文件
- (UIView *)hitTest:(CGPoint)point withEvent:(UIEvent *)event
{
    if (CGRectContainsPoint(self.composeButton.frame, point)) {
        return self.composeButton;
    }
    else {
        return [super hitTest:point withEvent:event];
    }
}
具体结果还是和目标那里一样,就不贴图了。
后记
谢谢亲人朋友和喜欢我的人对我的支持,还有就是有什么写的不对的地方,希望多多指正。
