OpenGL学习之帧缓冲
什么是帧缓冲呢?
我们使用了几种不同类型的屏幕缓冲:用于写入颜色值的颜色缓冲,用于写入深度信息的深度缓冲,以及允许我们基于一些条件丢弃指定片段的模板缓冲。把这几种缓冲结合起来叫做帧缓冲(Framebuffer),它被储存于内存中。OpenGL给了我们自己定义帧缓冲的自由,我们可以选择性的定义自己的颜色缓冲、深度和模板缓冲。
帧缓冲的步骤主要有哪些呢?
//创建帧缓冲对象
GLuint fbo;
glGenFramebuffers(1,&fbo);
//绑定帧缓冲对象
glBindFramebuffer(GL_FRAMEBUFFER,fbo);
//建构一个完整的帧缓冲必须满足以下条件:
//我们必须往里面加入至少一个附件(颜色、深度、模板缓冲)。
//其中至少有一个是颜色附件。
//所有的附件都应该是已经完全做好的(已经存储在内存之中)。
//每个缓冲都应该有同样数目的样本。
//检查当前的帧缓冲对象
if(!(glCheckFramebufferStatus(GL_FRAMEBUFFER) == GL_FRAMEBUFFER))
return ;
//为了让所有的渲染操作对主窗口产生影响我们必须通过绑定为0来使默认帧缓冲被激活:
glBindFramebuffer(GL_FRAMEBUFFER, 0);//最后记得删除帧缓冲对象
glDeleteFramebuffers(1, &fbo);
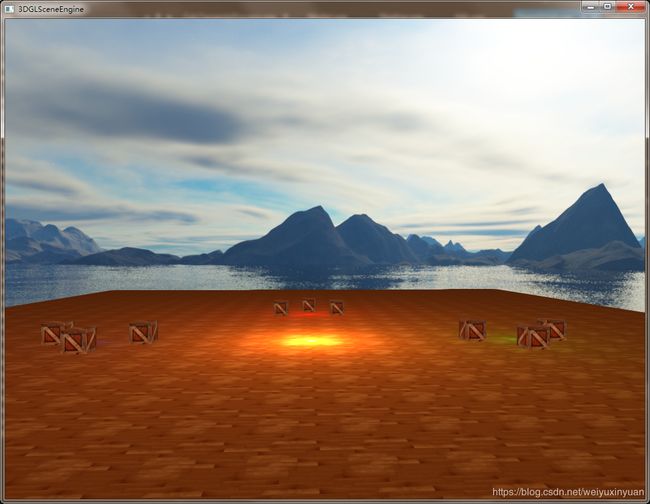
下面贴图代码详细一一实验不同的帧缓冲所带来的炫酷效果。只能贴出部分重要伪代码,全部代码忽略根据你自己的场景来定。
frame.h
    //帧缓冲对象
    GLuint m_FrameBuffer;
    //帧缓冲纹理DI
    GLuint m_FrmeTextureID;
    //四边形顶点数组对象
    GLuint m_quadVAO;
    //渲染屏幕纹理着色器对象
    CShader* m_screenShader;
frame.cpp
void initScene()
{
//帧缓冲初始化代码
      //创建帧缓冲对象
      glGenFramebuffers(1, &m_FrameBuffer);
      glBindFramebuffer(GL_FRAMEBUFFER, m_FrameBuffer);
      //创建帧缓冲纹理
      glGenTextures(1, &m_FrmeTextureID);
      glBindTexture(GL_TEXTURE_2D, m_FrmeTextureID);
      glTexImage2D(GL_TEXTURE_2D, 0, GL_RGB, 1024, 768, 0, GL_RGB, GL_UNSIGNED_BYTE, NULL);
      glTexParameteri(GL_TEXTURE_2D, GL_TEXTURE_MIN_FILTER, GL_LINEAR);
      glTexParameteri(GL_TEXTURE_2D, GL_TEXTURE_MAG_FILTER, GL_LINEAR);
      glBindTexture(GL_TEXTURE_2D, 0);

      glFramebufferTexture2D(GL_FRAMEBUFFER, GL_COLOR_ATTACHMENT0, GL_TEXTURE_2D, m_FrmeTextureID, 0);
      // Create a renderbuffer object for depth and stencil attachment (we won't be sampling these)
      GLuint rbo;
      glGenRenderbuffers(1, &rbo);
      glBindRenderbuffer(GL_RENDERBUFFER, rbo);
      glRenderbufferStorage(GL_RENDERBUFFER, GL_DEPTH24_STENCIL8, 1024, 768); // Use a single renderbuffer object for both a depth AND stencil buffer.
      glBindRenderbuffer(GL_RENDERBUFFER, 0);
      glFramebufferRenderbuffer(GL_FRAMEBUFFER, GL_DEPTH_STENCIL_ATTACHMENT, GL_RENDERBUFFER, rbo); // Now actually attach it
                                                                                                    // Now that we actually created the framebuffer and added all attachments we want to check if it is actually complete now
      if (glCheckFramebufferStatus(GL_FRAMEBUFFER) != GL_FRAMEBUFFER_COMPLETE)
          std::cout << "ERROR::FRAMEBUFFER:: Framebuffer is not complete!" << std::endl;
      glBindFramebuffer(GL_FRAMEBUFFER, 0);

//准备渲染帧缓冲纹理到四边形的数据
                                   // Positions   // TexCoords
          -1.0f,  1.0f,  0.0f, 1.0f,
          -1.0f, -1.0f,  0.0f, 0.0f,
           1.0f, -1.0f,  1.0f, 0.0f,

          -1.0f,  1.0f, 0.0f, 1.0f,
          1.0f, -1.0f,  1.0f, 0.0f,
          1.0f,  1.0f,  1.0f, 1.0f,

      };
      // Setup screen VAO
      GLuint quadVBO;
      glGenVertexArrays(1, &m_quadVAO);
      glGenBuffers(1, &quadVBO);
      glBindVertexArray(m_quadVAO);
      glBindBuffer(GL_ARRAY_BUFFER, quadVBO);
      glBufferData(GL_ARRAY_BUFFER, sizeof(quadVertices), &quadVertices, GL_STATIC_DRAW);
      glEnableVertexAttribArray(0);
      glVertexAttribPointer(0, 2, GL_FLOAT, GL_FALSE, 4 * sizeof(GLfloat), (GLvoid*)0);
      glEnableVertexAttribArray(1);
      glVertexAttribPointer(1, 2, GL_FLOAT, GL_FALSE, 4 * sizeof(GLfloat), (GLvoid*)(2 * sizeof(GLfloat)));
      glBindVertexArray(0);
      m_screenShader->loadShader("../res/shader/screen.vs", "../res/shader/screen.ps");
 }
渲染代码:
void render()
{
    glBindFramebuffer(GL_FRAMEBUFFER, m_FrameBuffer);
    glClear(GL_COLOR_BUFFER_BIT | GL_DEPTH_BUFFER_BIT/*| GL_STENCIL_BUFFER_BIT*/);
    // Clear all attached buffers
    glClearColor(0.1f, 0.1f, 0.1f, 1.0f);
    glEnable(GL_DEPTH_TEST);
    //此处是你的渲染场景物体的代码。此处忽略。
  	drawScene();
    glBindFramebuffer(GL_FRAMEBUFFER, 0);

     // Clear all relevant buffers
     glClearColor(1.0f, 1.0f, 1.0f, 1.0f); // Set clear color to white (not really necessery actually, since we won't be able to see behind the quad anyways)
     glClear(GL_COLOR_BUFFER_BIT);
     glDisable(GL_DEPTH_TEST); // We don't care about depth information when rendering a single quad

     m_screenShader->ProgramUse();
     m_screenShader->setShaderUniform(m_screenShader->getProgram(), "screenTexture", (GLuint)0);
     glBindVertexArray(m_quadVAO);
     glBindTexture(GL_TEXTURE_2D, m_FrmeTextureID);	// Use the color attachment texture as the texture of the quad plane
     glDrawArrays(GL_TRIANGLES, 0, 6);
     glBindVertexArray(0);
}
渲染帧缓冲纹理的着色器代码如下:
screen.vs
#version 330 core
layout (location = 0) in vec2 position;
layout (location = 1) in vec2 texCoords;

out vec2 TexCoords;

void main()
{
    gl_Position = vec4(position.x, position.y, 0.0f, 1.0f);
    TexCoords = texCoords;
}
screen.ps
#version 330 core
in vec2 TexCoords;
out vec4 color;

uniform sampler2D screenTexture;
void main()
{
    color = texture(screenTexture, TexCoords);
}
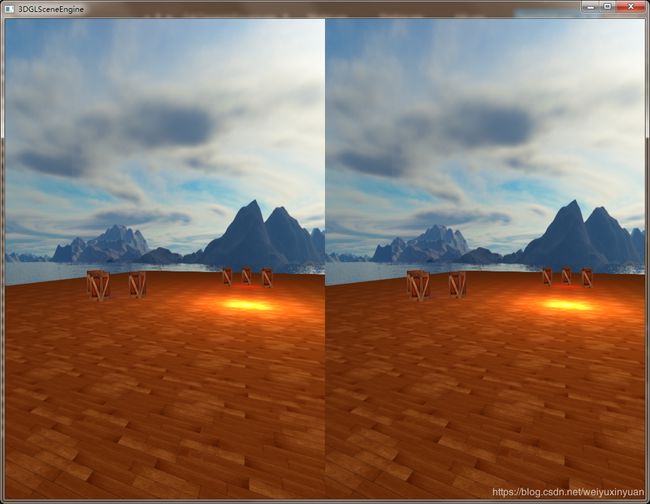
下面可以实现分屏,将渲染到纹理发挥到极致,只可修改四边形的顶点即可。
代码如下:
      GLfloat quadVertices1[] = {   // Vertex attributes for a quad that fills the entire screen in Normalized Device Coordinates.
           // Positions   // TexCoords
          -1.0f,  1.0f,  0.0f, 1.0f,
          -1.0f, -1.0f,  0.0f, 0.0f,
          0.0f, -1.0f,  1.0f, 0.0f,

          -1.0f,  1.0f,  0.0f, 1.0f,
          0.0f, -1.0f,  1.0f, 0.0f,
          0.0f,  1.0f,  1.0f, 1.0f,

          0.0f, 1.0f,   0.0f, 1.0f,
          0.0f,-1.0f,   0.0f, 0.0f,
          1.0f,-1.0f,   1.0f, 0.0f,

          0.0f,1.0f,    0.0f,1.0f,
          1.0f,-1.0f,   1.0f,0.0f,
          1.0f,1.0f,    1.0f,1.0f
      };
别忘了在渲染四边形时修改:
     glBindVertexArray(m_quadVAO);
     glBindTexture(GL_TEXTURE_2D, m_FrmeTextureID);	// Use the color attachment texture as the texture of the quad plane
     glDrawArrays(GL_TRIANGLES, 0, 12); //改为12
     glBindVertexArray(0);
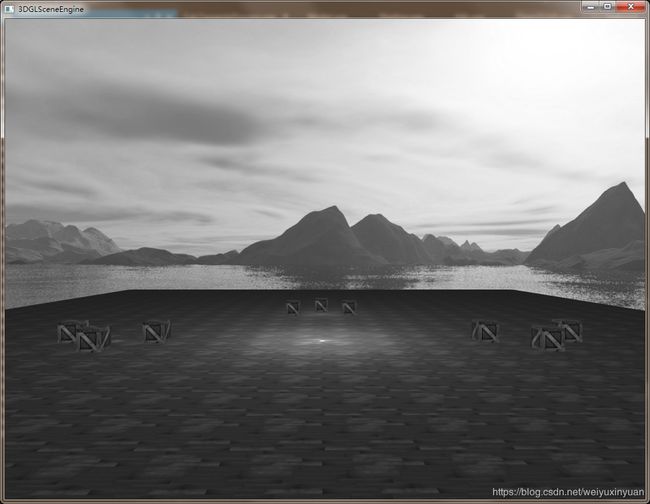
后期处理
接下来的实验变得简单了,只需要对片段着色器进行修改即可。
1.反相
screen.ps
#version 330 core
in vec2 TexCoords;
out vec4 color;

uniform sampler2D screenTexture;
void main()
{
   //反相
   //color = vec4(vec3(1.0 - texture(screenTexture, TexCoords)), 1.0);
 }
#version 330 core
in vec2 TexCoords;
out vec4 color;

uniform sampler2D screenTexture;
void main()
{
    color = texture(screenTexture, TexCoords);
   //灰度
   float average = (color.r + color.b + color.b) / 3.0;
   color = vec4(average , average, average, 1.0);
 }
#version 330 core
in vec2 TexCoords;
out vec4 color;

uniform sampler2D screenTexture;
const float fuzzy = 1.0 / 300;
void main()
{
       vec2 offsets[9] = vec2[](
        vec2(-fuzzy, fuzzy),  // top-left
        vec2(0.0f,    fuzzy),  // top-center
        vec2(fuzzy,  fuzzy),  // top-right
        vec2(-fuzzy, 0.0f),    // center-left
        vec2(0.0f,    0.0f),    // center-center
        vec2(fuzzy,  0.0f),    // center-right
        vec2(-fuzzy, -fuzzy), // bottom-left
        vec2(0.0f,    -fuzzy), // bottom-center
        vec2(fuzzy,  -fuzzy)  // bottom-right
    );

    float kernel[9] = float[](
        1, 1, 1,
        1, -8,1,
        1, 1, 1
    );

    vec3 sampleTex[9];
    for(int i = 0; i < 9; i++)
    {
        sampleTex[i] = vec3(texture(screenTexture, TexCoords.st + offsets[i]));
    }
    vec3 col;
    for(int i = 0; i < 9; i++)
        col += sampleTex[i] * kernel[i];

    color = vec4(col, 1.0);
}
效果如下所示:
4.锐化
#version 330 core
in vec2 TexCoords;
out vec4 color;

uniform sampler2D screenTexture;
const float fuzzy = 1.0 / 300;
void main()
{
       vec2 offsets[9] = vec2[](
        vec2(-fuzzy, fuzzy),  // top-left
        vec2(0.0f,    fuzzy),  // top-center
        vec2(fuzzy,  fuzzy),  // top-right
        vec2(-fuzzy, 0.0f),    // center-left
        vec2(0.0f,    0.0f),    // center-center
        vec2(fuzzy,  0.0f),    // center-right
        vec2(-fuzzy, -fuzzy), // bottom-left
        vec2(0.0f,    -fuzzy), // bottom-center
        vec2(fuzzy,  -fuzzy)  // bottom-right
    );

//原则是里面的每个值相加要必须等于1
    float kernel[9] = float[](
        -1, -1, -1,
        -1,  9, -1,
        -1, -1, -1
    );

    vec3 sampleTex[9];
    for(int i = 0; i < 9; i++)
    {
        sampleTex[i] = vec3(texture(screenTexture, TexCoords.st + offsets[i]));
    }
    vec3 col;
    for(int i = 0; i < 9; i++)
        col += sampleTex[i] * kernel[i];

    color = vec4(col, 1.0);
}
如图所示:
5.模糊
创建模糊(Blur)效果的kernel定义如下:
是由一个3x3矩阵定义。所有数值加起来的总和为16,简单返回结合起来的采样颜色是非常亮的,所以我们必须将kernel的每个值除以16。
screen.ps
#version 330 core
in vec2 TexCoords;
out vec4 color;

uniform sampler2D screenTexture;
const float fuzzy = 1.0 / 300;
void main()
{
       vec2 offsets[9] = vec2[](
        vec2(-fuzzy, fuzzy),  // top-left
        vec2(0.0f,    fuzzy),  // top-center
        vec2(fuzzy,  fuzzy),  // top-right
        vec2(-fuzzy, 0.0f),    // center-left
        vec2(0.0f,    0.0f),    // center-center
        vec2(fuzzy,  0.0f),    // center-right
        vec2(-fuzzy, -fuzzy), // bottom-left
        vec2(0.0f,    -fuzzy), // bottom-center
        vec2(fuzzy,  -fuzzy)  // bottom-right
    );

	float kernel[9] = float[](
    1.0 / 16, 2.0 / 16, 1.0 / 16,
    2.0 / 16, 4.0 / 16, 2.0 / 16,
    1.0 / 16, 2.0 / 16, 1.0 / 16
);

    vec3 sampleTex[9];
    for(int i = 0; i < 9; i++)
    {
        sampleTex[i] = vec3(texture(screenTexture, TexCoords.st + offsets[i]));
    }
    vec3 col;
    for(int i = 0; i < 9; i++)
        col += sampleTex[i] * kernel[i];

    color = vec4(col, 1.0);
}
效果如下所示:

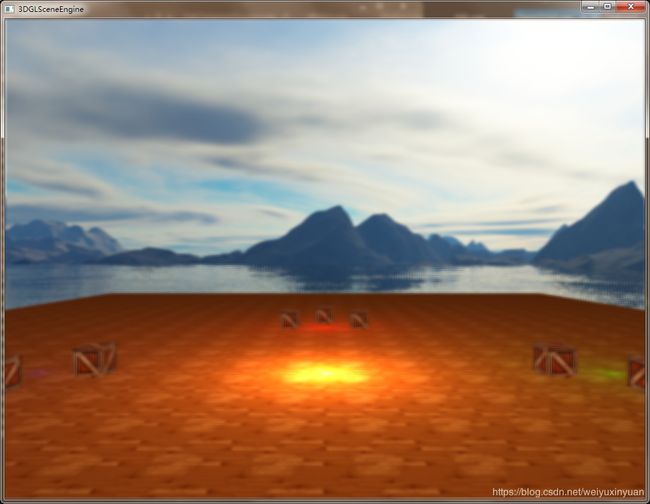
最后呢,我想做一个由模糊逐渐过渡到清晰的效果着色器代码如下:
#version 330 core
in vec2 TexCoords;
out vec4 color;

uniform sampler2D screenTexture;
uniform float fuzzy; //定义模糊值
void main()
{
       vec2 offsets[9] = vec2[](
        vec2(-fuzzy, fuzzy),  // top-left
        vec2(0.0f,    fuzzy),  // top-center
        vec2(fuzzy,  fuzzy),  // top-right
        vec2(-fuzzy, 0.0f),    // center-left
        vec2(0.0f,    0.0f),    // center-center
        vec2(fuzzy,  0.0f),    // center-right
        vec2(-fuzzy, -fuzzy), // bottom-left
        vec2(0.0f,    -fuzzy), // bottom-center
        vec2(fuzzy,  -fuzzy)  // bottom-right
    );

	float kernel[9] = float[](
    1.0 / 16, 2.0 / 16, 1.0 / 16,
    2.0 / 16, 4.0 / 16, 2.0 / 16,
    1.0 / 16, 2.0 / 16, 1.0 / 16
);

    vec3 sampleTex[9];
    for(int i = 0; i < 9; i++)
    {
        sampleTex[i] = vec3(texture(screenTexture, TexCoords.st + offsets[i]));
    }
    vec3 col;
    for(int i = 0; i < 9; i++)
        col += sampleTex[i] * kernel[i];

    color = vec4(col, 1.0);
}
frame.cpp
     m_screenShader->ProgramUse();
     m_screenShader->setShaderUniform(m_screenShader->getProgram(), "screenTexture", (GLuint)0);
     //模糊值计算
     static float fuzzy = 0;
     fuzzy +=  2 * frameTime * 10.0;
     m_screenShader->setShaderUniform(m_screenShader->getProgram(), "fuzzy", 1 / fuzzy);
     if (fuzzy > 1500.0f)
     {
         fuzzy = 0.0f;
     }
     glBindVertexArray(m_quadVAO);
     glBindTexture(GL_TEXTURE_2D, m_FrmeTextureID);	// Use the color attachment texture as the texture of the quad plane
     glDrawArrays(GL_TRIANGLES, 0, 6);
     glBindVertexArray(0);
效果如下:
好了,收工。


