Spring IOC本质、创建Spring程序、自动装配@Autowire+@Qualifier、使用注解开发详解
文章目录
- Spring
- 1、简介
- 2、IOC
- 1、通过简单程序理解控制反转
- 2、IOC本质
- 3、第一个Spring程序
- 4、IOC创建对象的方式
- 5、spring配置
- 6、属性注入方式
- 7、bean的作用域
- 8、自动装配
- 1、autowire在xml中实现自动装配
- 2、使用注解实现自动装配
- 9、使用注解开发
- 10、spring新特性
Spring
1、简介
Spring官网:https://spring.io/
Spring核心:IOC和AOP
Spring的目的:解决企业开发的复杂性,使得JavaEE开发更加容易
Spring框架是一个开放源代码的 J2EE 应用程序框架,由 Rod Johnson发起,是针对bean的生命周期进行管理的轻量级的**控制反转(IOC)和面向切面(AOP)**的容器框架。
从2002年第一次出现了Spring的一些核心思想,到目前,经过这么多年发展,Spring已经没有那么简单了,现在学Spring,是为了更好学习SpringMVC和SpringBoot
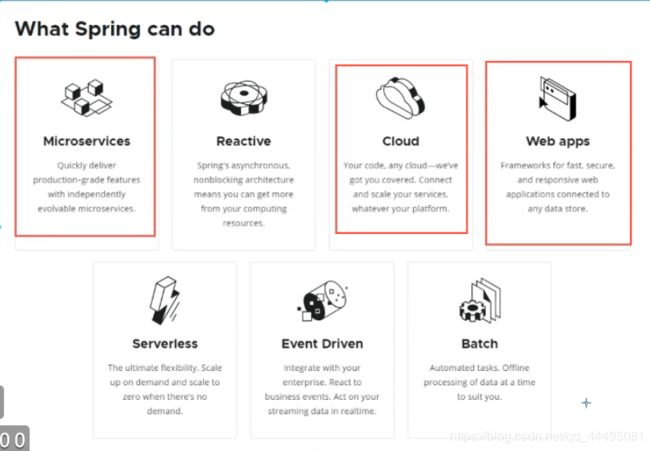
Spring可以做的事
2、IOC
1、通过简单程序理解控制反转
控制反转就是向外部提供调用接口,将控制权交给调用者,程序成了被动的接受对象,程序员不再管理对象的创建,降低程序的耦合性,让程序高效健壮
-
创建dao层接口及实现类
//dao层接口 public interface UserMapper { public void getUser(); } //实现类 public class UserMapperImpl implements UserMapper { public void getUser() { System.out.println("MySQL获取用户数据"); } } -
创建service层接口及实现类,调用dao层
//service层接口 public interface UserService { public void getUser(); } //实现类 public class UserServiceImpl implements UserService { private UserMapper mapper; //调用dao层接口的实现类得到user的信息 public void getUser() { mapper = new UserMapperImpl(); mapper.getUser(); } } -
当dao层接口的实现类只有一个的时候,这样写没有问题
但是,如果dao层接口的实现类有多个呢?
//新增dao层接口实现类 public class UserMapperOracleImpl implements UserMapper { public void getUser() { System.out.println("Oracle获取用户数据"); } } //service层接口实现类 public class UserServiceImpl implements UserService { //定义Mapper接口对象 private UserMapper mapper; public void getUser() { //具体是Mapper接口的哪个实现类就要修改代码了 mapper = new UserMapperImpl();//使用MySQL数据库 mapper = new UserMapperOracleImpl();//使用Oracle数据库 mapper.getUser(); } } -
可以看到,当有多个dao层接口的实现类时,我们要修改使用的dao层实现类,就必须要修改service层的代码,这对于大型的程序来说简直就是灾难,相当于要把底层的代码大换血一遍。是不可能的,那么我们来看这种方式
//service层实现类 public class UserServiceImpl implements UserService { private UserMapper mapper; //使用set方法,用户想使用哪个数据库,就使用set方法调用哪个数据库 public void setMapper(UserMapper mapper) { this.mapper = mapper; } public void getUser() { mapper.getUser(); } } //测试类 public class UserMapperTest { @Test public void testGetUser() { //得到service对象 UserService service = new UserServiceImpl(); //通过setMapper方法设置对应的Mapper接口的实现类,将具体实现类的选择交给调用者去选择 //解耦,这样子就不用再改动底层的代码 service.setMapper(new UserMapperImpl()); //调用dao层接口实现类的方法,得到数据库中的用户数据 service.getUser(); } } -
在上面的代码中,我们将使用什么数据库这个问题抛给了调用者去考虑,这样子不管调用者传递的是哪个实现类,我们service层的代码都不用改变,降低了程序的耦合度
-
其实在学习了Spring IOC之后,我们连new dao层接口的实现类都不用了,所有的对象都是使用IOC容器自动获取的。完全解耦,解决此类问题。
2、IOC本质
IOC(控制反转)是一种设计思想,当应用了IOC,IOC容器在对象初始化时,不等对象请求就主动将依赖注给它,而不是这个对象自己创建依赖对象,将对象的创建任务转移给第三方,降低程序的耦合度。
当采用XML方式配置Bean的时候,对象的定义(在类中定义属性和方法)和创建信息(在
控制反转是一种通过第三方(XML或注解)去生产或获取特定对象的方式,在Spring中实现控制反转的是IOC容器,其实现方法是依赖注入(Dependency Injection,DI)
3、第一个Spring程序
-
导入依赖包
在Maven项目中导入依赖的时候,Maven会自动帮我们导入所有要用到的依赖
<dependency> <groupId>org.springframeworkgroupId> <artifactId>spring-webmvcartifactId> <version>5.1.9.RELEASEversion> dependency> <dependency> <groupId>org.projectlombokgroupId> <artifactId>lombokartifactId> <version>1.18.12version> dependency> -
创建Spring的配置文件
建议命名为:applicationContext.xml
<beans xmlns="http://www.springframework.org/schema/beans" xmlns:xsi="http://www.w3.org/2001/XMLSchema-instance" xsi:schemaLocation="http://www.springframework.org/schema/beans https://www.springframework.org/schema/beans/spring-beans.xsd"> <bean id="hello" class="org.westos.pojo.Hello"> <property name="name" value="spring"/> bean> beans> -
实体类
package org.westos.pojo; import lombok.AllArgsConstructor; import lombok.Data; import lombok.NoArgsConstructor; //简化类开发的,使用lombok就不用写get/set/构造器/tostring等方法了 @Data @NoArgsConstructor @AllArgsConstructor public class Hello { private String name; public void show (){ System.out.println("hello,"+name); } } -
在applicationContext.xml配置文档中注册bean
<bean id="hello" class="org.westos.pojo.Hello"> <property name="name" value="spring"/> bean> -
测试类
package org.westos.pojo;

import org.junit.Test;
import org.springframework.context.ApplicationContext;
import org.springframework.context.support.ClassPathXmlApplicationContext;
import org.westos.pojo.Hello;

public class HelloTest {
    @Test
    public void testShow() {
        //根据配置文档获得连接对象
        ApplicationContext context = new ClassPathXmlApplicationContext("applicationContext.xml");

        //根据bean标签中的id获得对象
        Hello hello = (Hello) context.getBean("hello");
        hello.show();
    }
}

//输出结果
hello,spring
问题
-
hello对象谁创建的
spring
-
hello对象谁赋值的
spring
其实这就是控制反转,由Spring容器进行对象的创建与注入,我们并没有在程序中使用new关键字创建任何一个对象,对象都是从IOC容器中获取的。
反转:程序本身并不创建对象,而只是对象的接收者
控制反转是一种程序设计思想,由主动的创建变成被动的接收 ,现在我们彻底不用在程序中去改动了 , 要实现不同的操作 , 只需要在xml配置文件中进行修改对象由Spring 来创建、管理 、 装配
4、IOC创建对象的方式
-
IOC容器对象创建的时间
在加载容器的时候(获得context连接对象时),所有
标签中的对象就被创建在容器中了,使用getBean()方法只是将对象取出来 -
对象创建的两种方式
-
类无参构造创建(默认)
先使用类的无参构造创建,后使用setter方法初始化
使用
标签(P命名注入) -
类有参构造创建
使用类的有参构造创建并初始化
使用
标签(C命名注入),有参构造中的参数由三种写法 - 使用参数名称(主要使用)
- 使用参数的类型
- 使用参数下标顺序
-
如果属性是引用类型,要使用
ref属性引用别的对象如果是基本类型,直接使用
value赋值
-
练习
-
创建实体类
package org.westos.pojo; public class User { private String name; private int age; public User(String name, int age) { this.name = name; this.age = age; System.out.println("有参构造执行了"); } public User() { System.out.println("无参构造执行了"); } public String getName() { return name; } public void setName(String name) { this.name = name; System.out.println("set方法执行了"); } public int getAge() { return age; } public void setAge(int age) { this.age = age; } public void show() { System.out.println("name:" + name + ",age:" + age); } } -
创建bean
<bean id="user" class="org.westos.pojo.User"> <property name="name" value="张三"/> <property name="age" value="23"/> bean> -
测试
package org.westos.pojo;

import org.junit.Test;
import org.springframework.context.ApplicationContext;
import org.springframework.context.support.ClassPathXmlApplicationContext;

public class UserTest {

    @Test
    public void testShow() {
        ApplicationContext context = new ClassPathXmlApplicationContext("text.xml");
        System.out.println("=================");
        User user = (User) context.getBean("user");
        user.show();
    }
}
5、spring配置
-
可以给bean设置别名,别名可以设置多个,中间使用空格隔开
<alias name="user" alias="user2 user3"/>
-
用来表示一个对象,一个bean标签就是一个对象
id是bean的唯一标志,只能有一个值
name 可以有多个值,中间使用空格隔开
<bean id="user"  name="user3 user4" class="org.westos.pojo.User">
    <property name="name" value="张三"/>
    <property name="age" value="23"/>
bean>
-
用来导入其他xml配置文件,从其他文件中读取bean标签
在多人协作中,每个人负责一个模块,最后使用import标签导入进去
<import resource="text.xml"/>
6、属性注入方式
- 创建实体类
package org.westos.pojo;

import lombok.AllArgsConstructor;
import lombok.Data;
import lombok.NoArgsConstructor;
import java.util.List;
import java.util.Map;
import java.util.Properties;
import java.util.Set;

//使用lombok简化类的创建
@Data
@NoArgsConstructor
@AllArgsConstructor
public class Student {

    private String name;
    private Address address;
    private String[] books;
    private List<String> list;
    private Map<String, String> map;
    private Set<String> set;
    private String wife;// null
    private Properties info;
}
-
创建配置文件,使用xml文件将不同类型的属性注入
<beans xmlns="http://www.springframework.org/schema/beans" xmlns:xsi="http://www.w3.org/2001/XMLSchema-instance" xsi:schemaLocation="http://www.springframework.org/schema/beans https://www.springframework.org/schema/beans/spring-beans.xsd"> <bean id="ZSaddress" class="org.westos.pojo.Address" scope="prototype"> <property name="address" value="陕西西安"/> bean> <bean id="student" class="org.westos.pojo.Student"> <property name="name" value="张三"/> <property name="address" ref="ZSaddress"/> <property name="books"> <array> <value>红楼梦value> <value>西游记value> <value>水浒传value> <value>三国演义value> array> property> <property name="list"> <list> <value>list1value> <value>list2value> <value>list3value> list> property> <property name="map"> <map> <entry key="k1" value="v1"/> <entry key="k2" value="v2"/> map> property> <property name="set"> <set> <value>set1value> <value>set2value> set> property> <property name="wife"> <null/> property> <property name="info"> <props> <prop key="id">001prop> <prop key="name">张三prop> props> property> bean> beans> -
测试
package org.westos.pojo;

import org.junit.Test;
import org.springframework.context.ApplicationContext;
import org.springframework.context.support.ClassPathXmlApplicationContext;

public class StudentTest {
    @Test
    public void test() {
        ApplicationContext context = new ClassPathXmlApplicationContext("student.xml");
        Student student = (Student) context.getBean("student");
        System.out.println(student);
    }
}

//运行结果
//Student(name=张三, address=org.westos.pojo.Address@eb21112, books=[红楼梦, 西游记, 水浒传, 三国演义], list=[list1, list2, list3], map={k1=v1, k2=v2}, set=[set1, set2], wife=null, info={name=张三, id=001})
7、bean的作用域
在bean标签中的scope属性中进行配置
由如下几个值
-
prototype
原型,每次创建新对象
-
singleton
单例,默认,只有一个对象
-
request,在web中使用
-
response,在web中使用
8、自动装配
手动装配:对引用类型的参数使用ref属性手动分别引用
<bean id="user" class="org.westos.entity.User" >
    <property name="name" value="张三"/>

    <property name="cat" ref="cat"/>

    <property name="dog" ref="dog"/>
bean>

<bean id="cat" class="org.westos.entity.Cat">
    <property name="name" value="猫"/>
bean>
<bean id="dog" class="org.westos.entity.Dog">
    <property name="name" value="狗"/>
bean>
自动装配:自动化赋值
分为根据属性名和属性类型两种方式
1、autowire在xml中实现自动装配
-
byName
通过属性名与bean的id进行自动匹配
本质上是setter方法,会自动匹配与属性名相同的id的bean,id与属性名不一致,就会赋值失败
-
byType
通过类型自动匹配,如果同一个类型有多个bean(对象),程序就不知道使用哪个,就会报错
    <bean id="user" class="org.westos.entity.User" autowire="byName">
        <property name="name" value="张三"/>

    bean>


    <bean id="cat1" class="org.westos.entity.Cat">
        <property name="name" value="猫"/>
    bean>
    <bean id="dog" class="org.westos.entity.Dog">
        <property name="name" value="狗"/>
    bean>
2、使用注解实现自动装配
一般在实际的开发中,不会使用xml进行自动配置,而是使用Spring中的注解(@Autowire+@Qualifier)
步骤
-
增加context命名空间
-
开启注解支持
<beans xmlns="http://www.springframework.org/schema/beans" xmlns:context="http://www.springframework.org/schema/context" xmlns:xsi="http://www.w3.org/2001/XMLSchema-instance" xsi:schemaLocation="http://www.springframework.org/schema/beans https://www.springframework.org/schema/beans/spring-beans.xsd http://www.springframework.org/schema/context https://www.springframework.org/schema/context/spring-context.xsd"> <context:annotation-config/> beans> -
使用注解自动装配(spring的)
-
@Autowired
required=false,表示允许对象是否为空,默认为true
默认是使用byType的形式查找,找不到或同类型有多个bean就会报错
-
@Qualifier(“bean标签的id”)
按照指定的标签id进行匹配查找
-
@Autowired+@Qualifier(“bean标签的id”)
这两个注解是Spring的,一般组合使用
-
-
Resource注解(java的)
1. 如果同时指定了name和type,则从Spring上下文中找到唯一匹配的bean进行装配,找不到则抛出异常
2. 如果只指定了name,则查找匹配的id进行装配,找不到则抛出异常
3. 如果指定了type,则查找到类型匹配的唯一bean进行装配,找不到或者找到多个,都会抛出异常
4. 如果既没有指定name,又没有指定type,则自动按照byName方式进行装配;如果没有匹配,则回退为一个原始类型进行匹配,如果匹配则自动装配;
5. 一般用在字段上比较多,不和前两个混合使用
9、使用注解开发
-
导入aop的依赖
<dependency> <groupId>org.springframeworkgroupId> <artifactId>spring-aopartifactId> <version>5.2.1.RELEASEversion> dependency> -
配置context约束,并且开启注解支持
<beans xmlns="http://www.springframework.org/schema/beans" xmlns:context="http://www.springframework.org/schema/context" xmlns:xsi="http://www.w3.org/2001/XMLSchema-instance" xsi:schemaLocation="http://www.springframework.org/schema/beans https://www.springframework.org/schema/beans/spring-beans.xsd http://www.springframework.org/schema/context https://www.springframework.org/schema/context/spring-context.xsd"> <context:annotation-config/> beans> -
@Component注解
在类上添加,该类就相当于一个
标签,id 就相当于bean标签里的 id,class就是该类 -
添加扫描包
<context:component-scan base-package="org.westos" /> -
@Value注解
都是给属性进行赋值
- 在类属性上使用
- 在setter方法上使用
-
@Component等价的注解
与@Component注解的作用完全一致,区别在于约定俗成的使用地点
- @Repository,在dao层
- @Service,在service层
- @Controller,在controller层
注解和xml的最佳实践
-
xml
通过xml管理bean
-
注解
通过注解完成属性的注入
10、spring新特性
最新SpringBoot推荐摒弃使用xml配置文件,而是完全使用注解进行配置
-
@Configuration注解
被修饰的类等价于一个xml文件,为配置类
-
@Bean注解
被修饰的方法等同于一个
标签,方法名为id,class为具体返回对象的类型 -
@Import(***.class)
类似于
标签,用来导入其他的配置类
但是目前传统的SSM框架还是使用xml配置文档居多
