Mandelbrot Set & Julia Set -- 美丽分形 (C++, MFC + BCG + CxImage 实现)
一、分形(Fractal)
这个概念应该很多人听过,说到这个应该就会提到最著名的Mandelbrot Set与Julia Set,最近便着手写了个能画出两者图形的一个小程序,环境为 VS2013 + BCG + CxImage。
关于两者的概念,网上很多非常清晰的解释,这里便不再啰嗦,核心公式即
f(z) = z^2 + c
Mandelbrot Set是在z = 0处,对复平面上每一点c进行迭代计算,若每一个 |f(z)| 小于2,则其属于集合内,当然,我们在计算机计算时只能设定一个迭代次数,超过迭代上限仍然模小于2的认为属于集合。
Julia Set则是对于设定的一个常数c(其模假定小于2),对复平面内的每一点z进行迭代计算,若满足模小于2则属于集合,两者有差别,具体解释可以维基。
二、 画图实现
2.1 复数定义
class CComplex
{
public:
	~CComplex(){};

	CComplex(long double real = 0, long double imag = 0)
		: m_real(real)
		, m_imag(imag)
	{}

	CComplex& operator +=(const CComplex &rhs)
	{
		this->m_real += rhs.m_real;
		this->m_imag += rhs.m_imag;

		return *this;
	}

	CComplex& operator -=(const CComplex &rhs)
	{
		this->m_real -= rhs.m_real;
		this->m_imag -= rhs.m_imag;

		return *this;
	}

	friend CComplex operator +(const CComplex &lhs, const CComplex &rhs);
	friend CComplex operator -(const CComplex &lhs, const CComplex &rhs);
	friend CComplex operator *(const CComplex &lhs, const CComplex &rhs);
	friend bool operator ==(const CComplex &lhs, const CComplex &rhs);

	inline friend double modulus_square(const CComplex & c)
	{
		return c.m_real * c.m_real + c.m_imag * c.m_imag;
	}

	inline friend CComplex complex_power(const CComplex &c, unsigned int n)
	{
		CComplex result(1);

		for (unsigned int i = 0; i < n; ++i)
			result = result * c;

		return result;
	}


	void setReal(long double real)
	{
		this->m_real = real;
	}

	void setImag(long double imag)
	{
		this->m_imag = imag;
	}


private:
	long double m_real;
	long double m_imag;
};
CComplex operator +(const CComplex &lhs, const CComplex &rhs)
{
CComplex result(lhs);
result += rhs;
return result;
}
CComplex operator -(const CComplex &lhs, const CComplex &rhs)
{
CComplex result(lhs);
result -= rhs;
return result;
}
CComplex operator *(const CComplex &lhs, const CComplex &rhs)
{
CComplex result(lhs.m_real * rhs.m_real - lhs.m_imag * rhs.m_imag,
lhs.m_imag * rhs.m_real + lhs.m_real * rhs.m_imag);
return result;
}
bool operator ==(const CComplex &lhs, const CComplex &rhs)
{
return lhs.m_real == rhs.m_real && lhs.m_imag == rhs.m_imag;
}2.2 迭代计算
Mandelbrot 的计算代码如下(为速度考虑,使用了OpenMP多线程)
void CMandelSet::CalcImagePixel()
{
	if (!m_pxim) return;

	CxImage *pxim = m_pxim;

	int width = pxim->GetWidth();
	int height = pxim->GetHeight();

#ifndef _DEBUG
#pragma omp parallel for
#endif
	for (int i = 0; i < height; ++i)
	{
		CComplex C(0, m_dFromY + (m_dToY - m_dFromY) * i / static_cast(height));

		for (int j = 0; j < width; ++j)
		{
			C.setReal(m_dFromX + (m_dToX - m_dFromX) * j / static_cast(width));

			CComplex Z;
			int k = 0;
			for (k = 0; k < m_nIteration; ++k)
			{
				if (modulus_square(Z) > 4.0) break;
				// f(z) = z^n + C;
				Z = complex_power(Z, m_nExponent) + C;
			}

			m_matImageInfo[j][i] = k;
		}
	}
}
类似, Julia 的计算如下,
void CMandelSet::CalcImagePixel()
{
	if (!m_pxim) return;

	CxImage *pxim = m_pxim;

	int width = pxim->GetWidth();
	int height = pxim->GetHeight();

#ifndef _DEBUG
#pragma omp parallel for
#endif
	for (int i = 0; i < height; ++i)
	{
		CComplex C(0, m_dFromY + (m_dToY - m_dFromY) * i / static_cast(height));

		for (int j = 0; j < width; ++j)
		{
			C.setReal(m_dFromX + (m_dToX - m_dFromX) * j / static_cast(width));

			CComplex Z;
			int k = 0;
			for (k = 0; k < m_nIteration; ++k)
			{
				if (modulus_square(Z) > 4.0) break;
				// f(z) = z^n + C;
				Z = complex_power(Z, m_nExponent) + C;
			}

			m_matImageInfo[j][i] = k;
		}
	}
}
这里,为了后期调整颜色时无需重新计算,只是先把迭代次数记录进一个与图像同样大小的矩阵中,调整颜色时直接对图像的每个像素点按其迭代次数从调色板取颜色即可。
2.3 颜色设定
这里颜色的设定通过迭代次数来确定,借用HSL空间,保证L(Lightness)渐变,然后转到RGB空间进行着色,这里参考了网上yangw80的做法,先定义一个调色板,定义一共多少颜色数,我这里MAXCOLOR取了128,代码如下
void CFractal::InitPallette(double h1 /* = 137.0 */, double h2 /* = 30.0 */)
{
	for (int i = 0; i < MAXCOLOR / 2; ++i)
	{
		m_crPallette[i] = HSL2RGB(h1, 1.0, i * 2.0 / double(MAXCOLOR));
		m_crPallette[MAXCOLOR - 1 - i] = HSL2RGB(h2, 1.0, i * 2.0 / double(MAXCOLOR));
	}
}COLORREF CFractal::HSL2RGB(double h, double s, double l)
{
const double C = (1 - fabs(2 * l - 1)) * s; // chroma
const double H = h / 60;
const double X = C * (1 - fabs(fmod(H, 2) - 1));
double rgb1[3] = { 0 };
if (H > 0 && H < 1) rgb1[0] = C, rgb1[1] = X, rgb1[2] = 0;
else if (H >= 1 && H < 2) rgb1[0] = X, rgb1[1] = C, rgb1[2] = 0;
else if (H >= 2 && H < 3) rgb1[0] = 0, rgb1[1] = C, rgb1[2] = X;
else if (H >= 3 && H < 4) rgb1[0] = 0, rgb1[1] = X, rgb1[2] = C;
else if (H >= 4 && H < 5) rgb1[0] = X, rgb1[1] = 0, rgb1[2] = C;
else if (H >= 5 && H < 6) rgb1[0] = C, rgb1[1] = 0, rgb1[2] = X;
else rgb1[0] = 0, rgb1[1] = 0, rgb1[2] = 0;
const double m = l - 0.5 * C;
return RGB((rgb1[0] + m) * 255, (rgb1[1] + m) * 255, (rgb1[2] + m) * 255);
} 然后整幅图形的着色便是根据每一个像素点的迭代次数从调色板里的颜色取值,比如迭代次为1000次,则取 1000 % MAXCOLOR 相应调色板位置的颜色。
2.4 结果
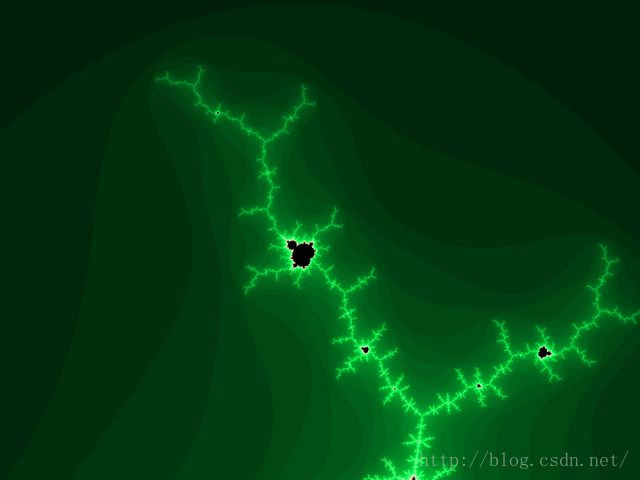
下面为 Mandelbrot Set 的原图与一张局部放大图效果:
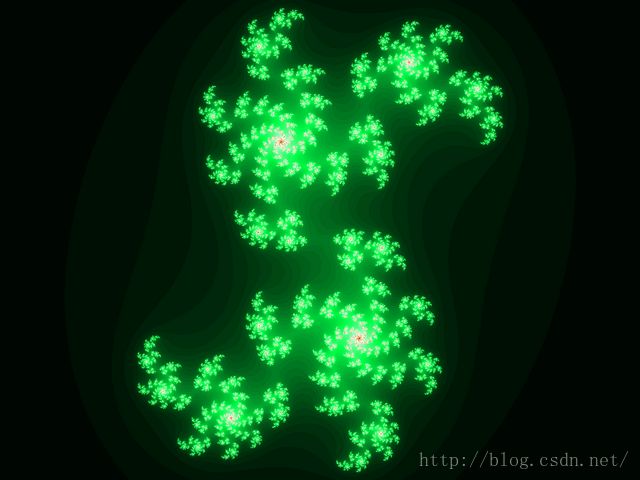
Julia 下面为 Julia Set 在C = 0.4 + 0.3i 时的原图及局部放大图
随便局部放大一下就是一张绝美的壁纸啊,有木有^_^。
此外,Mandelbrot 还可以设置 F(z) = z^2 + c 的幂的大小,下面分别是 z^2、z^3、 z^4、 z^5 下的图形
而对于 Julia 则可心通过设定不同的 C 值得到不同的图像,
数学的美有时不得不令人惊叹!!!


