zabbix系列(三)zabbix-proxy3.0.9安装部署
一、环境配置、关闭selinux状态
查看selinux状态
| 1 2 3 4 5 6 7 8 9 10 |
[root@localhost ~]# sestatus SELinux status: enabled SELinuxfs mount: /sys/fs/selinux SELinux root directory: /etc/selinux Loaded policy name: targeted Current mode: enforcing Mode from config file: enforcing Policy MLS status: enabled Policy deny_unknown status: allowed Max kernel policy version: 28 |
临时关闭 sellinux
| 1 |
[root@localhost ~]# setenforce 0 |
永久关闭,可以修改配置文件/etc/selinux/config,将其中SELINUX设置为disabled。
| 1 2 3 4 5 6 7 8 9 10 11 12 13 14 15 16 17 |
[root@localhost ~]# cat /etc/selinux/config
# This file controls the state of SELinux on the system. # SELINUX= can take one of these three values: # enforcing - SELinux security policy is enforced. # permissive - SELinux prints warnings instead of enforcing. # disabled - No SELinux policy is loaded. #SELINUX=enforcing SELINUX=disabled # SELINUXTYPE= can take one of three two values: # targeted - Targeted processes are protected, # minimum - Modification of targeted policy. Only selected processes are protected. # mls - Multi Level Security protection. SELINUXTYPE=targeted
[root@rdo ~]# sestatus SELinux status: disabled |
关闭防火墙
直接关闭防火墙
systemctlstop firewalld.service #停止firewall
systemctldisable firewalld.service #禁止firewall开机启动
二、安装数据库
我们现在来配置mysql数据库。
设置开机自启动mysql,并启动mysql,使用如下命令:
systemctlenable mariadb
systemctlstart mariadb

初始化mysql数据库,并配置root用户密码。使用如下命令:
mysql_secure_installation

注意:在上图中的Enter current passwdord for root处,我们直接敲回车键即可。因为centos7上mysql的默认root用户密码为空。
下图中主要是为root用户配置密码,并刷新相关权限。

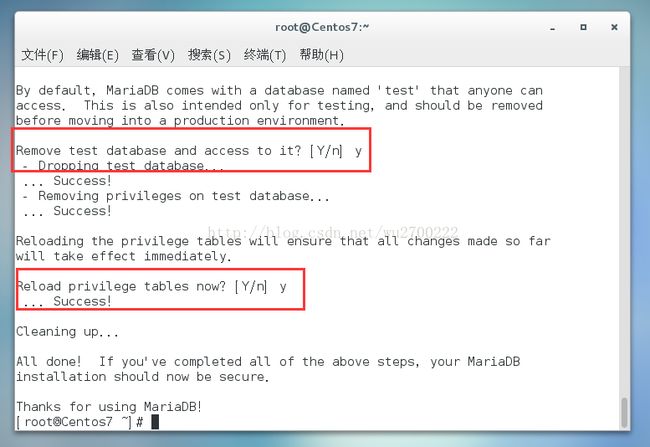
上图中主要是配置匿名用户、test用户以及root用户远程连接等相关配置。
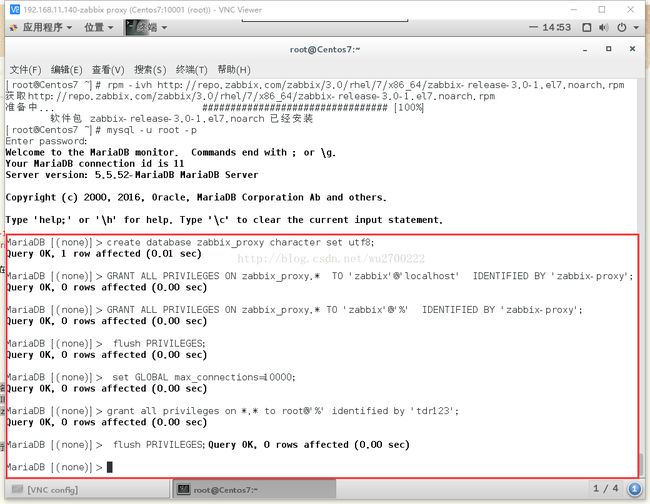
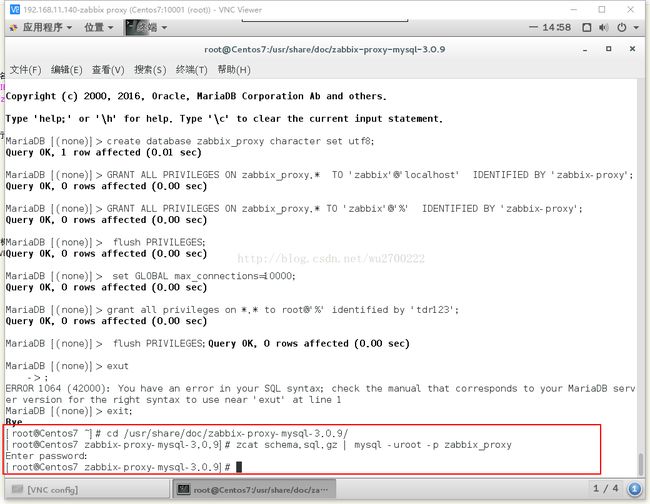
mysql初始化完毕后,我们现在来创建zabbix数据库及其用户,使用如下命令:
mysql -u root –p

> create database zabbix_proxycharacter set utf8; #数据名可以跟server端名称不同
> GRANT ALL PRIVILEGES ON zabbix_proxy.* TO 'zabbix'@'localhost' IDENTIFIED BY 'zabbix-proxy';
> GRANT ALL PRIVILEGES ON zabbix_proxy.* TO'zabbix'@'%' IDENTIFIED BY 'zabbix-proxy';
> flush PRIVILEGES;
> set GLOBAL max_connections=10000;
> grant all privileges on *.* to root@'%'identified by 'tdr123'; #也可以放行root访问权限
> flush privileges;
> exit;
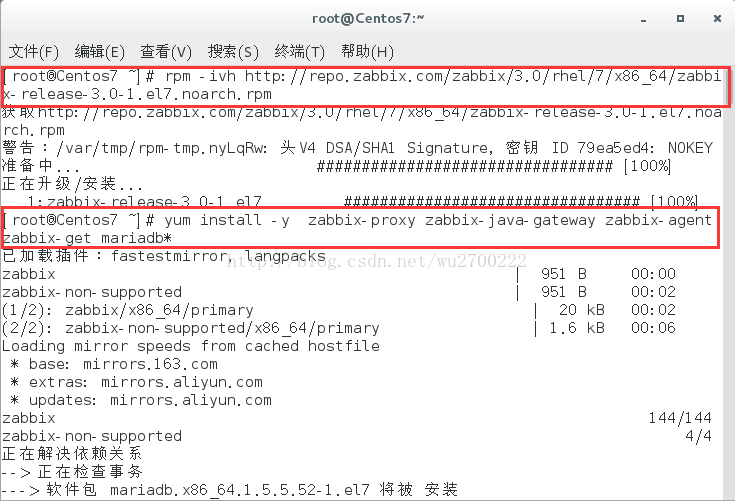
三、 安装zabbix proxy3.0.9
rpm -ivh http://repo.zabbix.com/zabbix/3.0/rhel/7/x86_64/zabbix-release-3.0-1.el7.noarch.rpm
yum install -y zabbix-proxy zabbix-java-gateway zabbix-agent zabbix-get mariadb*
以上安装完毕后,我们现在开始进行zabbix的相关配置。
导入zabbix数据库结构,如下:
cd /usr/share/doc/zabbix-proxy-mysql-3.0.9/
zcat schema.sql.gz| mysql -uroot -p zabbix_proxy
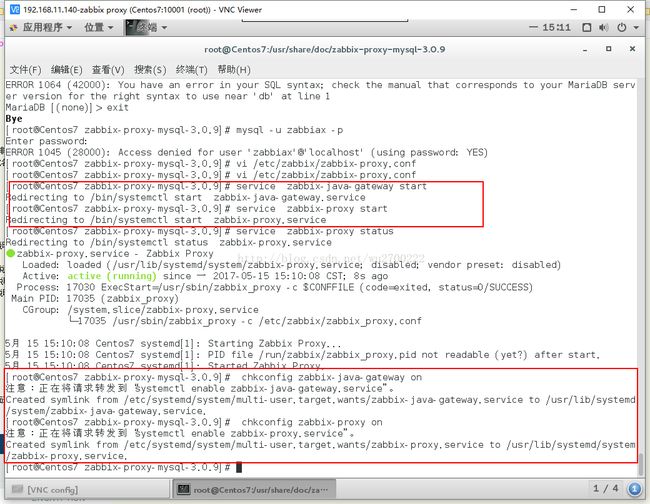
数据库导入完毕后,我们现在来修改zabbix proxy的配置文件,如下:
vi/etc/zabbix/zabbix-proxy.conf
Server=192.168.11.139 #同步指向的server端的IP,非本地IP。可以是server端的主机域名,但要确保proxy端解析server的域名,并且网络可达
Hostname=zabbix-proxy-sh140 #proxy本地的名称,此名称需要与将来在server端的WEB页面上的代理程序名称一致,名称自定义
DBHost=localhost #与上面配置对应
DBName=zabbix_proxy #与上面配置对应
DBUser=zabbix #与上面配置对应
DBPassword=zabbix-proxy #与上面配置对应
DBPort=3306 #与上面配置对应
StartDiscoverers=4 #与server端配置的功能说明一致。
JavaGateway=127.0.0.1 #与server端配置的功能说明一致。
JavaGatewayPort=10052 #与server端配置的功能说明一致。
StartJavaPollers=4 #与server端配置的功能说明一致。
StartSNMPTrapper=1

# service zabbix-java-gateway start
# service zabbix-proxy start
# chkconfig zabbix-java-gateway on
# chkconfig zabbix-proxy on
4、更新备监控的主机zabbix_agentd.win.conf
Server=192.168.11.140
ServerActive=192.168.11.140
修改完后重启zabbix_agent服务
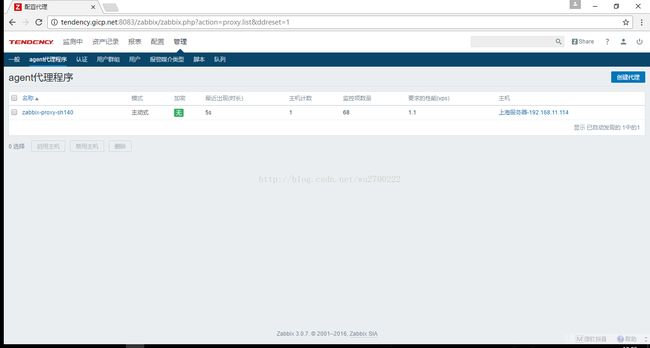
新增代理配置

最终效果: