vue+element 学习之路(九)vue-cropper 图片裁剪上传
今天在做头像上传需求的时候 发现了一个巨好用的图片裁剪插件,捣鼓了一天踩了不少坑终于取得了“阶段性”的成功,嘿嘿嘿。下面就来总结分享给大家
需求:
用户上传一张图片,进行裁剪功能,裁剪时可以预览,最后以裁剪的图片作为头像使用
思路:
思路步骤其实很简单
1.点击上传头像按钮,打开图片裁剪弹出层。
2.选择图片后,按头像预览进行调整。
3.点击确定,开始裁剪图片,发送请求到后端,并将裁剪的图片上传到ftp服务器或本地。
前两步都非常简单,主要讲讲第三步带来的许多坑
首先 安装vue-cropper
npm install vue-cropper
下面来讲讲实时预览和第三步
实时预览
实时预览其实没有想象中这么复杂,也就是一行代码。意思是预览框和裁剪框用的图片都是同一张,区别只在于css的不同

预览框CSS: 只有圆形和加边框而已,连宽高都是继承剪切框的,大家可以在此基础上做更多地扩展,做更优雅的预览框。

event事件对象 : 可以参考这篇文章 https://blog.csdn.net/dangbai01_/article/details/83864498
uploadImg方法

这里我使用的是以dataURL的形式读取文件,并赋到图片的src中,还有一种是以blob对象的方法还没尝试过。
对于FileReader接口的用法
推荐这篇文章 http://www.cnblogs.com/makan/p/4807086.html 写的非常详细
点击确定开始裁剪
 这里axios一般来说都是用post请求,因为我之前封装了post请求qs转换参数的方法,再用post转换formData会报错。
后端接口接住
@RestController
@RequestMapping("/attach")
public class attachController {

	@RequestMapping("/upload")
	public Attach upload(@RequestParam MultipartFile file) throws IllegalStateException, IOException{
		String oldFileName = file.getOriginalFilename(); // 获取上传文件的原名
		String saveFilePath = "H://image";
		String newFileName = UUID.randomUUID() + ".png";
		// 新图片
        File newFile = new File(saveFilePath + "\\" + newFileName);
        // 将内存中的数据写入磁盘
        file.transferTo(newFile);
		return null;
	}
}
点击确定 生成截图 保存到本地,占时还没搭建ftp服务器,后面将会持续完善

前端源码
<template>
    <div class="footerBtn">
        <img v-if="attach.laterUrl" :src="attach.laterUrl" class="preview" style="width:200px;height:200px"/>
        <el-button @click="dialogVisible=true">上传头像</el-button>

        <!-- 弹出层-裁剪 -->
        <el-dialog
            title="编辑头像"
            :visible.sync="dialogVisible"
            :before-close="handleClose"
            >
            <span>
                <el-row>
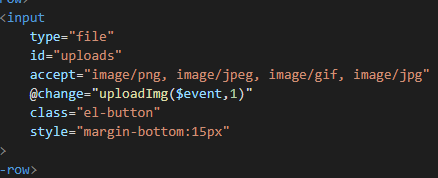
                    <input
                        type="file"
                        id="uploads"
                        accept="image/png, image/jpeg, image/gif, image/jpg"
                        @change="uploadImg($event,1)"
                        class="el-button"
                        style="margin-bottom:15px"
                    >
                </el-row>
                <el-row>
                    <el-col :span="16">
                        <!-- 裁剪 -->
                            <vueCropper
                                style="width:100%;height:300px"
                                ref="cropper"
                                :img="attach.customaryUrl"
                                :autoCrop="options.autoCrop"
                                :fixedBox="options.fixedBox"
                                :canMoveBox="options.canMoveBox"
                                :autoCropWidth="options.autoCropWidth"
                                :autoCropHeight="options.autoCropHeight"
                                :centerBox="options.centerBox"
                                @realTime="realTime"
                            >

                            </vueCropper>
                    </el-col>
                    <el-col :span="8">
                        <h2 align="center">头像预览</h2>
                            <div class="show-preview">
                                <div :style="previews.div" class="preview">
                                    <img :src="previews.url" :style="previews.img">
                                </div>
                            </div>
                    </el-col>
                </el-row>
                <el-row class="footerBtn" align="center">
                    <el-button type="primary" size="small" round="" @click="cut('blob')">确认</el-button>
                    <el-button type="primary" size="small" round="" @click="handleClose">取消</el-button>
                </el-row>
            </span>
        </el-dialog>
    </div>
</template>

<script>
//数据库里需要存两份图片地址,一张为原图地址,一张为裁剪后的头像地址
export default {
    data(){
        return{
            dialogVisible:false,
            options:{
                autoCrop:true,  //默认生成截图框
                fixedBox:true,  //固定截图框大小
                canMoveBox:false,    //截图框不能拖动
                autoCropWidth:200,  //截图框宽度
                autoCropHeight:200, //截图框高度
                centerBox:false,    //截图框被限制在图片里面
            },
            previews:{}, //实时预览图数据
            attach:{ //后端附件表
                id:'',
                userId:'',
                customaryUrl:'', //原图片路径
                laterUrl:'',//裁剪后图片路径  /static/logo.png
                attachType:'photo',//附件类型
            },
            fileName:'',//本机文件地址
            uploadImgRelaPath:'',//上传后图片地址
        }
    },
    methods:{
        //控制弹出层关闭
        handleClose(){
            this.dialogVisible=false
        },
        //实时预览
        realTime(data){
            this.previews=data
        },
        //加载头像信息
        find(){
            this.userId = sessionStorage.getItem('userId');
            this.$axios.post('/api/attach/find',this.attach).then(res=>{
                console.log(res);
            });
        },
        //选择本地图片
        uploadImg(e,num){
            var file = e.target.files[0];
            if(!/\.(gif|jpg|jpeg|png|bmp|GIF|JPG|PNG)$/.test(e.target.value)){
                this.$message.error('图片类型必须是.gif,jpeg,jpg,png,bmp中的一种');
                return false;
            }
            console.log(e.target.result);
            //fileReader 接口,用于异步读取文件数据
            var reader = new FileReader();
            reader.readAsDataURL(file); //重要 以dataURL形式读取文件
            reader.onload = e => {

                    // data = window.URL.createObjectURL(new Blob([e.target.result])) 转化为blob格式

                let data = e.target.result

                this.attach.customaryUrl=data
                // 转化为base64
                // reader.readAsDataURL(file)
                // 转化为blob
            }
        },
        //确认截图,上传
        cut(type){
            var formData = new FormData();
            this.$refs.cropper.getCropBlob(res=>{
                //res是裁剪后图片的bolb对象
                formData.append("file",res,this.userId);
                this.$axios.put('/api/attach/upload',formData,
                    {contentType: false, processData: false, headers:{'Content-Type': 'multipart/form-data'}}
                ).then(res=>{

                })
            })
        }
    }
}
</script>

<style scoped>
/* 弹性布局 水平居中 */
.show-preview{
    display: flex;
    justify-content: center;
    }

.preview{
        border-radius: 50%;
        overflow: hidden;
        border:1px solid #cccccc;
        background: #cccccc;
      }
.footerBtn{
    display: flex;
    justify-content: center;
    margin-top: 15px;
}

</style>


