UnityShader21:程序纹理
一、程序纹理
程序纹理顾名思义就是代码生成的纹理,好了到此就是程序纹理的全部介绍了……
再细一点讲:假设我们想生成一个下面这样的纹理(白色背景,9给黄色圆圈等距排列),对应的伪代码就为

定义圆的半径A = ?
定义第一个圆的圆心B = ?
定义相邻两个圆的横纵距离 = ?
定义每行每列圆的个数 = 3 x 3
定义纹理大小(HxW)= 512 x 512
定义圆的颜色 = yellow
……

for 纹理的每一个像素
    if 计算得到当前像素坐标在某个圆的内部
        设置当前像素点颜色为黄色
    else
        设置当前像素点颜色为白色
    end
end

输出这张纹理
完整代码:
using UnityEngine;
using System.Collections;
using System.Collections.Generic;

[ExecuteInEditMode]
public class ProceduralTextureGeneration: MonoBehaviour
{
	public Material material = null;

	#region Material properties
	[SerializeField, SetProperty("textureWidth")]
	private int m_textureWidth = 512;
	public int textureWidth
	{
		get { return m_textureWidth; }
		set { m_textureWidth = value; _UpdateMaterial(); }
	}

	[SerializeField, SetProperty("backgroundColor")]
	private Color m_backgroundColor = Color.white;
	public Color backgroundColor {
		get { return m_backgroundColor; }
		set { m_backgroundColor = value; _UpdateMaterial(); }
	}

	[SerializeField, SetProperty("circleColor")]
	private Color m_circleColor = Color.yellow;
	public Color circleColor {
		get { return m_circleColor; }
		set { m_circleColor = value; _UpdateMaterial(); }
	}

	[SerializeField, SetProperty("blurFactor")]
	private float m_blurFactor = 2.0f;
	public float blurFactor {
		get { return m_blurFactor; }
		set { m_blurFactor = value; _UpdateMaterial(); }
	}
	#endregion

	private Texture2D m_generatedTexture = null;
	void Start()
	{
		if (material == null)
		{
			Renderer renderer = gameObject.GetComponent();
			if (renderer == null)
			{
				Debug.LogWarning("Cannot find a renderer.");
				return;
			}
			material = renderer.sharedMaterial;
		}
		_UpdateMaterial();
	}

	//更新材质纹理
	private void _UpdateMaterial()
	{
		if (material != null)
		{
			m_generatedTexture = _GenerateProceduralTexture();
			material.SetTexture("_MainTex", m_generatedTexture);
		}
	}

	//将两个颜色按照插值的方法混合
	private Color _MixColor(Color color0, Color color1, float mixFactor)
	{
		Color mixColor = Color.white;
		mixColor.r = Mathf.Lerp(color0.r, color1.r, mixFactor);
		mixColor.g = Mathf.Lerp(color0.g, color1.g, mixFactor);
		mixColor.b = Mathf.Lerp(color0.b, color1.b, mixFactor);
		mixColor.a = Mathf.Lerp(color0.a, color1.a, mixFactor);
		return mixColor;
	}

	private Texture2D _GenerateProceduralTexture()
	{
		Texture2D proceduralTexture = new Texture2D(textureWidth, textureWidth);
		//两个圆的间隔
		float circleInterval = textureWidth / 4.0f;
		//圆的半径
		float radius = textureWidth / 10.0f;
		//模糊因子
		float edgeBlur = 1.0f / blurFactor;
		for (int w = 0; w < textureWidth; w++)
		{
			for (int h = 0; h < textureWidth; h++)
			{
				Color pixel = backgroundColor;
				//在纹理上画圆
				for (int i = 0; i < 3; i++)
				{
					for (int j = 0; j < 3; j++)
					{
						//得到圆心的位置
						Vector2 circleCenter = new Vector2(circleInterval * (i + 1), circleInterval * (j + 1));
						//判断当前纹理像素到圆心的距离
						float dist = Vector2.Distance(new Vector2(w, h), circleCenter) - radius;
						//得到当前像素的颜色
						Color color = _MixColor(circleColor, new Color(pixel.r, pixel.g, pixel.b, 0.0f), Mathf.SmoothStep(0f, 1.0f, dist * edgeBlur));
						//再次混合背景色
						pixel = _MixColor(pixel, color, color.a);
					}
				}
				//更新当前像素点
				proceduralTexture.SetPixel(w, h, pixel);
			}
		}
		//应用
		proceduralTexture.Apply();
		return proceduralTexture;
	}
}
这个代码报错(error CS0246: The type or namespace name 'SetProperty' could not be found)?
→ 需要一个开源插件,其下载地址:https://github.com/LMNRY/SetProperty,该插件可以支持在 Unity 面板修改材质属性:

将上面生成纹理的脚本随便挂在一个物体下之后,拖入对应的材质球,就可以看到这个材质球的纹理被成功修改:

关于代码中的 [SerializeField, SetProperty("textureWidth")]、以及上述插件的功能,都属于 Unity 编辑器的内容,这里就不跑题了
二、纹理生成工具 SubstanceDesigner
- 关于它的教程:https://www.bilibili.com/video/av22746446
- 官网:https://www.substance3d.com/products/substance-designer/
非常棒的纹理制作工具,最终可以得到 .sbsar 为后缀的材质

Unity导入 .sbsar 材质方法:
对于新版本的 Unity,内部已不再默认支持 .sbsar 材质了,需要手动从 Asset Store 中下载插件 Substance in Unity

如果成功,.sbsar 文件就能成功被识别,并且可以当作材质球使用:

如果失败,包括但不限于 .sbsar 识别不出,又或者 Unity 导入时崩溃,可能需要检查下 Substance in Unity 插件的版本,最好直接从 AssetStore 上下载
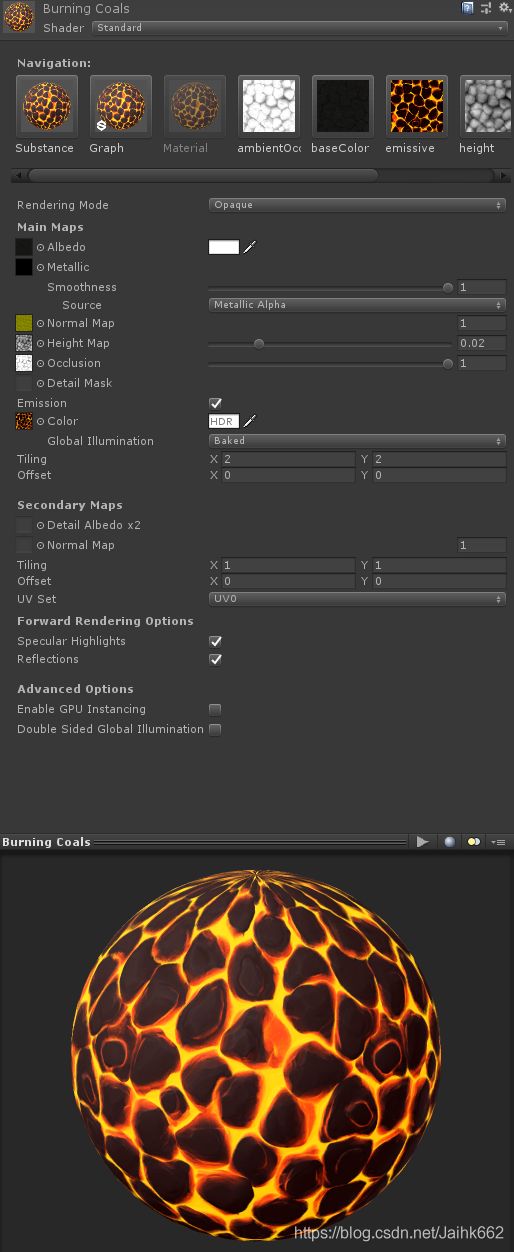
三、.sbsar 文件面板
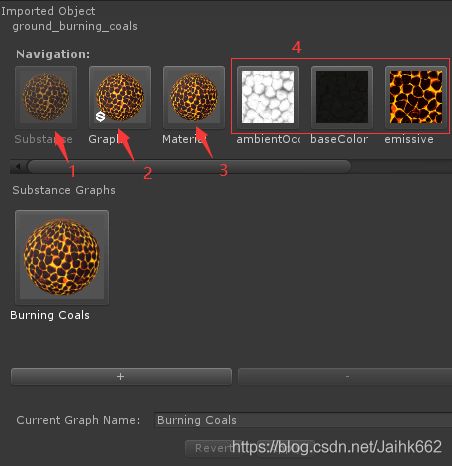
- 变体:以支持一个 sbsar 文件生成数个材质球供不同的物体使用,点击图中的 + 号就可以生成一个新的变体
- Graph:在这里调节程序化纹理的参数,在 SD 中曝露的属性也都会在这个面板显示出来,可以点击下面的 Bake textures to folder 按钮烘培到纹理
- Material:材质球,默认使用的 Shader 为 Standard
- Texture:纹理
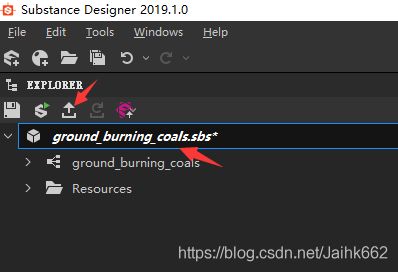
关于 .sbsar 文件的导出:打开你的 SD,加载你想要导出的 .sbs 文件,最后按照下面的步骤就 OK
参考资料:
- https://zhuanlan.zhihu.com/p/99362830?from_voters_page=true
- 《UnityShader入门精要》