1. 一层白色背景和半透明白色边框
.box {
    width: 300px;
    height: 300px;
    box-sizing: border-box;
    background-color: #fff;
    margin: 0 20px;
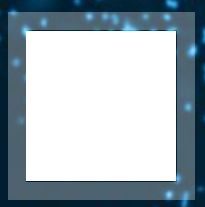
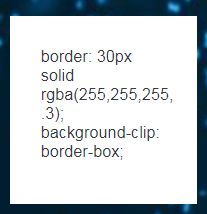
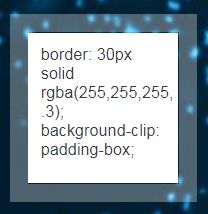
    border: 30px solid rgba(255,255,255, .3);
    background-clip: padding-box;
}
background-clip: border-box|padding-box|content-box;
以下示例的背景都是用上面.box的样式,background-color: #fff;
| 属性 | 说明 | 示例 |
|---|---|---|
| border-box | 背景从边框开始裁剪 | |
| padding-box | 背景从内边距开始裁剪 | |
| content-box | 背景从内容开始裁剪 |
还有一种方式是写两个元素,第一个元素的背景色用透明的颜色,第二个元素背景色用白色
2.多重边框
-
box-shadow方案
.m-shadow {
    width: 200px;
    height: 150px;
    background-color: #fff;
    margin-left: 30px;
    box-sizing: border-box;
    box-shadow: 5px 5px 45px #fff;
  }
box-shadow 还有第4个参数是扩张半径,通过指定正值或负值让投影面积增大或减小。
box-shadow的值可像上面代码用
,分隔开叠加,通过调整扩张半径,得到想要的边框效果。
.m-shadow-border,
.m-shadow-border-inset {
    width: 200px;
    height: 150px;
    background-color: #fff;
    margin-left: 30px;
    box-sizing: border-box;
    box-shadow:
      0 0 0 10px #655,
      0 0 0 15px #469EF1,
      0 0 0 20px #E6D923,
      0 0 0 25px #f6fa16;
  }
  .m-shadow-border-inset {
    box-shadow:
      0 0 0 10px #655 inset,
      0 0 0 15px #469EF1 inset,
      0 0 0 20px #E6D923 inset,
      0 0 0 25px #f6fa16 inset;
  }
左边和右边的大小是一样的,box-shadow一个设置了inset,一个没有设置。
注意事项:
① 投影的边框不会影响页面布局,也不受box-sizing的影响,图中红色边框的部分被第一个盒子的阴影实现的边框遮住了。
② 不能实现虚线边框
-
outline+border方案实现两层边框
outline是绘制在元素周围的一条线,位于边框边缘。在css中的属性与boder一致。使用如outline:none;
.m-outline-box {
    width: 200px;
    height: 150px;
    background-color: #fff;
    margin-left: 30px;
    box-sizing: border-box;
    border: 10px solid #469EF1;
    outline: 10px solid red;
}
注意事项:
① outline的边框不会影响页面布局,受box-sizing的影响
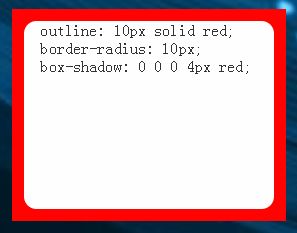
② 当元素有border-radius时,outline无法实现贴合
3.实现边框内圆角
.m-border-radius {
    width: 200px;
    height: 150px;
    background-color: #fff;
    margin-left: 30px;
    box-sizing: border-box;
    border-radius: 10px;
    outline: 10px solid red;
}
也可以使用两个元素去实现(略过)
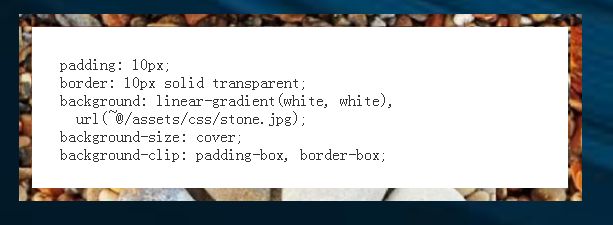
4. 连续的图像边框
背景图片之上,再叠加一层纯白的实色背景
.box {
    padding: 10px;
    border: 10px solid transparent;
    background: linear-gradient(white, white), url(~@/assets/css/stone.jpg);
    background-size: cover;
    background-clip: padding-box, border-box;
}
5. 平行四边形
transform: skewX(-45deg);
skewX函数定义了一个转换,该转换将元素倾斜到二维平面上的水平方向。由于倾斜会使整个元素都倾斜,所以这里使用伪类实现倾斜。
  .m-parallelogram-wrap {
    width: 150px;
    height: 50px;
    line-height: 50px;
    background-color: transparent;
    text-align: center;
    position: relative;
    &::after {
      content: '';
      position: absolute;
      left: 0; right: 0; right: 0; bottom: 0;
      background: #469EF1;
      @include box(100%, 100%);
      transform: skewX(-45deg);
      border-left: 1px solid #fff;
      z-index: -1;
    }
    &.active::after {
      background-color: #E6D923;
    }
  }
6. 切角效果
主要是用 background: linear-gradient(-45deg, transparent 15px, #fff 0);去实现。
  // 右下角切角效果
  .m-corner-curt1 {
    width: 150px;
    height: 50px;
    line-height: 50px;
    background: #fff;
    display: flex;
    align-items: center;
    justify-content: center;
    background: linear-gradient(-45deg, transparent 15px, #fff 0);
  }
7. 梯形
主要用到
transform: scaleY(1.5) perspective(.5em) rotateX(5deg);
transform-origin: bottom;
  .m-trapezoid-wrap {
    width: 150px;
    height: 50px;
    line-height: 50px;
    text-align: center;
    background: transparent;
    color: #333;
    position: relative;
    margin: 0 -5px;
    &:after {
      content: '';
      position: absolute;
      top: 0; right: 0; bottom: 0; left: 0;
      z-index: -2;
      background:#469EF1;
      transform: scaleY(1.5) perspective(.5em) rotateX(5deg);
      transform-origin: bottom;
    }
    &.active:after {
      background: #E6D923;
      z-index: -1;
    }
  }
