1. 简介
NetworkX 是用于创建、操作复杂图数据结构的 Python 包。
安装:
$ pip install networkx2. 修改操作
(1)创建图
import networkx as nx

G = nx.Graph()
(2)添加节点
节点可以是任何可哈希的对象。
G.add_node(1)                # 添加一个节点
G.add_nodes_from([2, 3])     # 添加多个节点
注:重复添加同一个节点是可以的。
图的节点甚至可以是另一个图:
H = nx.path_graph(10)
G.add_node(H)
(3)添加边
G.add_edge(1, 2)                      # 添加一条边
G.add_edges_from([(1, 3), (2, 3)])    # 添加多条边
G.add_edge(1, H)                      # 连接普通节点和图
注:重复添加同一条边是可以的。
(4)删除节点
G.remove_node(1)                # 删除一个节点
G.remove_nodes_from([2, 3])     # 删除多个节点
注:会自动删除相应的边。
(5)删除边
G.remove_edge(1, 2)                        # 删除一条边
G.remove_edges_from([(1, 3), (2, 3)])      # 删除多条边
(6)清空图
G.clear()3. 访问操作
(1)查看节点数和边数
n_nodes = G.number_of_nodes()    # 节点数
n_edges = G.number_of_edges()    # 边数
(2)查看节点邻居
# 节点 1 的邻居:G[1] 等价于 G.adj[1]
for neigh in G[1]:
    if isinstance(neigh, nx.classes.graph.Graph):
        print(neigh.nodes)
    else:
        print(neigh)

# 或
for neigh in G.neighbors(1):
    if isinstance(neigh, nx.classes.graph.Graph):
        print(neigh.nodes)
    else:
        print(neigh)
2
3
[0, 1, 2, 3, 4, 5, 6, 7, 8, 9](3)查看节点的度
deg = G.degree[1] # 节点 1 的度4. 属性图
(1)节点属性
G = nx.Graph()

G.add_node(1, color="red")
G.add_nodes_from([(2, {"color": "green"}), (3, {"color": "blue"})])

attr = G.nodes[1]    # {'color': 'red'}
G.nodes[1]['color'] = 'black'
(2)边属性
G.add_edge(1, 2, weight=4.7 )
G.add_edges_from([(1, 3, {'weight': 2.3}), (2, 3, {'weight': 6.5})])

attr = G[1][2]        # {'weight': 4.7}
G[1][2]['weight'] = 4.8
5. 遍历操作
(1)遍历节点
for node in G.nodes():
    print(node, end=', ')
1, 2, 3, (2)遍历节点及其邻居
for node, neighs in G.adj.items():
    for neigh, edge_attr in neighs.items():
        print(f"({node}, {neigh}, {edge_attr})")
(1, 2, {'weight': 4.8})
(1, 3, {'weight': 2.3})
(2, 1, {'weight': 4.8})
(2, 3, {'weight': 6.5})
(3, 1, {'weight': 2.3})
(3, 2, {'weight': 6.5})(3)遍历边
for edge in G.edges():
    print(edge, end=', ')
(1, 2), (1, 3), (2, 3), (4)遍历边及其属性
for u, v, edge_attr in G.edges.data():
    print(f"({u}, {v}, {edge_attr})")
(1, 2, {'weight': 4.8})
(1, 3, {'weight': 2.3})
(2, 3, {'weight': 6.5})6. 文件操作
此处以边列表的形式保存文件,当然也支持其他的格式。
(1)将图保存至文件
nx.write_edgelist(G, 'edgelist.txt')edgelist.txt:
1 2 {}
1 3 {}
2 3 {}
(2)从文件读取图
G = nx.read_edgelist('edgelist.txt')注意:读出来的节点以字符串的形式表示。
7. 绘图
注:如果出现 NetworkXError: random_state_index is incorrect 问题,可尝试执行:pip3 install decorator==4.4.2。
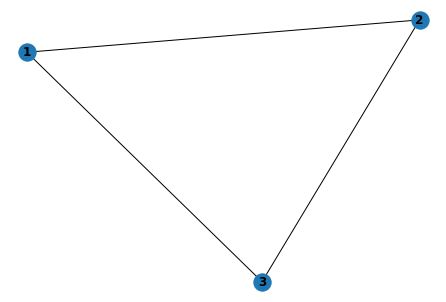
(1)简单的绘制
import matplotlib.pyplot as plt

nx.draw(G, with_labels=True, font_weight='bold')
plt.show()
(2)为节点绘制不同颜色
# 节点所在的社区(类),不同社区染不同颜色
partition = {
    1: 0,
    2: 1,
    3: 0,
}

pos = nx.spring_layout(G)

# 分别绘制节点、边、节点标签
nx.draw_networkx_nodes(G, pos, partition.keys(), node_size=300,
                       alpha=0.3, node_color=list(partition.values()))
nx.draw_networkx_edges(G, pos, alpha=0.5)
nx.draw_networkx_labels(G, pos)

plt.show()
8. 图算法
NetworkX 支持丰富的图数据结构算法,完整的算法支持见 https://networkx.org/document...。
如计算节点的最短路径:
G = nx.path_graph(5)

p = nx.shortest_path(G, source=0, target=4)       # 节点 0 到节点 4 的最短路径
print(p)

p = nx.shortest_path(G, source=0)                 # 节点 0 到其他节点的最短路径
print(p[4])

p = nx.shortest_path(G, target=4)                 # 其他节点到节点 4 的最短路径
print(p[0])

p = nx.shortest_path(G)                           # 各节点到其他各节点的最短路径
print(p[0][4])
[0, 1, 2, 3, 4]
[0, 1, 2, 3, 4]
[0, 1, 2, 3, 4]
[0, 1, 2, 3, 4]
