MATLAB实现基于BP神经网络的手写数字识别+GUI界面+mnist数据集测试
文章目录
- MATLAB实现基于BP神经网络的手写数字识别+GUI界面+mnist数据集测试
-
- 一、题目要求
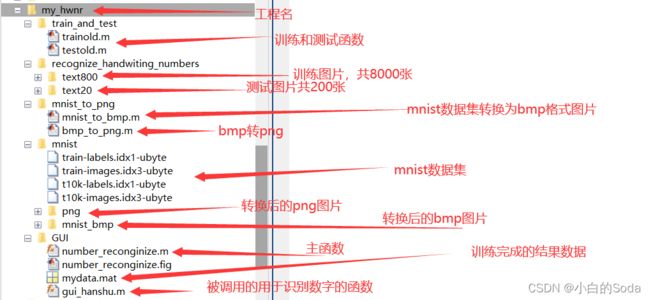
- 二、完整的目录结构说明
- 三、Mnist数据集及数据格式转换
- 四、BP神经网络相关知识
-
- 4.1 简介
- 4.2 基本原理
- 4.3 详情
- 五、相关代码详情
-
- 5.1 trainold.m 训练函数
- 5.2 testold.m 快速测试函数
- 六、GUI相关
-
- 6.1 图形界面设计
- 七、整合
-
- 7.1 完整的number_reconginize.m文件
- 7.2 gui_function
- 7.3 最终效果
MATLAB实现基于BP神经网络的手写数字识别+GUI界面+mnist数据集测试
有相关问题,请积极参考MATLAB中文文档:https://ww2.mathworks.cn/help/matlab/index.html。
一、题目要求
手写字符识别要求:
1、初步了解手写字符识别方法。
2、选择其中一种实现手写字符识别。
3、利用MNIST公共数据集进行性能测试。
4、熟练地掌握 matlab 的使用。
提高要求:1、BP神经网络算法。2、GUI界面设计
二、完整的目录结构说明
此代码在参考哔站某up主的代码上有改动。
三、Mnist数据集及数据格式转换
以下部分内容参考了:https://blog.csdn.net/didi_ya/article/details/105075859,点击可查看更详细的介绍。
MNIST手写数字数据库有60000个示例的训练集和10000个示例的测试集。它是NIST提供的更大集合的子集。这些数字已规格化,并在固定大小的图像中居中。
它是一个很好的数据库,适合那些想在实际数据上尝试学习技术和模式识别方法,同时在预处理和格式化方面花费最少精力的人。是可以被用来训练和测试关于手写数字识别的模型。
下载地址:http://yann.lecun.com/exdb/mnist/
点击下载四个数据集,下载完成之后解压。解压完成的效果如下图:
但是这些文件都是二进制的文件,需要对文件格式进行转换。转换的参考代码如下:
clear all;
clc;
%读取训练图片数据文件
[FileName,PathName] = uigetfile('*.*','选择训练图片数据文件train-images.idx3-ubyte');
TrainFile = fullfile(PathName,FileName);
fid = fopen(TrainFile,'r');
a = fread(fid,16,'uint8');
MagicNum = ((a(1)*256+a(2))*256+a(3))*256+a(4);
ImageNum = ((a(5)*256+a(6))*256+a(7))*256+a(8);
ImageRow = ((a(9)*256+a(10))*256+a(11))*256+a(12);
ImageCol = ((a(13)*256+a(14))*256+a(15))*256+a(16);
if ((MagicNum~=2051)||(ImageNum~=60000))
    error('不是 MNIST train-images.idx3-ubyte 文件!');
    fclose(fid);
    return;
end
savedirectory = uigetdir('','选择保存训练图片路径:');
h_w = waitbar(0,'请稍候,处理中>>');
for i=1:ImageNum
    b = fread(fid,ImageRow*ImageCol,'uint8');
    c = reshape(b,[ImageRow ImageCol]);
    d = c';
    e = 255-d;
    e = uint8(e);
    savepath = fullfile(savedirectory,['TrainImage_' num2str(i,'%05d') '.bmp']);
    imwrite(e,savepath,'bmp');
    waitbar(i/ImageNum);
end
fclose(fid);
close(h_w);
disp(['保存完毕']);
但是不知道为什么这段代码只能将train-images.idx3-ubyte转换成功,在转换t10k-images.idx3-ubyte时报错提示非.idx3-ubyte文件。
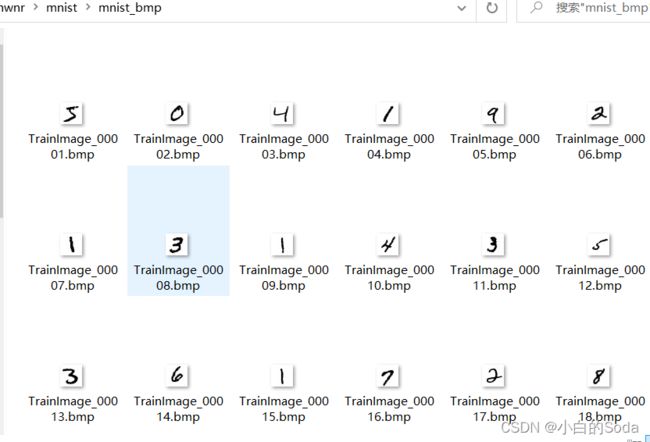
转换完成之后得到的图片如下,共60000张照片:
但是我们需要的是png格式的照片,所以还需要一段将bmp格式转换成png格式的代码:
clc;
bmps = dir('盘符:\转换后的照片存储路径\*.bmp');
num_bmps = length( bmps );
for i = 1 : num_bmps
	bmp_file = fullfile( '盘符:\转换后的照片存储路径\',bmps(i).name );
	bmp   = imread( bmp_file );
	% 第一步,解析文件名 pgm_file ,注意,pgm_file 包括路径+文件名+后缀,
	%[ path , name , ext ] = fileparts( bmp_file ) ;
  	% 第二步,生成新的文件名
  	filename = num2str(i,'%05i.png');
  	% 第三步,生成文件全称
   	png_file = fullfile( '转换后的文件存储路径\' , filename ) ;
  	% 第四步,将 pgm 以 png_file 作为文件名,保存为 png 格式.
  	imwrite( bmp , png_file , 'png' );
end
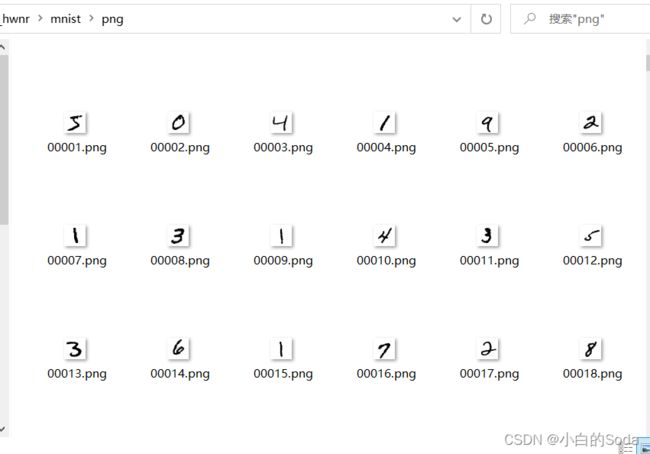
转换完成的效果如下:
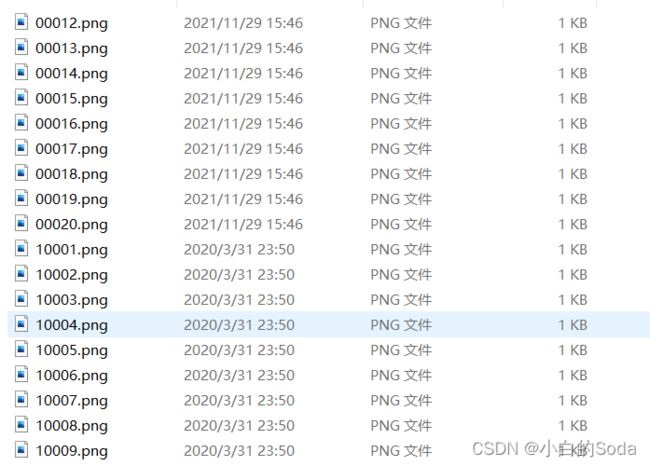
由于后面训练神经网络的时候,需要分类的图片(最好给图片一些有顺序标记的名字),这里我取了800张每种数字的图片,命名规则如下(参考了哔站某up的代码):
当然转换的时候也需要用代码进行批量转换,所以我又自己写了一个java工具类,用于图片名批量转换,代码如下(本工具类没有进行优化,读者可按需修改,自行优化):
import java.io.File;

/**
 * @Author: 小白的 Soda
 * @Description: 图片名批量修改
 * @Date Created in 2021-11-29 17:26
 * @Modified By:
 */
public class FileRename {
    // 注意文件之间的分隔符是 \\
    private static final String path = "C:\\图片存储的路径";

    public static void main(String[] args) {
        File file = new File(path);
        File[] tempList = file.listFiles();

        for (int i = 0; i < tempList.length; i++) {
            if (tempList[i].isFile()) {
                //原名称
                String oldFileName = tempList[i].getName();
                //原后缀名
                String suffix = oldFileName.substring(oldFileName.lastIndexOf(".") + 1);
                String num, second;
                int j = i + 1;
                String first = String.valueOf(j / 100);
                int k = j % 100;
                if (k < 10) {
                    if (k == 0) {
                        second = "00";
                    } else {
                        second = "0" + String.valueOf(k);
                    }
                } else {
                    second = String.valueOf(k);
                }
                num = first + second;
                //新名称
                String newFileName = "000" + num + "." + suffix;
                //重命名 路径+新名称
                tempList[i].renameTo(new File(path + "\\" + newFileName));
            }
        }
    }
}
转换完成之后的效果如下:
然后再准备一些用于测试训练结果的图片(每种数字20张,命名格式如下):
至此图片的准备工作就完成了。
四、BP神经网络相关知识
4.1 简介
BP(back propagation)神经网络是1986年由Rumelhart和McClelland为首的科学家提出的概念,是一种按照误差逆向传播算法训练的多层前馈神经网络,是应用最广泛的神经网络模型之一。
4.2 基本原理
人工神经网络无需事先确定输入输出之间映射关系的数学方程,仅通过自身的训练,学习某种规则,在给定输入值时得到最接近期望输出值的结果。作为一种智能信息处理系统,人工神经网络实现其功能的核心是算法。BP神经网络是一种按误差反向传播(简称误差反传)训练的多层前馈网络,其算法称为BP算法,它的基本思想是梯度下降法,利用梯度搜索技术,以期使网络的实际输出值和期望输出值的误差均方差为最小。
基本BP算法包括信号的前向传播和误差的反向传播两个过程。即计算误差输出时按从输入到输出的方向进行,而调整权值和阈值则从输出到输入的方向进行。正向传播时,输入信号通过隐含层作用于输出节点,经过非线性变换,产生输出信号,若实际输出与期望输出不相符,则转入误差的反向传播过程。误差反传是将输出误差通过隐含层向输入层逐层反传,并将误差分摊给各层所有单元,以从各层获得的误差信号作为调整各单元权值的依据。通过调整输入节点与隐层节点的联接强度和隐层节点与输出节点的联接强度以及阈值,使误差沿梯度方向下降,经过反复学习训练,确定与最小误差相对应的网络参数(权值和阈值),训练即告停止。此时经过训练的神经网络即能对类似样本的输入信息,自行处理输出误差最小的经过非线形转换的信息。
4.3 详情
关于一些详细的见解,本人也不是特别清楚,请参考类似:https://blog.csdn.net/fanxin_i/article/details/80212906的一些文章。
五、相关代码详情
对于每一部分的代码,我在参考的代码上面做了一些比较详细的注释,也有一些自己的修改,有助于没怎么接触过MATLAB的却又需要使用MATLAB完成一些作业的同学理解。
5.1 trainold.m 训练函数
% 产生双精度随机的784*64权值矩阵 V,为什么选择784呢,因为mnist数据集中的图片的28*28的
V=double(rand(784,64));
% 产生双精度随机的64*10权值矩阵 W
W=double(rand(64,10));
% δV和δW
delta_V=double(rand(784,64));
delta_W=double(rand(64,10));
% η和η1
yita=0.1;%缩放系数,有的文章称学习率
yita1=0.05;%自己加的参数,缩放激活函数的自变量防止输入过大进入函数的饱和区,去掉会有些变化
train_number=10;%训练样本中,有多少个数字,一共10个
train_num=400;%训练样本中,每种数字多少张图,一共400张,一共800张图片,可按识别准确率自己修改,不建议太大,会跑很久才会出结果。
% 输入层 x 为1*784的0矩阵, 隐藏层 y 为1*64的0矩阵,输出层 output 为1*10的0矩阵
x=double(zeros(1,784));%输入层
y=double(zeros(1,64));%中间层,也是隐藏层
output=double(zeros(1,10));%输出层
% tar_output 为1*10的0矩阵, δ 为1*10的0矩阵
tar_output=double(zeros(1,10));%目标输出,即理想输出
delta=double(zeros(1,10));%一个中间变量,可以不管

%记录总的均方差便于画图
s_record=1:1000;
tic %计时
for train_control_num=1:1000  %训练次数控制,在调参的最后发现1000次其实有多了,大概400次完全够了
    s=0;
    %读图,输入网络
    for number=1:train_number % 1-10 0暂时用10表示,后面的计算函数会对结果进行处理,保证最后显示的数字是0
        ReadDir=['C:\Users\24980\Desktop\my_hwnr\recognize_handwiting_numbers\text800\'];%读取样本的路径
            for num=1:train_num  %控制多少张 1-400
                % %05d,0表示在值之前补零以填充字段,5表示位数,d表示十进制有符号整数
                if number<10
                    photo_name=[num2str(number),num2str(num,'%05d'),'.png'];%图片名
                else
                	% 解决0图片的命名问题,避免出现1000001图片找不到的问题
                    photo_name=[num2str(0),num2str(num,'%05d'),'.png'];%图片名
                end
                photo_index=[ReadDir,photo_name];%路径加图片名得到总的图片索引
                photo_matrix=imread(photo_index); %使用imread得到图像矩阵 28*28
                photo_matrix=uint8(photo_matrix<=230);%二值化,黑色是1
                % graythresh(I) 使用 Otsu 方法根据灰度图像 I 计算全局阈值 T
                % Otsu 方法选择一个阈值,使阈值化的黑白像素的类内方差最小化
                thresh=graythresh(photo_matrix);%确定二值化阈值
                photo_matrix= imbinarize(photo_matrix,thresh); %将灰度图像转化为二值图像
                tmp=photo_matrix';
                % A(:) 就是把矩阵的元素按列的顺序变为一列,矩阵转化为向量
                tmp=tmp(:);%以上两步完成了图像二维矩阵转变为列向量,256维,作为输入
                %计算输入层输入
                x=double(tmp');%转化为行向量因为输入层X是行向量,并且化为浮点数
                %得到隐层输入
                y0=x*V;
                %激活
                y=1./(1+exp(-y0*yita1));
                %得到输出层输入
                output0=y*W;
                output=1./(1+exp(-output0*yita1));
                %计算预期输出
                tar_output=double(zeros(1,10));
                tar_output(number)=1.0;
                %计算误差
                %按照公式计算W和V的调整,为了避免使用for循环比较耗费时间,下面采用了直接矩阵乘法,更高效
                delta=(tar_output-output).*output.*(1-output);
                % repmat 相同元素矩阵初始化,创建一个元素都是 64*1 的 1*10的矩阵
                delta_W=yita*repmat(y',1,10).*repmat(delta,64,1);
                % sum(A) 将返回包含每列总和的行向量
                tmp=sum((W.*repmat(delta,64,1))');
                tmp=tmp.*y.*(1-y);
                delta_V=yita*repmat(x',1,64).*repmat(tmp,784,1);
                %计算均方差
                s=s+sum((tar_output-output).*(tar_output-output))/10;
                %更新权值
                W=W+delta_W;
                V=V+delta_V;
            end
      end
s=s/train_number/train_num;  %不加分号,随时输出误差观看收敛情况
train_control_num           %不加分号,随时输出迭代次数观看运行状态
s_record(train_control_num)=s;%记录
end
toc %计时结束
plot(1:1000,s_record);
% axis 设置坐标轴范围和纵横比
axis([1 1000,0 0.1]);
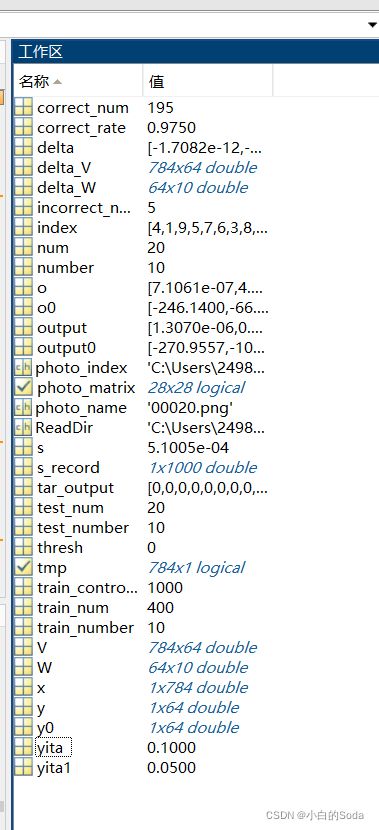
运行代码,可得到下图相关的数据结果:
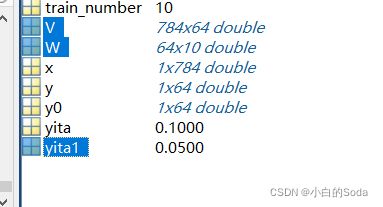
选中如下三个数据结果,单击右键另存为mydata.mat文件。
5.2 testold.m 快速测试函数
correct_num=0;%记录正确的数量
incorrect_num=0;%记录错误数量
test_number=10;%测试集中,一共多少数字,10个
test_num=20;%测试集中,每个数字多少个,最大100个
%load W;%%之前训练得到的W保存了,可以直接加载进来
%load V;
%load yita1;
%记录时间
tic %计时开始
for number=1:test_number
    ReadDir=['C:\Users\24980\Desktop\my_hwnr\recognize_handwiting_numbers\text20\'];
    for num=1:test_num  %控制多少张
        if number<10
            photo_name=[num2str(number),num2str(num,'%04d'),'.png'];
        else
            photo_name=[num2str(0),num2str(num,'%04d'),'.png'];
        end
        photo_index=[ReadDir,photo_name];
        photo_matrix=imread(photo_index);
        %大小改变
        %photo_matrix=imresize(photo_matrix,[20 20]);
        %二值化
        photo_matrix=uint8(photo_matrix<=230);%黑色是1
        thresh=graythresh(photo_matrix);%确定二值化阈值
        photo_matrix=imbinarize(photo_matrix,thresh);%对图像二值化
        %行向量
        tmp=photo_matrix';
        tmp=tmp(:);
        %计算输入层输入
        x=double(tmp');
        %得到隐层输入
        y0=x*V;
        %激活
        y=1./(1+exp(-y0*yita1));
        %得到输出层输入
        o0=y*W;
        o=1./(1+exp(-o0*yita1));
        %最大的输出即是识别到的数字
        [o,index]=sort(o);
        if index(10)==number
            correct_num=correct_num+1
        else
            incorrect_num=incorrect_num+1;
        	% 显示不成功的数字,显示会比较花时间
            %figure(incorrect_num)
            %imshow((1-photo_matrix)*255);
            %title(num2str(number));
        end
    end
end
correct_rate=correct_num/test_number/test_num
toc %计时结束
运行文件,可以看到,训练之后识别的准确率在97.5%:
至此训练和测试工作完成。
六、GUI相关
6.1 图形界面设计
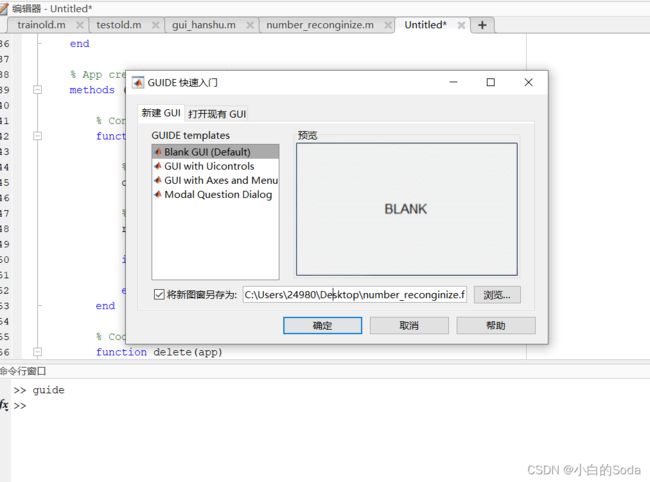
首先,在命令行输入guide,会跳出如下窗口,选择新建gui,选择创建空白gui并且指定自定义的文件存储路径和名称,然后点击确定。
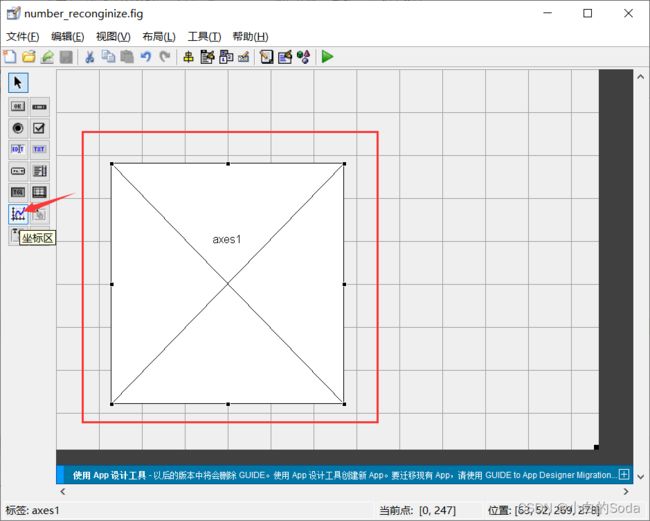
然后在弹出的窗口中,选择坐标区,并且在画布上创建如下所示的展示图像的区域。
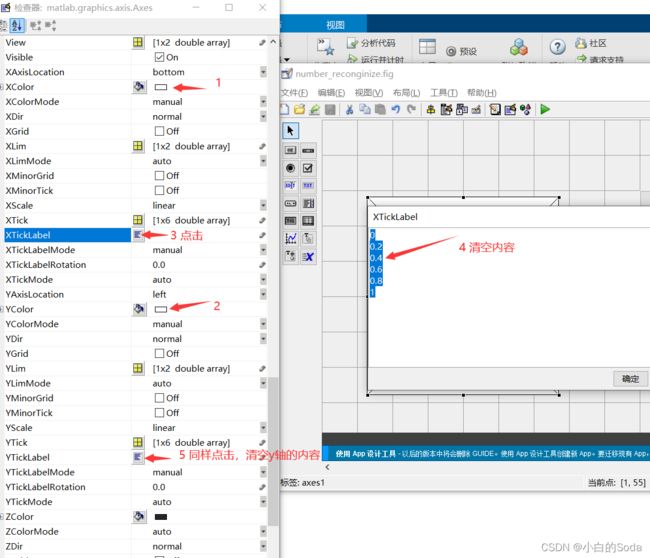
点击创建的坐标框,右键单击,选择检查器,将x,y轴的内容清空,颜色设置为白色。
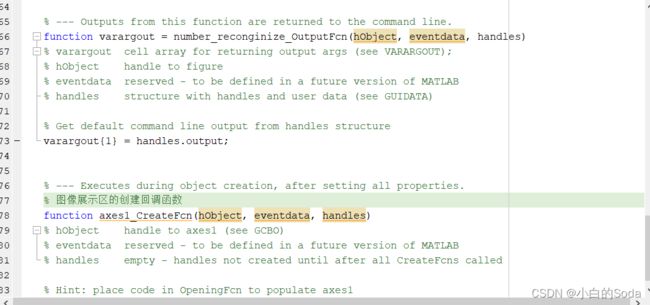
单击右键查看创建的回调函数,当然了,这里我在回调函数中写上了注释,因为自动创建的.m文件中全是英文的,小字母容易看花眼睛。
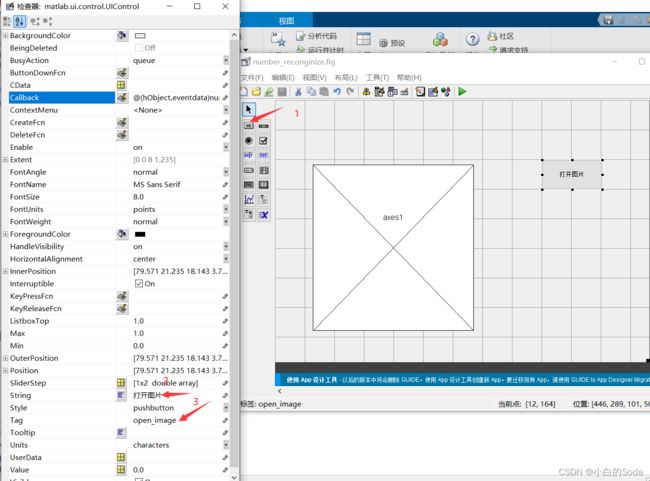
然后创建一个普通按钮,并且编辑按钮的名字,句柄等属性。
然后我们右键单击该按钮,找到回调函数callback,点击进入,编辑我们的回调逻辑:
% --- Executes on button press in open_image.
function open_image_Callback(hObject, eventdata, handles)
% hObject    handle to open_image (see GCBO)
% eventdata  reserved - to be defined in a future version of MATLAB
% handles    structure with handles and user data (see GUIDATA)
% 判断是否有选择图片文件
% 判断是否有选择图片文件
[filename,pathname]=uigetfile({'*.png';'*.bmp';'*.tif';'*.jpg';'*.*'},'载入图像');
if isequal(filename,0)|isequal(pathname,0)
    errordlg('没有选中文件','出错');
    return;
else
    file=[pathname,filename];
    global S   %设置全局变量S,保存初始图像路径,以便之后的还原操作
    S=file;
    x=imread(file);
    % 设置相关属性并展示图片
    set(handles.axes1,'HandleVisibility','ON');
    axes(handles.axes1);
    imshow(x);
    handles.img=x;
    % 存储图像信息
    guidata(hObject,handles);
end
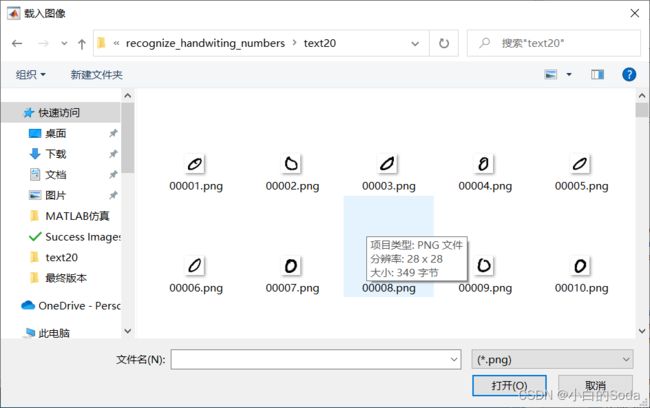
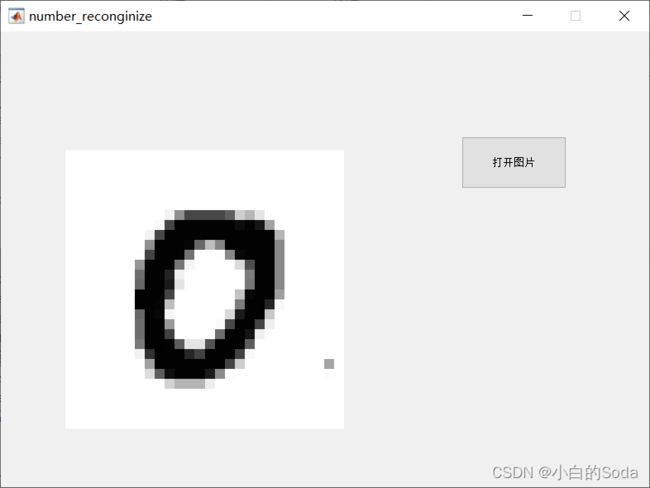
然后我们保存现在的文件,点击运行图标,点击打开图片,选择一张图片,查看一下效果怎么样:
能够成功显示,好的,接下来我们进行下面的步骤,创建其他的按钮。
根据上面的步骤,创建“开始识别”的按钮:
创建识别成功区的按钮,注意style的选择,以及给句柄命名:
接下来,就是处理开始识别和识别结果按钮背后的逻辑了。
右键单击“开始识别”,点击callback,编辑回调函数,此处需要用到gui的识别数字的函数:
% --- Executes on button press in Reconginize.
function Reconginize_Callback(hObject, eventdata, handles)
% hObject    handle to Reconginize (see GCBO)
% eventdata  reserved - to be defined in a future version of MATLAB
% handles    structure with handles and user data (see GUIDATA)
% 接收识别的结果,并将其展示到识别结果区
numberqqq=gui_function(handles.img);
set(handles.edit1,'String',num2str(numberqqq));
右键单击“识别结果”,点击CreateFcn,编辑创建函数:
function edit1_Callback(hObject, eventdata, handles)
% hObject    handle to edit1 (see GCBO)
% eventdata  reserved - to be defined in a future version of MATLAB
% handles    structure with handles and user data (see GUIDATA)
% 校验并设置相关属性
if ispc && isequal(get(hObject,'BackgroundColor'), get(0,'defaultUicontrolBackgroundColor'))
    set(hObject,'BackgroundColor','white');
end
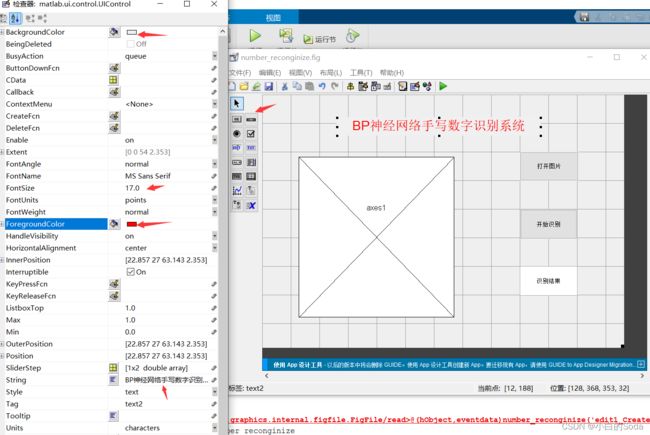
差点忘记了呢,给我们的gui界面搞个大标题啊!各种颜色字体标题啊,请根据个人喜好设定。
至此,图形界面的工作就创建完毕了,下一步进行整合。
七、整合
7.1 完整的number_reconginize.m文件
首先,我们看看完整的number_reconginize.m文件,虽然内容很多,但很多都是系统自动创建的哦:
function varargout = number_reconginize(varargin)
% NUMBER_RECONGINIZE MATLAB code for number_reconginize.fig
%      NUMBER_RECONGINIZE, by itself, creates a new NUMBER_RECONGINIZE or raises the existing
%      singleton*.
%
%      H = NUMBER_RECONGINIZE returns the handle to a new NUMBER_RECONGINIZE or the handle to
%      the existing singleton*.
%
%      NUMBER_RECONGINIZE('CALLBACK',hObject,eventData,handles,...) calls the local
%      function named CALLBACK in NUMBER_RECONGINIZE.M with the given input arguments.
%
%      NUMBER_RECONGINIZE('Property','Value',...) creates a new NUMBER_RECONGINIZE or raises the
%      existing singleton*.  Starting from the left, property value pairs are
%      applied to the GUI before number_reconginize_OpeningFcn gets called.  An
%      unrecognized property name or invalid value makes property application
%      stop.  All inputs are passed to number_reconginize_OpeningFcn via varargin.
%
%      *See GUI Options on GUIDE's Tools menu.  Choose "GUI allows only one
%      instance to run (singleton)".
%
% See also: GUIDE, GUIDATA, GUIHANDLES

% Edit the above text to modify the response to help number_reconginize

% Last Modified by GUIDE v2.5 30-Nov-2021 20:47:43

% Begin initialization code - DO NOT EDIT
gui_Singleton = 1;
gui_State = struct('gui_Name',       mfilename, ...
                   'gui_Singleton',  gui_Singleton, ...
                   'gui_OpeningFcn', @number_reconginize_OpeningFcn, ...
                   'gui_OutputFcn',  @number_reconginize_OutputFcn, ...
                   'gui_LayoutFcn',  [] , ...
                   'gui_Callback',   []);
if nargin && ischar(varargin{1})
    gui_State.gui_Callback = str2func(varargin{1});
end

if nargout
    [varargout{1:nargout}] = gui_mainfcn(gui_State, varargin{:});
else
    gui_mainfcn(gui_State, varargin{:});
end
% End initialization code - DO NOT EDIT


% --- Executes just before number_reconginize is made visible.
function number_reconginize_OpeningFcn(hObject, eventdata, handles, varargin)
% This function has no output args, see OutputFcn.
% hObject    handle to figure 句柄
% eventdata  reserved - to be defined in a future version of MATLAB 附加函数
% handles    structure with handles and user data (see GUIDATA)
% 当前GUI所有的数据的结构体
% varargin   command line arguments to number_reconginize (see VARARGIN)
% 命令行参数
handles.output = hObject;

% Update handles structure
guidata(hObject, handles);

% UIWAIT makes number_reconginize wait for user response (see UIRESUME)
% uiwait(handles.figure1);


% --- Outputs from this function are returned to the command line.
function varargout = number_reconginize_OutputFcn(hObject, eventdata, handles)
% varargout  cell array for returning output args (see VARARGOUT);
% hObject    handle to figure
% eventdata  reserved - to be defined in a future version of MATLAB
% handles    structure with handles and user data (see GUIDATA)

% Get default command line output from handles structure
varargout{1} = handles.output;


% --- Executes during object creation, after setting all properties.
% 图像展示区的创建回调函数
function axes1_CreateFcn(hObject, eventdata, handles)
% hObject    handle to axes1 (see GCBO)
% eventdata  reserved - to be defined in a future version of MATLAB
% handles    empty - handles not created until after all CreateFcns called

% Hint: place code in OpeningFcn to populate axes1


% --- Executes on button press in open_image.
function open_image_Callback(hObject, eventdata, handles)
% hObject    handle to open_image (see GCBO)
% eventdata  reserved - to be defined in a future version of MATLAB
% handles    structure with handles and user data (see GUIDATA)
% 判断是否有选择图片文件
[filename,pathname]=uigetfile({'*.png';'*.bmp';'*.tif';'*.jpg';'*.*'},'载入图像');
if isequal(filename,0)|isequal(pathname,0)
    errordlg('没有选中文件','出错');
    return;
else
    file=[pathname,filename];
    global S   %设置全局变量S,保存初始图像路径,以便之后的还原操作
    S=file;
    x=imread(file);
    % 设置相关属性并展示图片
    set(handles.axes1,'HandleVisibility','ON');
    axes(handles.axes1);
    imshow(x);
    handles.img=x;
    % 存储图像信息
    guidata(hObject,handles);
end


% --- Executes on button press in Reconginize.
function Reconginize_Callback(hObject, eventdata, handles)
% hObject    handle to Reconginize (see GCBO)
% eventdata  reserved - to be defined in a future version of MATLAB
% handles    structure with handles and user data (see GUIDATA)
% 接收识别的结果,并将其展示到识别结果区
numberqqq=gui_function(handles.img);
set(handles.edit1,'String',num2str(numberqqq));


% --- Executes during object creation, after setting all properties.
function Reconginize_CreateFcn(hObject, eventdata, handles)
% hObject    handle to Reconginize (see GCBO)
% eventdata  reserved - to be defined in a future version of MATLAB
% handles    empty - handles not created until after all CreateFcns called


function edit1_Callback(hObject, eventdata, handles)
% hObject    handle to edit1 (see GCBO)
% eventdata  reserved - to be defined in a future version of MATLAB
% handles    structure with handles and user data (see GUIDATA)
% 校验并设置相关属性
if ispc && isequal(get(hObject,'BackgroundColor'), get(0,'defaultUicontrolBackgroundColor'))
    set(hObject,'BackgroundColor','white');
end

% Hints: get(hObject,'String') returns contents of edit1 as text
%        str2double(get(hObject,'String')) returns contents of edit1 as a double
7.2 gui_function
这是窗口按钮的回调函数处理数据的时候,需要用到的识别函数:
function [ numberqq ] = gui_function( photo_matrix )
%UNTITLED2 此处显示有关此函数的摘要
%   此处显示详细说明
        % 加载之前的训练结果
        load mydata;
        photo_matrix=uint8(photo_matrix<=230);
        thresh=graythresh(photo_matrix);%确定二值化阈值
        photo_matrix=imbinarize(photo_matrix,thresh);%对图像二值化
        tmp=photo_matrix';
        tmp=tmp(:);
        %计算输入层输入
        x=double(tmp');
        %得到隐层输入
        y0=x*V;
        %激活
        y=1./(1+exp(-y0*yita1));
        %得到输出层输入
        o0=y*W;
        o=1./(1+exp(-o0*yita1));
        %最大的输出即是识别到的数字
        [o,index]=sort(o);
        % 对数字0的处理,当识别到是10的时候,替换成0
        if index(10)==10
            numberqq=0;
        else
            numberqq=index(10);
        end
        index;
end
7.3 最终效果
接下来,给子文件夹中添加了主函数、识别函数以及之前训练好的数据集之后呢,我们就可以看看我们的系统识别的效果了。
成功识别,效果是这样的:
至此所有的工作都做完啦!
这次的作业有参考各大博主和up主的学习成果,也有个人思考和创作的部分,如果有侵权,请私信联系删除,有不足之处,也请大家不吝指出!
