Ubuntu18.04 LTS 使用CUDA11.1编译TensoFlow-GPU版本
Ubuntu18.04 LTS 使用CUDA11.1编译TensoFlow-GPU版本
谷歌官方为python3.8编译的tensorflow-gpu 2.3版本只支持cuda 10.1和cudnn 7,为了支持cuda 11.1和cudnn 8,需要重新编译tensorflow。
1、编译准备
本次编译环境如下:
- 操作系统:Ubuntu 18.04 LTS
- Python版本:3.6
- CPU:Intel i5 / intel i10(和编译速度相关)
- 显卡:GTX 1050TI / RTX 3080
- 内存:64G
博主在i5、1050TI和i10、3080环境下均编译通过。
在编译前,需要确保主机已安装显卡驱动、cuda 11.1、cudnn 8、tensorrt 7.2,版本可根据实际情况选择,根据实际需要而定,cuda10好像不支持RTX 3000系列显卡,cuda 11及以上才支持RTX 3000系列显卡。
本教程是通过ssh远程连接主机进行编译,博主也建议通过此种方式,如何通过ssh远程连接主机可以在网上查找相关资料。
2、基础环境安装
如果已经安装显卡驱动、cuda 11.1、cudnn 8、tensorrt 7.2,则可以跳过此步骤。
2.1、下载文件
下载显卡驱动
显卡驱动从英伟达官网获取:英伟达官网(点击跳转),根据显卡型号选择信息,然后点击【开始搜索】:

然后在搜索下方回有搜索结果,选择最新版本,点击【获取下载】进入下载界面,下载该版本驱动(由于内地访访问官网较慢,所以点击按钮按钮可能需要一定才能反应,建议耐心等待):

下载 CUDA
进入英伟达的cuda下载页面:cuda下载页面(点击跳转),根据实际情况选择cuda版本,博主使用的是11.1.1版本,点击对应版本号,进入下载页面:

博主在Ubuntu 18.04下编译,所以依次选择【Linux】》【x86_64】》【Ubuntu】》【18.04】》【runfile(local)】(需要根据实际情况选择),依次点击后,会在下方出现下载步骤,按照步骤操作即可:

在命令行下输入命令第一句(下载cuda安装文件),第二句为安装指令,暂时只需要使用第一句下载就行:
wget https://developer.download.nvidia.com/compute/cuda/11.1.1/local_installers/cuda_11.1.1_455.32.00_linux.run
如果没有安装wget,需要使用sudo apt install wget安装。
下载cuDNN
进入cudnn下载页面:cudnn下载页面(点击跳转);cudnn下载需要注册账户,如果已有账户直接登录,没有则按照步骤注册,登录以后会跳转至下载页面(如果加载缓慢,耐心等待;无法正常加载,刷新网页)。
勾选【I Agree To the Terms of the cuDNN Software License Agreement】,会出现各个下载版本:
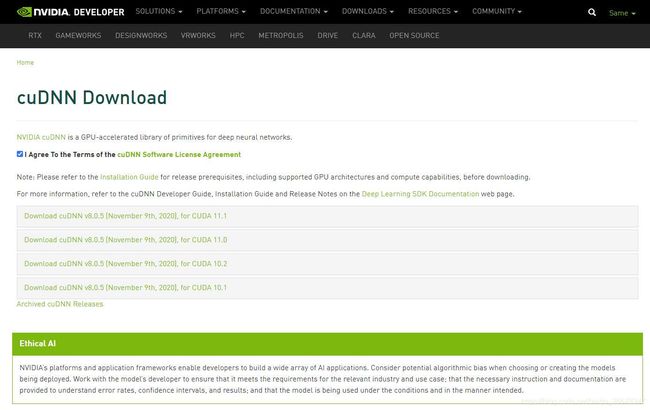
【注意】根据cuda版本选择,博主选择的是当时最新版本cudnn v8.0.5,对应的cuda版本为11.1。
选择好cuDNN版本后,点击下载“cuDNN Library for Linux”,如图所示:

下载完成后,会获取一个压缩包。
下载TensorRT
进入tensorrt下载页面:tensorrt下载页面(点击跳转),点击【Download Now】,同样也需要登录,在上一步已经登录的话,会直接跳转至下载界面,点击【TensorRT 7】(或者其他版本):

勾选【I Agree To the Terms of the NVIDIA TensorRT License Agreement】,选择详细版本,博主选择的是当时最新版本7.2.1,然后根据Linux系统版本和cuda版本选择tensorrt版本,博主选择的为【TensorRT 7.2.1 for Ubuntu 18.04 and CUDA 11.1 TAR package】,一定要下载TAR类型文件,后续教程使用该类型文件安装,不同类型安装方法不一致:

下载完成后,会得到一个压缩包类型文件。
文件汇总
可以新建一个文件夹,将上述下载的文件汇总在一起,便于操作,博主在当前用户根目录下创建了一个名为install的文件夹,将下载的文件全部放置在该目录下,文件夹内容如下(如果下述文件在windows系统下下载,可以使用ftp或者U盘将文件复制至Ubuntu系统):
$ ls -l
total 6135424
-rwxrwxr-x 1 sworld sworld 3498245611 Nov 14 12:29 cuda_11.1.0_455.23.05_linux.run
-rw-rw-r-- 1 sworld sworld 1548325637 Nov 14 04:36 cudnn-11.1-linux-x64-v8.0.5.39.tgz
-rwxrwxr-x 1 sworld sworld  168953614 Oct 24 13:13 NVIDIA-Linux-x86_64-455.28.run
-rw-r--r-- 1 root   root   1024005281 Nov 16 07:01 TensorRT-7.2.1.6.Ubuntu-18.04.x86_64-gnu.cuda-11.1.cudnn8.0.tar.gz
2.2、安装显卡驱动
cuda安装文件带有显卡驱动安装项,但可能不是最新版本,如果想安装cuda的时候安装驱动,可以跳过这一步,直接进入cuda安装步骤。
在安装显卡需要检查BIOS,关闭一些选项:
- 在开机启动项的Security选项中检查UEFI是否开启,如果开启的话请立马关掉它(重要)
- 在开机启动项的Boot选项中检查Secure Boot是否开启,如果开启的话请立马关掉它(重要)
安装下述相关依赖:
sudo apt-get install libprotobuf-dev libleveldb-dev libsnappy-dev libopencv-dev libhdf5-serial-dev protobuf-compiler
sudo apt-get install --no-install-recommends libboost-all-dev
sudo apt-get install libopenblas-dev liblapack-dev libatlas-base-dev
sudo apt-get install libgflags-dev libgoogle-glog-dev liblmdb-dev make
如果有图形化界面,需要禁用x-window服务:
sudo service lightdm stop
或
sudo /etc/init.d/lightdm stop
还需要禁用nouveau,禁用方法是编辑/etc/modprobe.d/blacklist.conf,在文末添加下述内容:
blacklist nouveau
blacklist lbm-nouveau
options nouveau modeset=0
alias nouveau off
alias lbm-nouveau off
最后更新后重启电脑:
sudo update-initramfs -u
reboot
安装驱动
添加可执行权限并安装驱动:
sudo chmod a+x NVIDIA-Linux-x86_64-455.38.run
sudo ./NVIDIA-Linux-x86_64-455.38.run
根据引导安装驱动,其中【NVIDIA-Linux-x86_64-455.38.run】为驱动文件。
查看驱动
安装完成后,可以在命令行下使用nvidia-smi查看显卡使用情况,出现如下内容,说明显卡驱动已经安装:
Sun Nov 15 19:15:50 2020
+-----------------------------------------------------------------------------+
| NVIDIA-SMI 455.38       Driver Version: 455.38       CUDA Version: 11.1     |
|-------------------------------+----------------------+----------------------+
| GPU  Name        Persistence-M| Bus-Id        Disp.A | Volatile Uncorr. ECC |
| Fan  Temp  Perf  Pwr:Usage/Cap|         Memory-Usage | GPU-Util  Compute M. |
|                               |                      |               MIG M. |
|===============================+======================+======================|
|   0  GeForce RTX 3080    Off  | 00000000:17:00.0 Off |                  N/A |
|  0%   52C    P8    11W / 320W |      5MiB / 10018MiB |      0%      Default |
|                               |                      |                  N/A |
+-------------------------------+----------------------+----------------------+
|   1  GeForce RTX 3080    Off  | 00000000:65:00.0  On |                  N/A |
|  0%   49C    P8    11W / 320W |    173MiB / 10014MiB |      1%      Default |
|                               |                      |                  N/A |
+-------------------------------+----------------------+----------------------+

+-----------------------------------------------------------------------------+
| Processes:                                                                  |
|  GPU   GI   CI        PID   Type   Process name                  GPU Memory |
|        ID   ID                                                   Usage      |
|=============================================================================|
|    0   N/A  N/A      1139      G   /usr/lib/xorg/Xorg                  4MiB |
|    0   N/A  N/A      1338      G   /usr/bin/gnome-shell                0MiB |
|    1   N/A  N/A      1139      G   /usr/lib/xorg/Xorg                106MiB |
|    1   N/A  N/A      1338      G   /usr/bin/gnome-shell               64MiB |
+-----------------------------------------------------------------------------+
卸载旧驱动
如果需要重新安装显卡驱动,可以使用下述命令:
sudo apt-get remove --purge nvidia*
sudo apt-get autoremove
sudo chmod +x NVIDIA-Linux-x86_64xx.xx.run
sudo ./NVIDIA-Linux-x86_64xx.xx.run --uninstall
其中,NVIDIA-Linux-x86_64xx.xx.run是安装的旧显卡驱动。
2.3、安装CUDA
安装CUDA
添加可执行权限并运行安装程序:
sudo chmod a+x cuda_11.1.0_455.23.05_linux.run
sudo ./cuda_11.1.0_455.23.05_linux.run
然后回出现下述界面,输入accept,然后回车:
x  End User License Agreement                                                  x
x  -                                                                           x
x  NVIDIA Software License Agreement and CUDA Supplement to                    x
x  Software License Agreement.                                                 x
x                                                                              x
x  Preface                                                                     x
x  -                                                                           x
x  The Software License Agreement in Chapter 1 and the Supplement              x
x  in Chapter 2 contain license terms and conditions that govern               x
x  the use of NVIDIA software. By accepting this agreement, you                x
x  agree to comply with all the terms and conditions applicable                x
x  to the product(s) included herein.                                          x
x                                                                              x
x  NVIDIA Driver                                                               x
                                                                               x
x Do you accept the above EULA? (accept/decline/quit):                         x
x                                                                              x
进入选择界面,如果没有安装显卡驱动,直接使用上下按键选择【Install】,按回车开始安装即可。
如果已经安装驱动,使用上下按键选择【Driver】,使用空格取消选择,然后选择【Install】,等待cuda安装完成。
x CUDA Installer se Agreement                                                  x
x - [ ] Driver                                                                 x
x      [ ] 455.23.05                                                           x
x + [X] CUDA Toolkit 11.1                                                      x
x   [X] CUDA Samples 11.1                                                      x
x   [X] CUDA Demo Suite 11.1                                                   x
x   [X] CUDA Documentation 11.1                                                x
x   Options                                                                    x
x   Install                                                                    x
x                                                                              x
x   VIDIA Driver                                                               x
x
x                                                                              x
x Up/Down: Move | Left/Right: Expand | 'Enter': Select | 'A': Advanced options x
安装完成后,需要配置环境变量,编辑~/.bashrc文件,如果其他用户需要使用cuda,再按照上述步骤添加环境变量并更新即可:
sudo nano ~/.bashrc
在末尾添加:
export CUDA_HOME=/usr/local/cuda
export LD_LIBRARY_PATH=${LD_LIBRARY_PATH}:${CUDA_HOME}/lib64
export PATH=${CUDA_HOME}/bin:${PATH}
添加后更新环境变量:
source ~/.bashrc
cuda安装目录为/usr/loca/cuda-xxx,xxx为版本号,同时,cuda还会建立一个/usr/local/cuda同步链接,所以可以直接将该路径添加至环境变量,之后更换cuda版本,也不需要修改环境变量。
查看CUDA
添加环境变量以后,使用命令nvcc -V可以查看cuda安装情况:
nvcc: NVIDIA (R) Cuda compiler driver
Copyright (c) 2005-2020 NVIDIA Corporation
Built on Tue_Sep_15_19:10:02_PDT_2020
Cuda compilation tools, release 11.1, V11.1.74
Build cuda_11.1.TC455_06.29069683_0
出现上述内容,说明安装成功,可以看到博主的cuda版本为11.1。
卸载CUDA
卸载cuda需要进入cuda的程序目录:
cd /usr/local/cuda/bin
然后执行:
sudo ./cuda-uninstaller
使用空格选取全部选项,然后按下回车卸载:
x CUDA Uninstaller                                                             x
x   [X] CUDA_Samples_11.1                                                      x
x   [X] CUDA_Demo_Suite_11.1                                                   x
x   [X] CUDA_Documentation_11.1                                                x
x   [X] CUDA_Toolkit_11.1                                                      x
x   Done                                                                       x
x                                                                              x
x                                                                              x
x                                                                              x
x Up/Down: Move | 'Enter': Select                                              x
卸载完成后,使用下述命令删除残留项:
sudo rm -R /usr/local/cuda*
2.4、安装CUDNN
解压下载得到的cudnn压缩文件:
sudo tar -zxvf cudnn-11.1-linux-x64-v8.0.5.39.tgz
解压完成后,在该文件夹下会出现一个叫cuda的文件夹,该文件下包含cudnn相关项,使用下述命令复制文件至cuda目录:
sudo cp cuda/lib64/* /usr/local/cuda/lib64/
sudo  cp cuda/include/* /usr/local/cuda/include/
sudo chmod a+r /usr/local/cuda/include/cudnn.h /usr/local/cuda/lib64/libcudnn*
安装完成后,可以使用下述命令查看cudnn版本信息:
cat /usr/local/cuda/include/cudnn_version.h | grep CUDNN_MAJOR -A 2
2.5 安装TensorRT
安装TensorRT
cudnn默认安装路径为/usr/local/,所以为了统一管理,将tensorrt也安装在此处,将tensorrt压缩文件移动至该路径(注意最后的/,文件名称根据你实际下载名称而定):
sudo mv TensorRT-7.2.1.6.Ubuntu-18.04.x86_64-gnu.cuda-11.1.cudnn8.0.tar.gz /usr/local/
解压该文件夹,解压完成会在同级目录生成一个TensorRT-x.x.x.x文件夹:
sudo tar -zxvf TensorRT-7.2.1.6.Ubuntu-18.04.x86_64-gnu.cuda-11.1.cudnn8.0.tar.gz
建立同步链接:
sudo ln -s /usr/local/TensorRT-7.2.1.6 /usr/local/tensorrt
添加环境变量,编辑~/.bashrc文件,如果其他用户需要使用tensorrt,再按照下述步骤添加环境变量并更新即可:
sudo nano ~/.bashrc
在文末添加下述内容:
export LD_LIBRARY_PATH=${LD_LIBRARY_PATH}:/usr/local/tensorrt/lib
更新环境变量:
source ~/.bashrc
安装Python接口
如果需要用 Python API 进行编程,需要安装下述库,需要根据Python版本选择whl文件,博主Python版本为3.6:
cd /usr/local/tensorrt/python
sudo pip3 install tensorrt-7.2.1.6-cp36-none-linux_x86_64.whl
安装UFF转换库
安装该文件夹下的whl文件:
cd /usr/local/tensorrt/uff
sudo pip3 install uff-0.6.9-py2.py3-none-any.whl
安装graphsurgeon
graphsurgeon 是对UFF编码网络进行定制化操作的库,比如插入或删除神经网络某一层layer,安装该文件夹下的whl文件:
cd /usr/local/tensorrt/graphsurgeon
sudo pip3 install graphsurgeon-0.4.5-py2.py3-none-any.whl
验证安装
- 查看TensorRT的安装目录下文件是否齐全,可使用命令
tree -d,会看到包含以下文件夹:lib,include,data… - 运行例子
sampleMNIST
# 进入目录文件
cd /usr/local/tensorrt/samples/sampleMNIST
# 编译
sudo make
# 运行
./usr/local/tensorrt/bin/sample_mnist
如果上述命令无ERROR输出,则证明安装成功。
3、编译Tensorflow-GPU
TensorFlow使用Bazel编译。在编译之前,先整理一下已经配置好的环境:
- CUDA 11.1
- cuDNN 8.0.5
- TensorRT 7.2.1
3.1、安装Bazel
【注意】:到目前为止,需要Bazel 3.1.0来编译TensorFlow,如果编译时提示更改Bazel版本,只需要按照命令执行即可。
进入Bazel Release下载页面:Bazel releases page on GitHub,找到版本号为3.1.0的Bazel执行文件,点击【Assets】:

选择名称为bazel-x.x.x-installer-linux-x86_64.sh下载,其中x.x.x为版本号,右键复制链接,然后使用wget下载:
wget https://github.com/bazelbuild/bazel/releases/download/3.1.0/bazel-3.1.0-installer-linux-x86_64.sh
添加可执行权限并执行:
sudo chmod a+x bazel-3.1.0-installer-linux-x86_64.sh
./bazel-3.1.0-installer-linux-x86_64.sh --user
添加环境变量,如果更换其他用户,同样需要执行下述添加环境变量操作:
编辑~/.bashrc:
sudo nano ~/.bashrc
在文末添加下述内容:
export BAZEL_HOME=/home/sworld
export PATH=${PATH}:${BAZEL_HOME}/bin
【注意】:其中BAZEL_HOME为当前用户根目录,由于博主当前用户为sworld,所以用户根目录为/home/sworld。
使环境变量生效:
source ~/.bashrc
最后使用bazel命令查看是否安装成功,如果出现下述内容,说明安装成功:
$ bazel
                                                           [bazel release 3.1.0]
Usage: bazel <command> <options> ...

Available commands:
  analyze-profile     Analyzes build profile data.
  aquery              Analyzes the given targets and queries the action graph.
#...省略
3.2、编译准备
获取源码
访问tensorflow项目的github地址,使用git将项目clone至本地(Linux主机),如果没有安装git,使用下述命令安装:
sudo apt install git
clone项目,进入项目文件夹:
# 官方地址克隆
git clone https://github.com/tensorflow/tensorflow.git
# 加速通道克隆
git clone https://hub.fastgit.org/tensorflow/tensorflow.git
# 建议使用加速通道克隆,在国内使用官方地址克隆,速度较慢
# 进入项目文件夹
cd tesorflow
配置编译选项
使用下述指定,开始配置编译选项:
./configure
第一步,选择python版本,默认python3,直接回车即可:
You have bazel 3.1.0 installed.
Please specify the location of python. [Default is /usr/bin/python3]:
第二步,选择python库路径,直接回车即可:
Found possible Python library paths:
  /usr/lib/python3/dist-packages
  /usr/local/lib/python3.6/dist-packages
Please input the desired Python library path to use.  Default is [/usr/lib/python3/dist-packages]
第三步,是否支持ROCm,输入N,回车:
Do you wish to build TensorFlow with ROCm support? [y/N]: N
No ROCm support will be enabled for TensorFlow.
第四步,是否支持cuda,也就是是否支持GPU,输入y,回车:
Do you wish to build TensorFlow with CUDA support? [y/N]: y
CUDA support will be enabled for TensorFlow.
第五步,是否支持tensorrt,输入y,回车:
Do you wish to build TensorFlow with TensorRT support? [y/N]: y
TensorRT support will be enabled for TensorFlow.
第六步,开始配置cuda版本,同时可能回出现找不到相关文件,这块可以忽略,由于使用的cuda版本为11.1,所以在此处输入11.1,回车:
Could not find any NvInferVersion.h matching version '' in any subdirectory:
        ''
        'include'
        'include/cuda'
        'include/*-linux-gnu'
        'extras/CUPTI/include'
        'include/cuda/CUPTI'
        'local/cuda/extras/CUPTI/include'
of:
        '/lib'
        '/lib/x86_64-linux-gnu'
        '/lib32'
        '/libx32'
        '/usr'
        '/usr/lib'
        '/usr/lib/x86_64-linux-gnu'
        '/usr/lib/x86_64-linux-gnu/libfakeroot'
        '/usr/lib32'
        '/usr/libx32'
        '/usr/local/cuda'
        '/usr/local/cuda-10.1/targets/x86_64-linux/lib'
Asking for detailed CUDA configuration...

Please specify the CUDA SDK version you want to use. [Leave empty to default to CUDA 10]: 11.1
第七步,输入cudnn版本,使用的cudnn版本为8.0.5,可以直接输入8,回车:
Please specify the cuDNN version you want to use. [Leave empty to default to cuDNN 7]: 8
第八步,输入tensorrt版本,使用的tensorrt版本为7.2.1,可以直接输入7,回车:
Please specify the TensorRT version you want to use. [Leave empty to default to TensorRT 6]: 7
第九步,输入nccl版本,由于没有配置nccl,所以直接回车,使用默认的即可:
Please specify the locally installed NCCL version you want to use. [Leave empty to use http://github.com/nvidia/nccl]:
第十步,关键的一步,需要输入cuda、cudnn、tensorrt的安装路径,如果按照上述教程安装的cuda、tensorrt等,则可以直接输入下述内容,否则需要将下述的cuda、tensorrt路径改为实际安装路径:
/usr/local/tensorrt$ /lib,/lib/x86_64-linux-gnu,/usr,/usr/lib/x86_64-linux-gnu/libfakeroot,/usr/local/cuda,/usr/local/cuda/targets/x86_64-linux/lib,/usr/local/tensorrt
输入上述内容,回车:
Please specify the comma-separated list of base paths to look for CUDA libraries and headers. [Leave empty to use the default]: /usr/local/tensorrt$ /lib,/lib/x86_64-linux-gnu,/usr,/usr/lib/x86_64-linux-gnu/libfakeroot,/usr/local/cuda,/usr/local/cuda/targets/x86_64-linux/lib,/usr/local/tensorrt


Found CUDA 11.1 in:
    /usr/local/cuda-11.1/targets/x86_64-linux/lib
    /usr/local/cuda-11.1/targets/x86_64-linux/include
Found cuDNN 8 in:
    /usr/local/cuda-11.1/targets/x86_64-linux/lib
    /usr/local/cuda-11.1/targets/x86_64-linux/include
Found TensorRT 7 in:
    /usr/local/TensorRT-7.2.1.6/targets/x86_64-linux-gnu/lib
    /usr/local/TensorRT-7.2.1.6/include
第十一步,选择算力等级,算力等级和显卡相关,显卡性能越好,则算力等级越高,可通过该网址查看显卡算力等级:算力等级。
博主使用的显卡为RTX 3080,通过查询,算力等级为8.6,所以输入8.6,回车:
Please specify a list of comma-separated CUDA compute capabilities you want to build with.
You can find the compute capability of your device at: https://developer.nvidia.com/cuda-gpus. Each capability can be specified as "x.y" or "compute_xy" to include both virtual and binary GPU code, or as "sm_xy" to only include the binary code.
Please note that each additional compute capability significantly increases your build time and binary size, and that TensorFlow only supports compute capabilities >= 3.5 [Default is: 3.5,7.0]: 8.6
第十二步,是否使用clang作为cuda编译器,输入N,回车:
Do you want to use clang as CUDA compiler? [y/N]: N
nvcc will be used as CUDA compiler.
第十三步,指定nvcc应该使用哪个gcc作为主机编译器,默认即可,回车:
Please specify which gcc should be used by nvcc as the host compiler. [Default is /usr/bin/gcc]:
第十四步,当bazel选项——config=opt被指定时,请指定编译期间使用的优化标志,对于编译优化标记,默认值 (-march=native) 会优化针对计算机的 CPU 类型生成的代码。但是,如果要针对不同类型的 CPU 构建 TensorFlow,请考虑指定一个更加具体的优化标记。请参阅 GCC 手册查看示例。
默认即可,回车:
Please specify optimization flags to use during compilation when bazel option "--config=opt" is specified [Default is -march=native -Wno-sign-compare]:
第十五步,安卓构建相关,输入N,回车:
Would you like to interactively configure ./WORKSPACE for Android builds? [y/N]: N
Not configuring the WORKSPACE for Android builds
到此配置完成,然后会弹出下述编译帮助选项:
Preconfigured Bazel build configs. You can use any of the below by adding "--config=<>" to your build command. See .bazelrc for more details.
	--config=mkl         	# Build with MKL support.
	--config=mkl_aarch64 	# Build with oneDNN support for Aarch64.
	--config=monolithic  	# Config for mostly static monolithic build.
	--config=numa        	# Build with NUMA support.
	--config=dynamic_kernels	# (Experimental) Build kernels into separate shared objects.
	--config=v2          	# Build TensorFlow 2.x instead of 1.x.
Preconfigured Bazel build configs to DISABLE default on features:
	--config=noaws       	# Disable AWS S3 filesystem support.
	--config=nogcp       	# Disable GCP support.
	--config=nohdfs      	# Disable HDFS support.
	--config=nonccl      	# Disable NVIDIA NCCL support.
Configuration finished
3.3、开始编译
您可以将一些预先配置好的构建配置添加到 bazel build 命令中,例如:
--config=mkl:支持 Intel® MKL-DNN。--config=monolithic:此配置适用于基本保持静态的单体 build。--config=v1:用于构建 TensorFlow 1.x,而不是 2.x。
【注意】:从 TensorFlow 1.6 开始,二进制文件使用 AVX 指令,这些指令可能无法在旧版 CPU 上运行。
GitHub加速配置
如果在github上克隆项目速度较快,可以直接跳过这一步,但是在国内一般都快不起来。
github加速方式有很多种,大家可以参考这篇文章:github加速。
本文是利用 Cloudflare Workers进行文件加速,具体方法就是在github链接之前添加一个加速网址,如:
# 在下载链接之前添加 https://g.ioiox.com/,博主实测该链接有效,但是不保证长期有效,大家也可以更换为实测可用的加速网址
git clone https://g.ioiox.com/https://github.com/stilleshan/ServerStatus.git
wget https://g.ioiox.com/https://github.com/stilleshan/ServerStatus/archive/master.zip
wget https://g.ioiox.com/https://raw.githubusercontent.com/stilleshan/ServerStatus/master/Dockerfile
由于编译tensorflow,需要从github上下载部分文件,所以需要修改tensorflow工程中的部分链接地址,达到加速的目的:
第一步,修改tensorflow目录下的WORKSPACE文件,博主使用的是nano编辑器,大家可自行选择,但是需要掌握使用编辑器搜索关键词:
sudo nano WORKSPACE
nano下使用Ctrl+W搜索
https://github.com/
找到https://github.com/bazelbuild/rules_closure/archive/...,在链接前添加:
https://g.ioiox.com/
然后保存。
第二步,修改tensorflow目录下的tensorflow/workspace.bzl文件:
sudo nano tensorflow/workspace.bzl
同样搜索所有https://github.com/,在链接前添加:
https://g.ioiox.com/
然后保存,有大概50处需要修改。
编译过程中,如果下载某个文件卡住,可以搜索整个项目,找到对应链接,然后使用上述方法修改,除了搜索整个项目外,还可以搜索用户根目录下的.cache/bazel文件夹,这是一个隐藏文件夹。可以使用ls -a查看,然后修改相关链接,实现加速。
除了在链接之前添加加速链接,也可以将
https://github.com/
改为:
https://hub.fastgit.org/
构建pip软件包
使用下述指令构建:
bazel build --config=opt --config=cuda //tensorflow/tools/pip_package:build_pip_package
输入上述指令后,首先会下载相关依赖项,然后开始编译,下载依赖项和网速相关,编译速度和主机性能相关。
编译时间大概为2个小时及以上,耐心等待或者干些其他事情:

下述是构建指令相关示例:
- TensorFlow 2.x
tensorflow:master 代码库已经默认更新为 build 2.x。
bazel build //tensorflow/tools/pip_package:build_pip_package
【注意】:为了支持 GPU,请在 ./configure 阶段使用 cuda=Y 启用 CUDA。
- TensorFlow 1.x
如需从 master 分支构建 TensorFlow 1.x,请使用 bazel build --config=v1 创建 TensorFlow 1.x 软件包。
bazel build --config=v1 //tensorflow/tools/pip_package:build_pip_package
- 仅支持 CPU
使用 bazel 构建仅支持 CPU 的 TensorFlow 软件包构建器:
bazel build --config=opt //tensorflow/tools/pip_package:build_pip_package
- GPU 支持
要构建支持 GPU 的 TensorFlow 软件包编译器,请运行以下命令:
bazel build --config=opt --config=cuda //tensorflow/tools/pip_package:build_pip_package
Bazel 构建选项:
请参阅 Bazel 命令行参考文档,详细了解构建选选项。
从源代码构建 TensorFlow 会消耗大量 RAM。如果您的系统受内存限制,请将 Bazel 的 RAM 使用量限制为:--local_ram_resources=2048。
官方 TensorFlow 软件包是使用符合 manylinux2010 软件包标准的 GCC 7.3 工具链构建的。
对于 GCC 5 及更高版本,可以使用 --cxxopt="-D_GLIBCXX_USE_CXX11_ABI=0" 进行构建,以与旧版 ABI 兼容。兼容 ABI 可确保针对官方 TensorFlow pip 软件包构建的自定义操作继续支持使用 GCC 5 构建的软件包。
构建软件包
bazel build 命令会创建一个名为 build_pip_package 的可执行文件,此文件是用于构建 pip 软件包的程序。如下所示地运行该可执行文件,以在 /tmp/tensorflow_pkg 目录中构建 .whl 软件包。
如需从某个版本分支构建,请使用如下目录:
./bazel-bin/tensorflow/tools/pip_package/build_pip_package /tmp/tensorflow_pkg
如需从 master 分支构建,请使用 --nightly_flag 获取合适的依赖项:
./bazel-bin/tensorflow/tools/pip_package/build_pip_package --nightly_flag /tmp/tensorflow_pkg
尽管可以在同一个源代码树下构建 CUDA 和非 CUDA 配置,但建议在同一个源代码树中的这两种配置之间切换时运行 bazel clean。
安装软件包
生成的 .whl 文件的文件名取决于 TensorFlow 版本和您的平台。例如,使用 pip3 install 安装软件包:
pip3 install /tmp/tensorflow_pkg/tensorflow--.whl
4、测试TensorFlow-GPU
查看可用GPU
安装完成后,可以使用下述代码查看当前可用的GPU:
from tensorflow.python.client import device_lib

def get_available_gpus():
  local_device_protos = device_lib.list_local_devices()
  return [x.name for x in local_device_protos if x.device_type == 'GPU']

print(get_available_gpus())
出现下述类似结果,说明成功编译并安装,可以正常使用tensorflow-gpu版本:
2020-11-16 19:15:24.036370: I tensorflow/stream_executor/platform/default/dso_loader.cc:49] Successfully opened dynamic library libcudart.so.11.0
2020-11-16 19:15:25.867856: I tensorflow/compiler/jit/xla_gpu_device.cc:99] Not creating XLA devices, tf_xla_enable_xla_devices not set
2020-11-16 19:15:25.868498: I tensorflow/stream_executor/platform/default/dso_loader.cc:49] Successfully opened dynamic library libcuda.so.1
2020-11-16 19:15:27.721411: I tensorflow/core/common_runtime/gpu/gpu_device.cc:1724] Found device 0 with properties:
pciBusID: 0000:17:00.0 name: GeForce RTX 3080 computeCapability: 8.6
coreClock: 1.71GHz coreCount: 68 deviceMemorySize: 9.78GiB deviceMemoryBandwidth: 707.88GiB/s
2020-11-16 19:15:27.721909: I tensorflow/core/common_runtime/gpu/gpu_device.cc:1724] Found device 1 with properties:
pciBusID: 0000:65:00.0 name: GeForce RTX 3080 computeCapability: 8.6
coreClock: 1.71GHz coreCount: 68 deviceMemorySize: 9.78GiB deviceMemoryBandwidth: 707.88GiB/s
# ...省略
2020-11-16 19:15:28.330945: I tensorflow/core/common_runtime/gpu/gpu_device.cc:1271]      0 1
2020-11-16 19:15:28.330950: I tensorflow/core/common_runtime/gpu/gpu_device.cc:1284] 0:   N N
2020-11-16 19:15:28.330953: I tensorflow/core/common_runtime/gpu/gpu_device.cc:1284] 1:   N N
2020-11-16 19:15:28.332812: I tensorflow/core/common_runtime/gpu/gpu_device.cc:1410] Created TensorFlow device (/device:GPU:0 with 9071 MB memory) -> physical GPU (device: 0, name: GeForce RTX 3080, pci bus id: 0000:17:00.0, compute capability: 8.6)
2020-11-16 19:15:28.334046: I tensorflow/core/common_runtime/gpu/gpu_device.cc:1410] Created TensorFlow device (/device:GPU:1 with 9068 MB memory) -> physical GPU (device: 1, name: GeForce RTX 3080, pci bus id: 0000:65:00.0, compute capability: 8.6)
['/device:GPU:0', '/device:GPU:1']
使用GPU加速
如果已经安装配置好GPU版本的tensorflow,那么运行模型的时候会自动选择可用的GPU,os.environ["CUDA_VISIBLE_DEVICES"]来选择我们要使用的GPU:
import tensorflow as tf
import os
import keras as layers
# 选择编号为0的GPU
os.environ["CUDA_VISIBLE_DEVICES"] = "0"
# 创建模型
model = tf.keras.Sequential()
model.add(layers.Dense(16, activation='relu', input_shape=(10,)))
model.add(layers.Dense(1, activation='sigmoid'))
# 设置目标函数和学习率
optimizer = tf.keras.optimizers.SGD(0.2)
# 编译模型
model.compile(loss='binary_crossentropy', optimizer=optimizer)
# 输出模型概况
model.summary()
上述代码中,使用了编号为“0”的GPU,执行完上述代码后,可以使用nvidia-smi来查看GPU的占用情况:

如果我们希望使用多块GPU,例如同时使用“0”、“1”两块GPU,可以设置“os.environ[“CUDA_VISIBLE_DEVICES”] = “0,1””,除此之外我们还可以使用TensorFlow为“tf.keras”提供的分布式训练策略tf.distribute.MirroredStrategy来实现单机环境下的多GPU训练:
import tensorflow as tf
from tensorflow.keras import layers

strategy = tf.distribute.MirroredStrategy()

# 优化器以及模型的构建和编译必须嵌套在“scope()”中
with strategy.scope():
 model = tf.keras.Sequential()
 model.add(layers.Dense(16, activation='relu', input_shape=(10,)))
 model.add(layers.Dense(1, activation='sigmoid'))

 optimizer = tf.keras.optimizers.SGD(0.2)
 model.compile(loss='binary_crossentropy', optimizer=optimizer)

model.summary()
运行MNIST样例
import os
# os.environ["CUDA_VISIBLE_DEVICES"] = "-1"

import tensorflow as tf

mnist = tf.keras.datasets.mnist

(x_train, y_train), (x_test, y_test) = mnist.load_data()
x_train, x_test = x_train / 255.0, x_test / 255.0

model = tf.keras.models.Sequential([
  tf.keras.layers.Flatten(input_shape=(28, 28)),
  tf.keras.layers.Dense(128, activation='relu'),
  tf.keras.layers.Dropout(0.2),
  tf.keras.layers.Dense(10, activation='softmax')
])

model.compile(optimizer='adam',
              loss='sparse_categorical_crossentropy',
              metrics=['accuracy'])
model.fit(x_train, y_train, epochs=5)
model.evaluate(x_test,  y_test, verbose=2)
参考链接:
How To Compile TensorFlow 2.3 with CUDA 11.1
win10+tensorflow2.3GPU+cuda11+cudnn8+python3.8编译(AVX2)
tensorflow github
Installing Bazel on Ubuntu
算力等级
linux安装GPU显卡驱动、CUDA和cuDNN库
一文上手最新Tensorflow2.0系列(五)|使用GPU加速
Ubuntu18.04重装Nvidia驱动,cuda和cudnn,多用户使用anaconda
TensorRT 教程(一):安装TensorRT
ubuntu18.04卸载和重装驱动
Linux ln 命令
RTX3080 install RuntimeError: CUDA runtime implicit initialization on GPU:0 failed. Status: device kernel image is invalid
从源代码构建 TensorFlow pip 软件包
从源代码编译TensorFlow
多种GitHub加速方式
GitHub 文件加速