Stanford UE4 & UE5 C++ 开发 课程笔记(四)可交互物体与交互特效
Stanford UE4 & UE5 C++ 开发 课程笔记(四) 可交互物体与交互特效
- 交互功能
-
- 1. 定义统一的交互接口
- 2. 实现可交互的宝箱类
-
- 交互动作实现
- 宝箱模型
- 交互动作实现
- 3. 在角色中添加交互功能
-
- 实现交互组件
- 在角色类中调用交互动作
- 4. 最终效果
课程素材下载地址
交互功能
为了提高代码复用性,首先使用Unreal中提供的接口定义一组统一的操作,再创建具体的交互物品类实现该接口。这样角色触发交互时无需关心被触发的是哪类物品,只需调用统一的接口方法,是一种多态性的实现。
1. 定义统一的交互接口
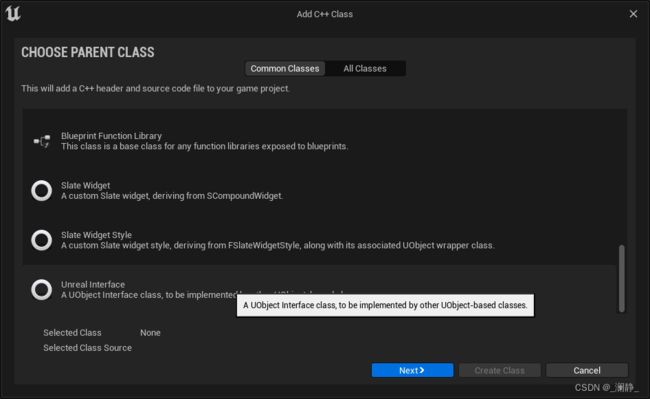
在编辑器中新建UInterface类LGameplayInterface:
创建的接口类会包含两个部分。根据Unreal官方文档的解释,上部由UINTERFACE宏修饰的部分不是实际的接口,它是一个空白类,它的存在只是为了向虚幻引擎反射系统确保其可见性:
// This class does not need to be modified.
UINTERFACE(MinimalAPI)
class ULGameplayInterface : public UInterface
{
	GENERATED_BODY()
};
在前缀为 I 的类中定义需要的接口方法,同时也会在继承中使用。向其中添加接口方法Interact,表示所有可交互物品的交互行为,参数是触发交互行为的角色:
class ROGUELIKEACTION_API ILGameplayInterface
{
	GENERATED_BODY()

	// Add interface functions to this class. This is the class that will be inherited to implement this interface.
public:

	UFUNCTION(BlueprintNativeEvent)
	void Interact(APawn * InstigatorPawn);
};
BlueprintNativeEvent表示在蓝图和C++中都可以实现,但蓝图不可调用。如果希望蓝图也可调用,可以同时添加BlueprintCallable修饰符。
2. 实现可交互的宝箱类
交互动作实现
在编辑器中创建新Actor类LItemChest:
在头文件中实现上一步的ILGameplayInterface接口:
class ROGUELIKEACTION_API ALItemChest : public AActor, public ILGameplayInterface
{
GENERATED_BODY()

public:
	// Sets default values for this actor's properties
	ALItemChest();

public:
	// 实现接口中的方法
	void Interact_Implementation(APawn* InstigatorPawn) override;
添加如下属性:
protected:
	// 宝箱体
	UPROPERTY(VisibleAnywhere)
	UStaticMeshComponent * BaseMesh;
	// 宝箱盖
	UPROPERTY(VisibleAnywhere, BlueprintReadOnly)
	UStaticMeshComponent * LidMesh;

public:
	// 宝箱打开时,盖子旋转的角度
	UPROPERTY(EditAnywhere)
	float TargetPitch;
构造函数初始化:
ALItemChest::ALItemChest()
{
 	// Set this actor to call Tick() every frame.  You can turn this off to improve performance if you don't need it.
	PrimaryActorTick.bCanEverTick = true;

	BaseMesh = CreateDefaultSubobject<UStaticMeshComponent>("BaseMesh");
	RootComponent = BaseMesh;

	LidMesh = CreateDefaultSubobject<UStaticMeshComponent>("LidMesh");
	LidMesh->SetupAttachment(BaseMesh);

	TargetPitch = 110.0f;
}
宝箱模型
创建蓝图类:
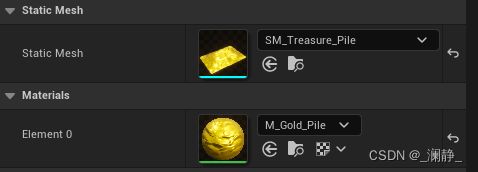
BaseMesh设置:
LidMesh设置:
为了更加符合宝箱特性,可以添加一些打开后金币四溅的特效,在蓝图类中额外添加如下组件:
GoldMesh设置:
ParticleSystem设置:
交互动作实现
在Event Graph中,实现接口的Interact方法,通过动画平滑地打开/关闭宝箱:
动画的具体设置,从0时刻开始,0.5s内让宝箱盖旋转110度:
3. 在角色中添加交互功能
为了实现功能的解耦,没有直接在角色类中添加交互操作。首先创建一个ActorComponent专门负责交互功能,再将其组装到角色类中。
实现交互组件
新建 ActorComponent C++类,在其中添加 PrimaryInteract 方法实现具体交互功能:
public:
	// Called every frame
	virtual void TickComponent(float DeltaTime, ELevelTick TickType, FActorComponentTickFunction* ThisTickFunction) override;

	void PrimaryInteract();
void ULInteractionComponent::PrimaryInteract()
{
	FCollisionObjectQueryParams ObjectQueryParams;
	// 指定目标为WorldDynamic
	ObjectQueryParams.AddObjectTypesToQuery(ECC_WorldDynamic);

	// 获取当前组件的拥有对象(操控的角色)
	AActor* Owner = GetOwner();
	// 获得角色(相机)视角的位置和角度
	FVector Start;
	FRotator EyeRotation;
	Owner->GetActorEyesViewPoint(Start, EyeRotation);
	// 从当前视角推导出终点
	FVector End = Start + (EyeRotation.Vector() * 1000);

	FHitResult Hit;
	// 追踪特定类型
	bool bBlockSomething = GetWorld()->LineTraceSingleByObjectType(Hit, Start, End, ObjectQueryParams);

	// 处理结果
	AActor* HitActor = Hit.GetActor();
	// 结果不能为空
	if (HitActor)
	{
		// 确认击中的目标是实现了交互接口的类(可交互的物体)
		if (HitActor->Implements<ULGameplayInterface>())
		{
			// 将触发的Actor转换为Pawn,因为交互函数仅接收Pawn及其子类
			APawn * TriggerPawn = Cast<APawn>(Owner);
			// 第一个参数是被触发的交互物品,第二个参数是主动触发的角色
			ILGameplayInterface::Execute_Interact(HitActor, TriggerPawn);
		}
	}
}
在角色类中调用交互动作
在Character中添加新组件:
protected:
	// 负责处理与其他物品交互的组件
	UPROPERTY(VisibleAnywhere)
	ULInteractionComponent * InteractionComponent;

	void PrimaryInteract();
绑定并实现交互:
void ALCharacter::SetupPlayerInputComponent(UInputComponent* PlayerInputComponent)
{
	// 上下左右移动
	PlayerInputComponent->BindAxis("MoveForward", this, &ALCharacter::MoveForward);
	PlayerInputComponent->BindAxis("MoveRight", this, &ALCharacter::MoveRight);

	// 视角旋转
	PlayerInputComponent->BindAxis("Turn", this, &APawn::AddControllerYawInput); // Yaw绕Z轴转动
	PlayerInputComponent->BindAxis("Lookup", this, &APawn::AddControllerPitchInput); // Pitch绕Y轴转动

    // 射击
    PlayerInputComponent->BindAction("PrimaryAttack", IE_Pressed, this, &ALCharacter::PrimaryAttack);

	// 物品交互
	PlayerInputComponent->BindAction("PrimaryInteract", IE_Pressed, this, &ALCharacter::PrimaryInteract);
}

void ALCharacter::PrimaryInteract()
{
	InteractionComponent->PrimaryInteract();
}


