优遨机器人UR5与RealSense深度摄像头D435的手眼标定
优遨机器人UR5与RealSense深度摄像头D435的手眼标定
- 系统环境:虚拟机VMware® Workstation 12 Pro,操作系统Ubuntu 16.04.7LTS,ROS版本Kinetic
- 机器人型号UR5,软件版本PolyScope3.5,相机为RealSense D435
1.软件环境搭建
终端执行下面命令:
$ cd
$ mkdir -p ur_ws/src
$ cd ur_ws
$ catkin_make
然后从github仓库中clone下列软件包
$ cd src
$ git clone -b kinetic-devel https://github.com/pal-robotics/aruco_ros.git
$ git clone -b kinetic-devel https://github.com/lagadic/vision_visp.git
$ git clone https://github.com/IFL-CAMP/easy_handeye.git
$ git clone https://github.com/IntelRealSense/realsense-ros.git
$ git clone https://github.com/ros-industrial/universal_robot.git
$ git clone -b kinetic-devel https://github.com/ros-industrial/ur_modern_driver.git
安装依赖
$ rosdep install --from-paths . --rosdistro kinetic --ignore-src
最后执行编译工作
$ cd ..
$ catkin_make
2.启动文件编辑
下面进行launch文件的编辑工作,其中的marker我们选用ArUco marker # 100的二维码标记
在easy_handeye/easy_handeye/launch目录下新建一launch文件ur5_rs_d435_hand2eye_calibration.launch,内容如下:
3.手眼标定过程
终端中启动标定所需各节点,即步骤2所编辑的launch文件
$ roslaunch easy_handeye ur5_rs_d435_hand2eye_calibration.launch
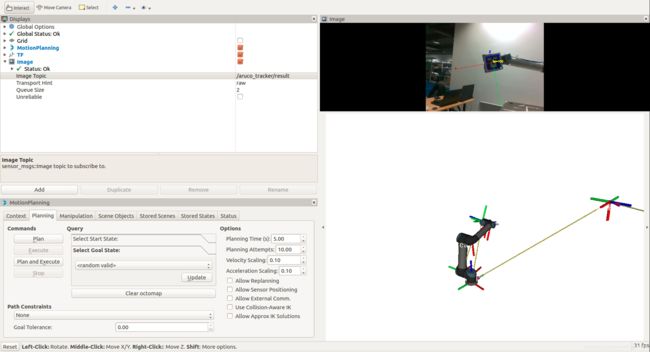
然后按照下图在Rviz窗口中添加一Image并订阅话题/aruco_tracker/result,同时将运动规划的速度和加速度比例都改为0.1(仅在MotionPlanning GUI中有效)
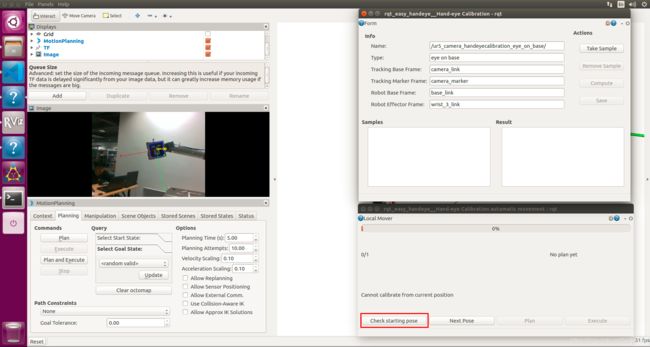
开始时先须找到home构型,点击Check starting pose
如果出现错误提示:Can't calibrate from this position!
可以修改目录easy_handeye/easy_handeye/src/easy_handeye中的python脚本handeye_robot.py
将函数_check_target_poses(self, joint_limits)定义中的下面两行注释掉即可
# if len(plan.joint_trajectory.points) == 0 or CalibrationMovements._is_crazy_plan(plan, joint_limits):
# return False
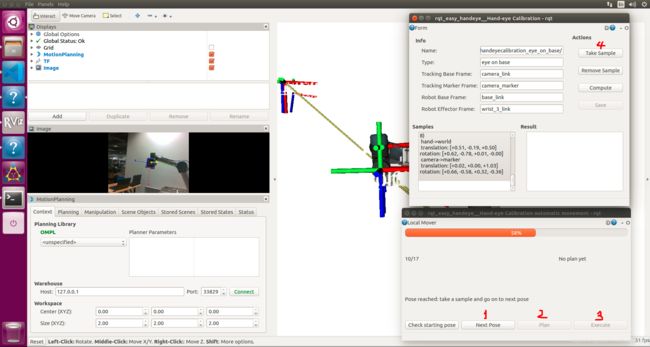
如果能找到初始构型,点击Next Pose ,然后再点击Plan,规划成功会出现绿色的矩形框提示,然后点击Execute,机器人将运动至目标构型
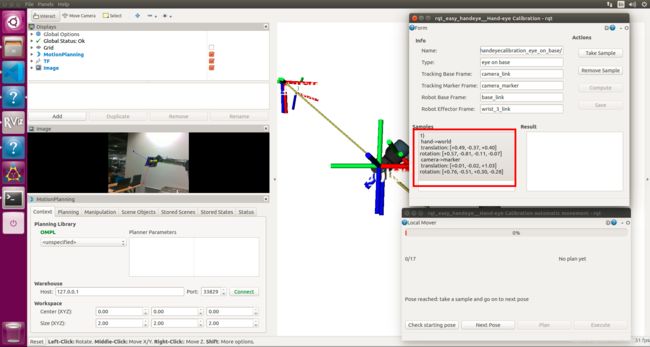
然后再点击take sample,得到下面的结果:
这样就采样成功一次,接下来按照顺序循环执行点击Next Pose——Plan——Execute——Take Sample,直到17个采样成功结束,
若过程中出现红色的矩形提示框,为Bad Plan,即可以直接跳过当前循环执行下一次采样。
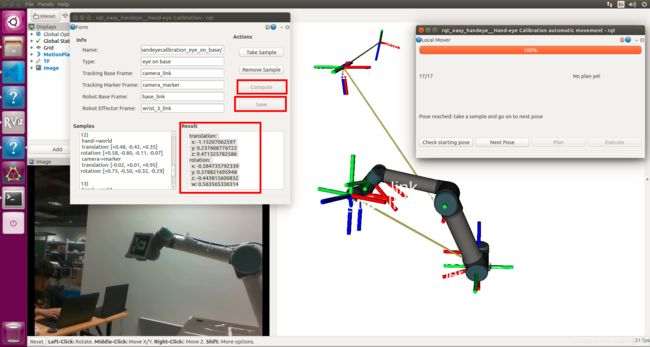
完成所有的采样后,点击Compute,会得到标定结果,然后点击Save,结果将保存到$HOME/.ros/easy_handeye目录下的yaml文件中:
这样就可以得到相机坐标系和机器人坐标系之间的位姿关系了。
