zabbix监控nginx、监控mysql数据库、监控java应用、Zabbix + proxy分布式
目录
-
- 一、zabbix监控nginx
- 1.搭建nginx环境
- 2.修改字体
- 3.布置前端
- 4.浏览器访问http://172.25.28.1/zabbix
- (1)创建server2监控项
- (2)创建图形
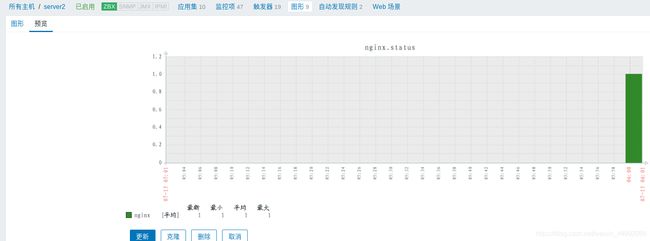
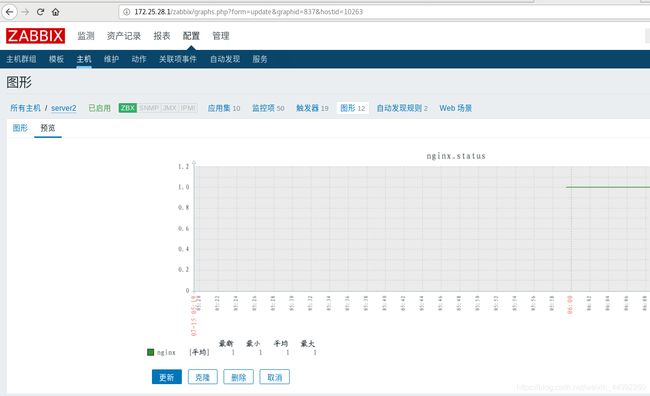
- (3)监控图像查看
- 5.添加多条监控
- (1)配置多条
- (2)server1查看
- (3)监控项添加
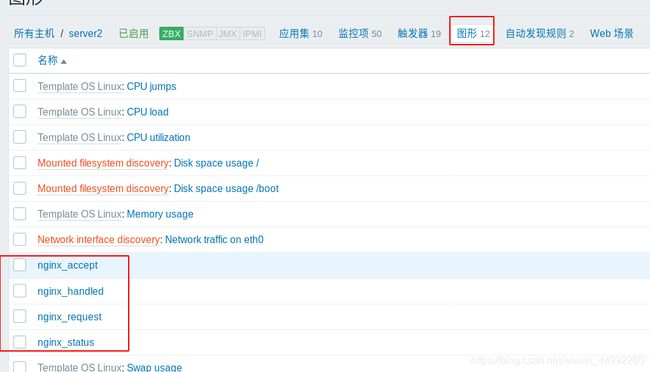
- (4)图形添加
- (5)更新查看
- 二、zabbix监控mysql数据库
- 手动结合mysql与zabbix
-
- 1.server1配置
- 2.web图形添加
- 添加percona-mysql模块
-
- 1.安装percona-mysql模块的rpm包
- 2.安装php与mysql连接模块
- 3.修改连接文件
- 4.测试
- 5.测试完成后删除.txt
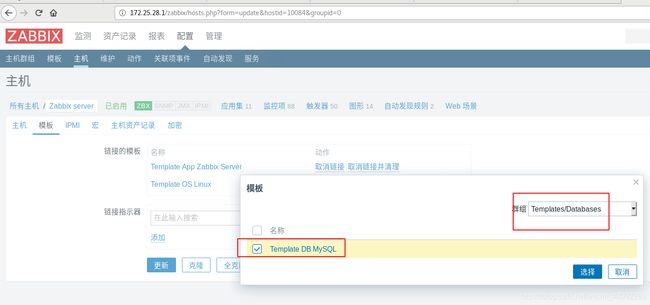
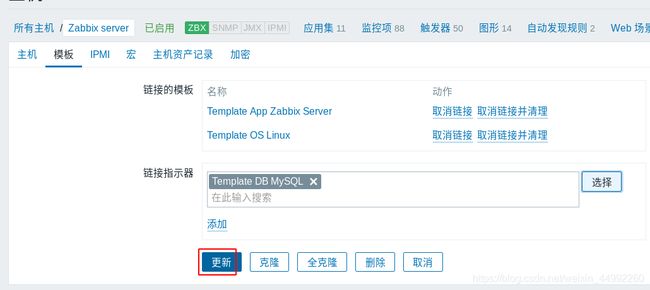
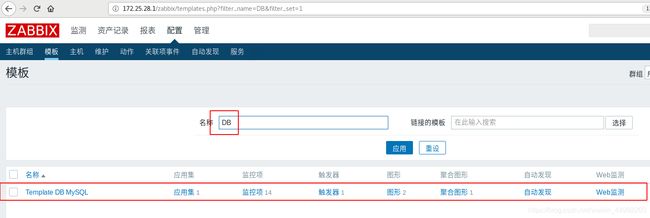
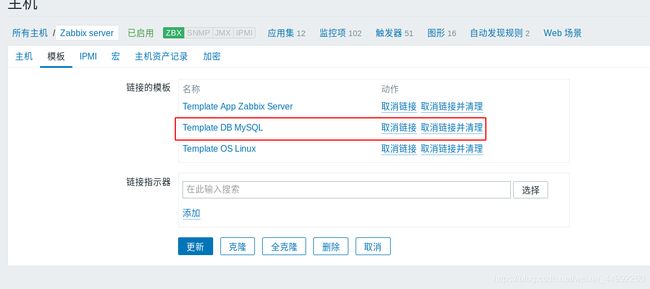
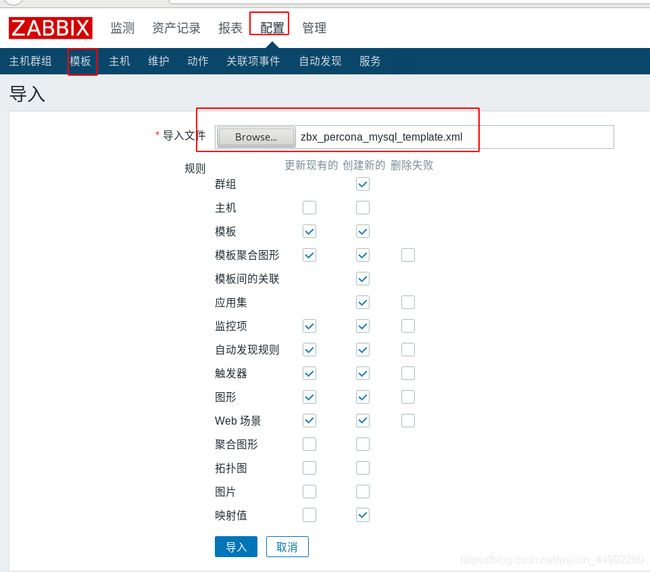
- 6.web添加模板
- 三、zabbix监控java应用
-
- 1.安装zabbix与java模块插件,查看配置文件并重启服务
- 2.编辑zabbix_server.conf文件, 重启zabbix-server服务
- 3.server3:安装java服务,安装tomcat
- 4.server3:启动并查看端口8888
- 5.图形配置
- 四、Zabbix + proxy分布式
-
- 1.server4安装proxy并使用Mysql数据库
- 2.server4修改zabbix_proxy配置文件
- 3.server1创建mysql数据库zabbix_proxy并将库的所有权利给zabbix用户,授权后刷新
- 4.server4将生成的数据库信息传给数据库位置server1中
- 5.server1将schema.sql.gz 文件解压后导入 zabbix_proxy 库中
- 6.修改server4的主机名称,server1,2,4都进行解析
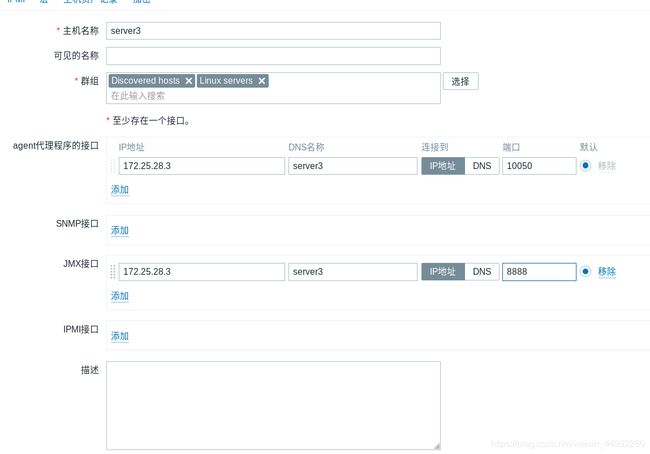
- 7.将server3的服务指向proxy(4),通过proxy连接server(1)
- 8.测试web创建agent代理程序
- 9.监控状态查看
- 10.server1,2,4查看日志
一、zabbix监控nginx
1.搭建nginx环境
[root@server2 ~]# ls
nginx-1.20.1.tar.gz  simkai.ttf
[root@server2 ~]# tar -zxf nginx-1.20.1.tar.gz #解压
[root@server2 ~]# ls
nginx-1.20.1  nginx-1.20.1.tar.gz  simkai.ttf
[root@server2 nginx-1.20.1]# yum install -y gcc pcre-devel openssl-devel
#安装ngix依赖包
[root@server2 nginx-1.20.1]# ./configure --with-http_stub_status_module --with-http_ssl_module
#两个模块:hhtp模块,监控nginx模块,--prefix=/usr/local/ngix 安装目录
[root@server2 nginx-1.20.1]# make && make install #安装
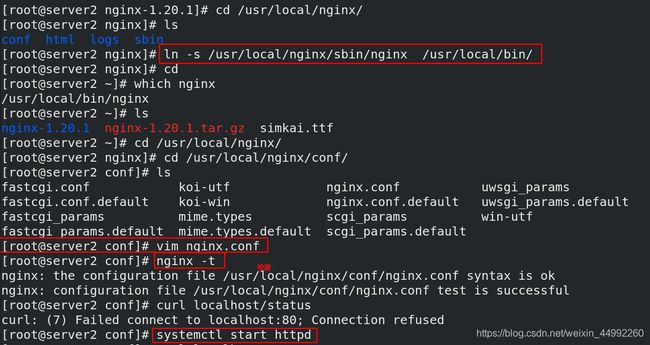
[root@server2 nginx-1.20.1]# cd /usr/local/nginx/
[root@server2 nginx]# ls
conf  html  logs  sbin
[root@server2 nginx]# cd sbin
[root@server2 sbin]# pwd
/usr/local/nginx/sbin
[root@server2 sbin]# ln -s /usr/local/nginx/sbin/nginx  /usr/local/bin/
#作软链接访问方便
[root@server2 sbin]# vim /usr/local/nginx/conf/nginx.conf
#编辑配置文件
[root@server2 conf]# vim nginx.conf #添加location段使用监控
        location /status {
                stub_status on; #激活监控模块
                access_log off; #不要日志
                allow 127.0.0.1; #允许本机
                deny all; #其他拒绝
        }
[root@server2 conf]#nginx -t ##检测语法
[root@server2 conf]# nginx  ##开启
[root@server2 conf]# curl localhost/status #测试
[root@server2 conf]# curl 127.0.0.1/status #测试
2.修改字体
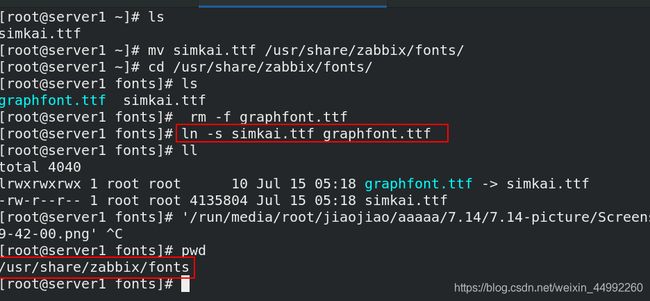
[root@server1 ~]# ls
simkai.ttf
[root@server1 ~]# mv simkai.ttf /usr/share/zabbix/fonts/
[root@server1 ~]# cd /usr/share/zabbix/fonts/
[root@server1 fonts]# ls
graphfont.ttf  simkai.ttf
[root@server1 fonts]# rm -f graphfont.ttf
[root@server1 fonts]# ln -s simkai.ttf graphfont.ttf
[root@server1 fonts]# ll
total 4040
lrwxrwxrwx 1 root root      10 Jul 13 22:10 graphfont.ttf -> simkai.ttf
-rw-r--r-- 1 root root 4135804 Jul  9 22:45 simkai.ttf
[root@server1 fonts]#
3.布置前端
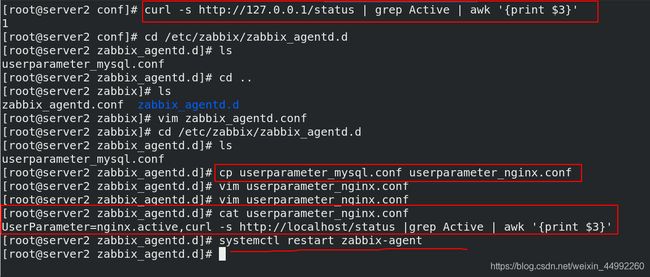
[root@server2 ~]# curl -s http://127.0.0.1/status | grep Active | awk '{print $3}' #查看连接数量
[root@server2 ~]# cd /etc/zabbix/zabbix_agentd.d
[root@server2 zabbix_agentd.d]# ls
userparameter_mysql.conf
[root@server2 zabbix_agentd.d]# cp userparameter_mysql.conf userparameter_nginx.conf
[root@server2 zabbix_agentd.d]# vim userparameter_nginx.conf 	#配置监控命令
UserParameter=nginx.active,curl -s http://localhost/status |grep Active | awk '{print $3}'
#
[root@server2 zabbix_agentd.d]# systemctl restart zabbix-agent
##server端
[root@server1 ~]# yum install -y zabbix-get #安装获取的包
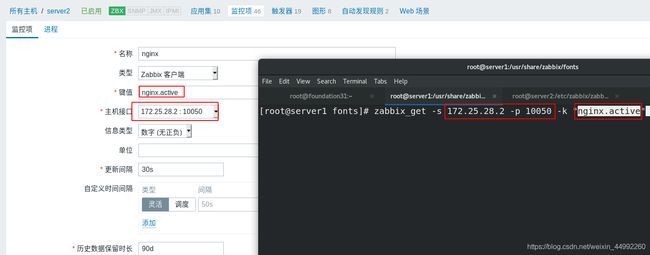
[root@server1 fonts]# zabbix_get -s 172.25.28.2 -p 10050 -k "nginx.active"
1
4.浏览器访问http://172.25.28.1/zabbix
(1)创建server2监控项
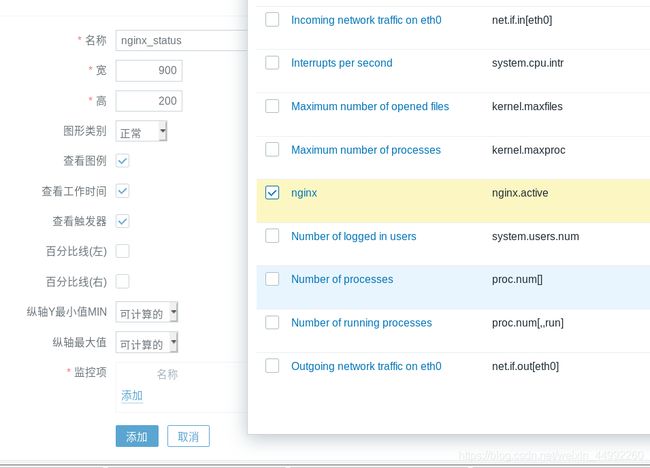
(2)创建图形
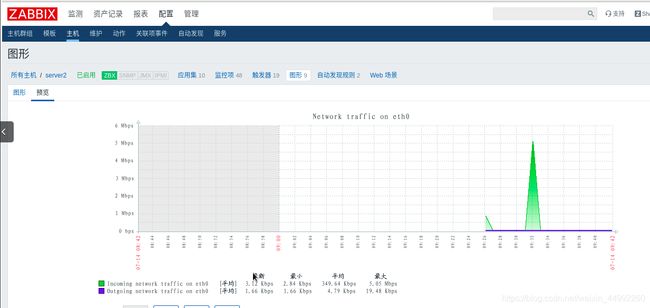
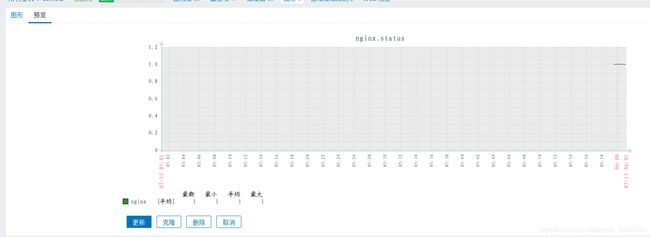
(3)监控图像查看
5.添加多条监控
(1)配置多条
root@server2 zabbix_agentd.d]# vim userparameter_nginx.conf
[root@server2 zabbix_agentd.d]# cat userparameter_nginx.conf
UserParameter=nginx.active,curl -s http://localhost/status |grep Active | awk '{print $3}'
UserParameter=nginx.accept,curl -s http://localhost/status | awk 'NR==3{print $1}'
UserParameter=nginx.handled,curl -s http://localhost/status | awk 'NR==3{print $2}'
UserParameter=nginx.request,curl -s http://localhost/status | awk 'NR==3{print $3}'
[root@server2 zabbix_agentd.d]# systemctl restart zabbix-agent.service
(2)server1查看
root@server1 ~]# zabbix_get -s 172.25.28.2 -p 10050 -k "nginx.active"
1
[root@server1 ~]# zabbix_get -s 172.25.28.2 -p 10050 -k "nginx.accept"
1049
[root@server1 ~]# zabbix_get -s 172.25.28.2 -p 10050 -k "nginx.handled"
1050
[root@server1 ~]# zabbix_get -s 172.25.28.2 -p 10050 -k "nginx.request"
1047
(3)监控项添加
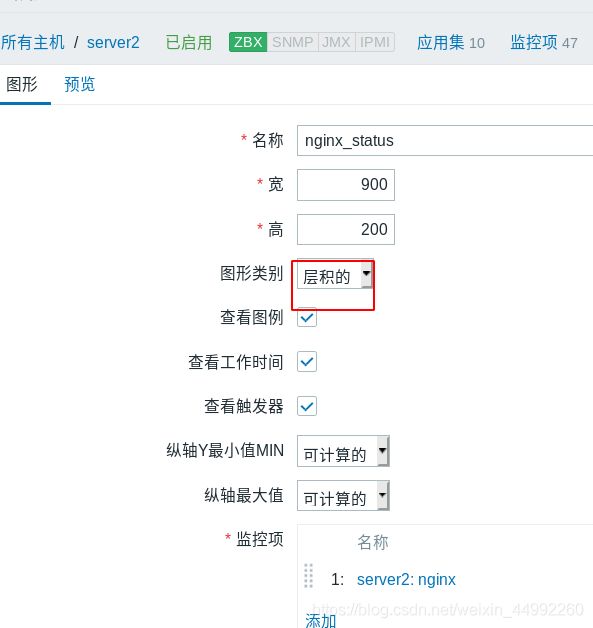
(4)图形添加
(5)更新查看
二、zabbix监控mysql数据库
手动结合mysql与zabbix
1.server1配置
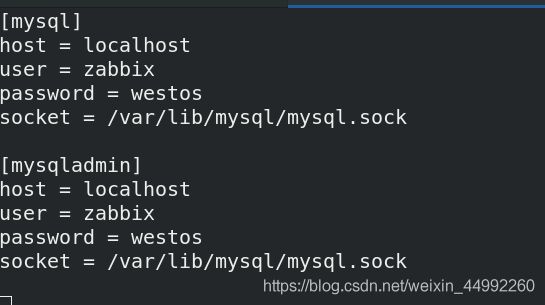
zabbix添加服务会读取/etc/zabbix/zabbix_agentd.d/的.conf文件,手动监控添加mysql即编写musql相关.conf文件。由于server1主机已存在mysql,所以server1既可以当主机,又可以当agent机。
[root@server1 zabbix_agentd.d]# cd /etc/zabbix/zabbix_agentd.d/
[root@server1 zabbix_agentd.d]# ls
userparameter_mysql.conf
[root@server1 zabbix_agentd.d]# vim userparameter_mysql.conf
[root@server1 zabbix_agentd.d]# mkdir /var/lib/zabbix
#创建目录存放zabbix脚本与模板
[root@server1 zabbix_agentd.d]# cd /var/lib/zabbix/
[root@server1 zabbix]# vim .my.cnf #编写文件引导
[mysql]
host = localhost
user = zabbix
password = westos
socket = /var/lib/mysql/mysql.sock

[mysqladmin]
host = localhost
2.web图形添加
添加percona-mysql模块
手动添加的监控项为14个,对于一个庞大的mysql数据库而言是有点少了,此处我们采用固定模板 percona-mysql建立更加全面的监控MySQL数据库。
1.安装percona-mysql模块的rpm包
[root@server1 ~]# rpm -ivh percona-zabbix-templates-1.1.8-1.noarch.rpm
 将/var/lib/zabbix/percona/templates/userparameter_percona_mysql.conf存放到/etc/zabbix/zabbix_agentd.d/目录中,才能被监控,重启azbix-agent才能生效

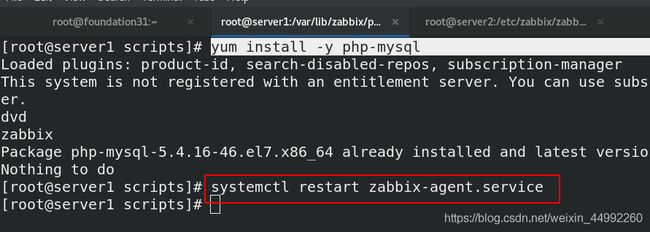
2.安装php与mysql连接模块
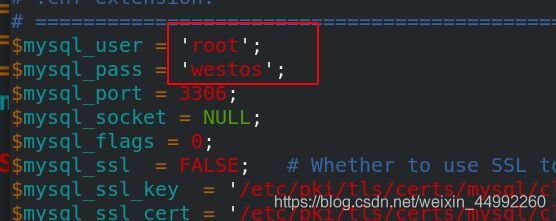
3.修改连接文件
编辑php脚本,修改连接mysql数据库的用户和密码为root,
![]()
重启agent服务
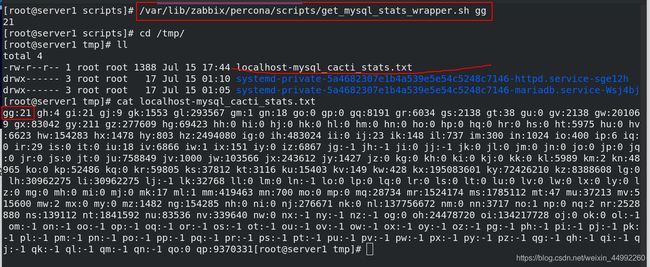
4.测试
[root@server1 scripts]# /var/lib/zabbix/percona/scripts/get_mysql_stats_wrapper.sh gg
#查看模块是否添加成功
21
[root@server1 scripts]# cd /tmp/
#测试后在/tmp/目录下生成.txt文件
[root@server1 tmp]# ll
total 4
-rw-r--r-- 1 root root 1388 Jul 15 17:44 localhost-mysql_cacti_stats.txt
drwx------ 3 root root   17 Jul 15 01:10 systemd-private-5a4682307e1b4a539e5e54c5248c7146-httpd.service-sge12h
drwx------ 3 root root   17 Jul 15 01:05 systemd-private-5a4682307e1b4a539e5e54c5248c7146-mariadb.service-Wsj4bj
[root@server1 tmp]# cat localhost-mysql_cacti_stats.txt
#查看生成文件内容
5.测试完成后删除.txt
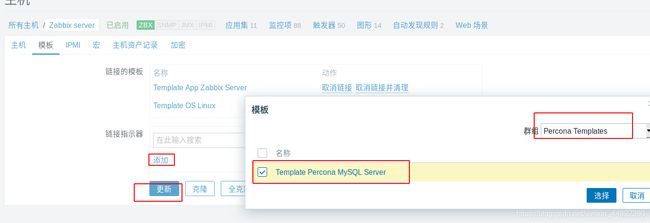
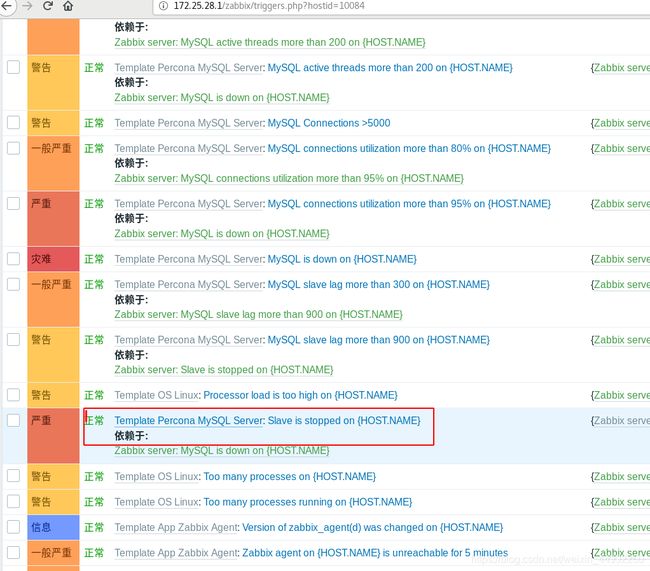
6.web添加模板
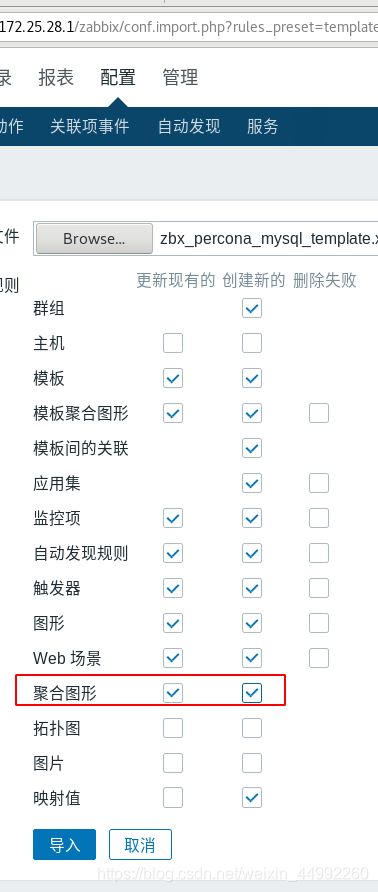
导入 zabbix_agent_template_percona_mysql_server_ht_2.0.9-sver1.1.8.xml 模板文件,此处的文件与所用zabbix 4.0版本不匹配,所以需要修改,此处用的模板文件是更新后的

三、zabbix监控java应用
1.安装zabbix与java模块插件,查看配置文件并重启服务
![]()
2.编辑zabbix_server.conf文件, 重启zabbix-server服务
3.server3:安装java服务,安装tomcat
[root@server3 ~]# tar zxf apache-tomcat-7.0.90.tar.gz -C /usr/local/
#解压
[root@server3 local]# ln -s apache-tomcat-7.0.90/ tomcat
#软链接
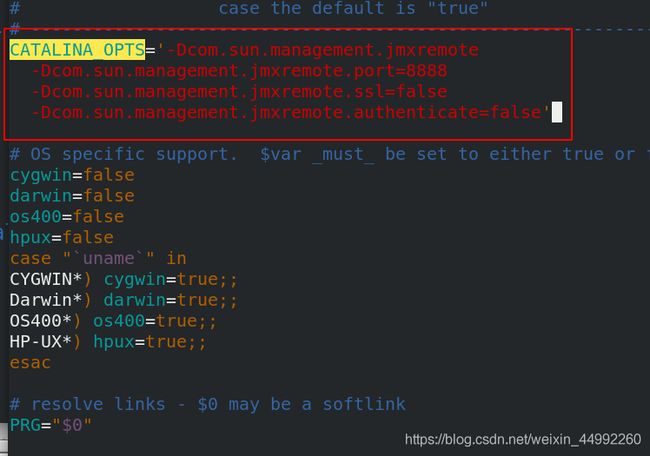
[root@server3 tomcat]# vim /usr/local/tomcat/bin/catalina.sh
#编辑tomcat脚本,设定监听端口为8888
[root@server3 tomcat]# yum install -y java
#使用默认jdk,安装java
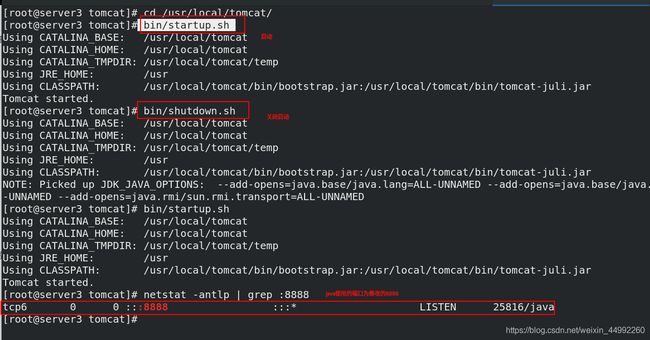
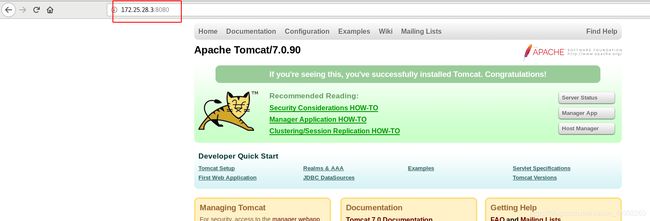
4.server3:启动并查看端口8888
5.图形配置
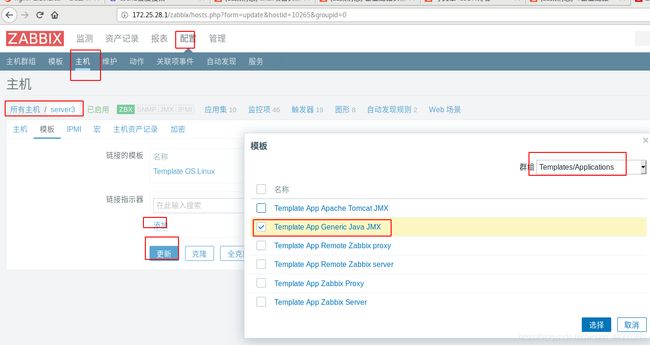
进入zabbix-web配置模板添加java通用模板

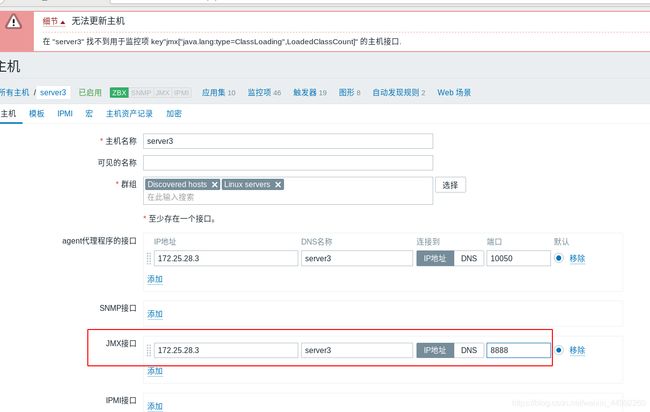
添加JMX接口
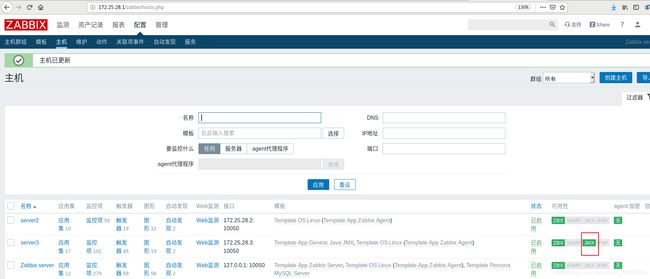
JMX启动成功状态
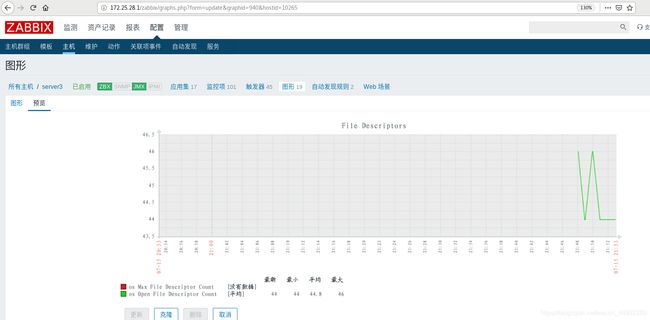
查看图形
四、Zabbix + proxy分布式
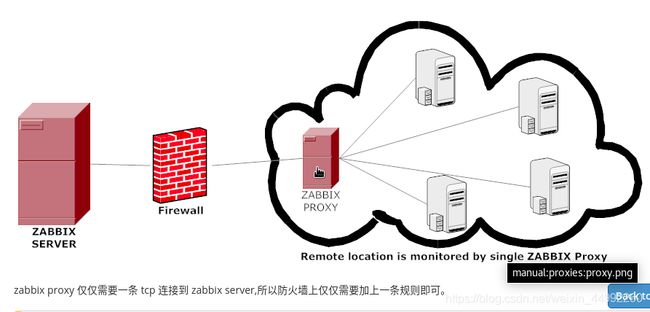 分布式部署示意:
server1 ( zabbix-server、mysql-server ) <---- server4( proxy ) <------ server3( agent )
原理:
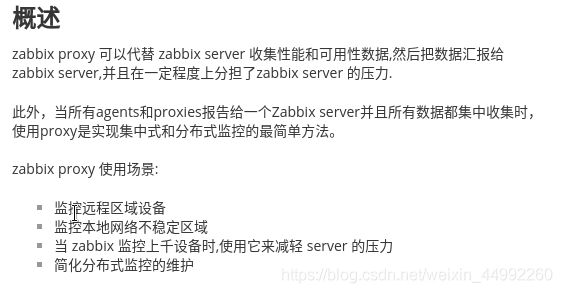
如果所有agent直接向server传递主机信息,一方面会增大server的负载,另一方面由于所有agent都需要穿过防火墙,降低安全性,因此设定代理server收集所有受监控主机信息,再传给server控制端,降低负载同时保证安全性。
server1作为server控制端
server4作为代理端,负责接受其他agent发来的信息,再传递给server控制端
server3作为agent,向代理端传递信息
1.server4安装proxy并使用Mysql数据库
[root@server4 yum.repos.d]# yum list zabbix-*
[root@server4 yum.repos.d]# yum install -y zabbix-proxy-mysql.x86_64
2.server4修改zabbix_proxy配置文件
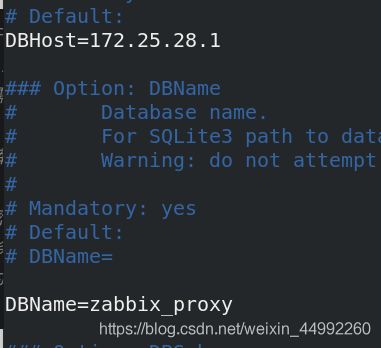
[root@server4 yum.repos.d]# vim /etc/zabbix/zabbix_proxy.conf
Server=172.25.28.1 #分布式服务位于zabbix-server端
ServerPort=10051 #默认端口为10051
Hostname=proxy #主机名为proxy,需要与添加的proxy名保持一致,并且所有zabbix的服务机都需要做解析
DBHost=172.25.28.1 #数据库位置
DBName=zabbix_proxy #数据库中的库名称
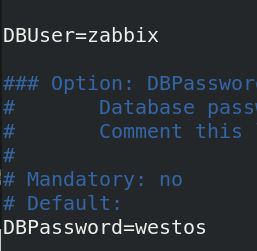
DBUser=zabbix #访问数据库的身份
DBPassword=westos #访问数据库的密码
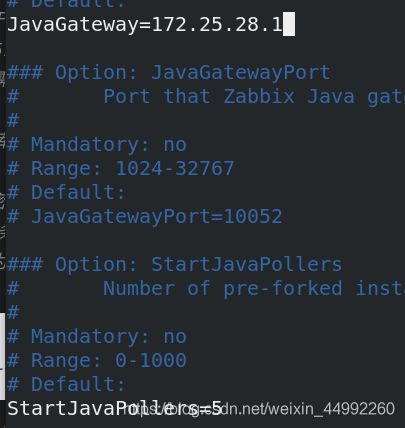
JavaGateway=172.25.28.1 #java服务监听端口指向zabbix-server端
StartJavaPollers=5 #Java轮询器为5,实际设置根据需求
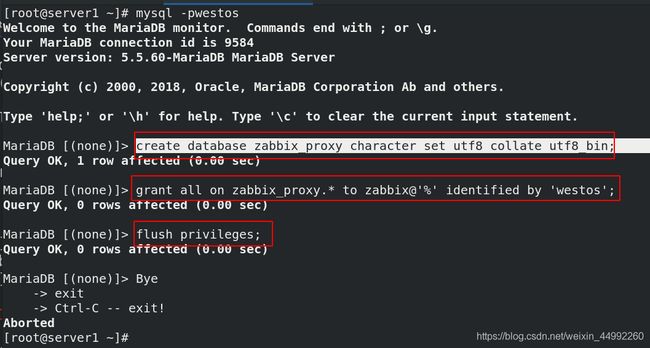
3.server1创建mysql数据库zabbix_proxy并将库的所有权利给zabbix用户,授权后刷新
4.server4将生成的数据库信息传给数据库位置server1中
5.server1将schema.sql.gz 文件解压后导入 zabbix_proxy 库中
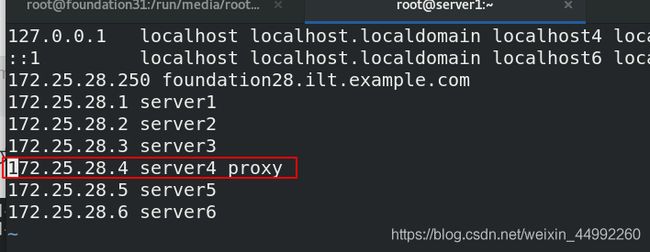
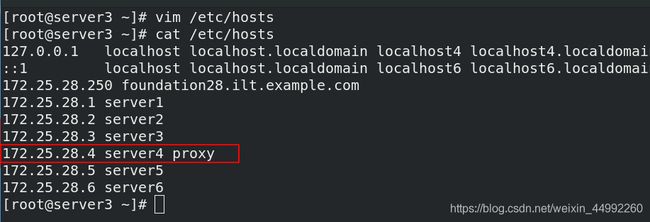
6.修改server4的主机名称,server1,2,4都进行解析
(1)server4解析
[root@server4 zabbix-proxy-mysql-4.0.5]# hostnamectl set-hostname proxy
[root@server4 zabbix-proxy-mysql-4.0.5]# vim /etc/hosts
重启zabbix-agent服务
[root@server4 zabbix-proxy-mysql-4.0.5]# systemctl restart zabbix-proxy.service
[root@server1 ~]# vim /etc/hosts
7.将server3的服务指向proxy(4),通过proxy连接server(1)
agent(3) ----> proxy(4) ----> server(1)


