Visio Studio2022调用yolov5脚本+IntelrealsenseD405+opencv 4.6.0
近期项目需要使用MFC设计界面,调用yolov5脚本,实现检测结果的实时输出。
(一)VS2022下载安装和opencv环境的配置
(1)从官网下载VS2022community版本即可,VS下载地址: Visual Studio 2022 IDE - 适用于软件开发人员的编程工具 (microsoft.com)
opencv下载地址:Releases - OpenCV下载对用版本这里我使用的是4.6.0
opencv在VS环境中的配置教程很多,主要是几个部分,环境变量的添加,还有VS中包含目录、库目录和附加依赖项的配置。有个简单省事的办法可以避免每个项目VS中包含目录、库目录和附加依赖项都配置一遍,会在下文介绍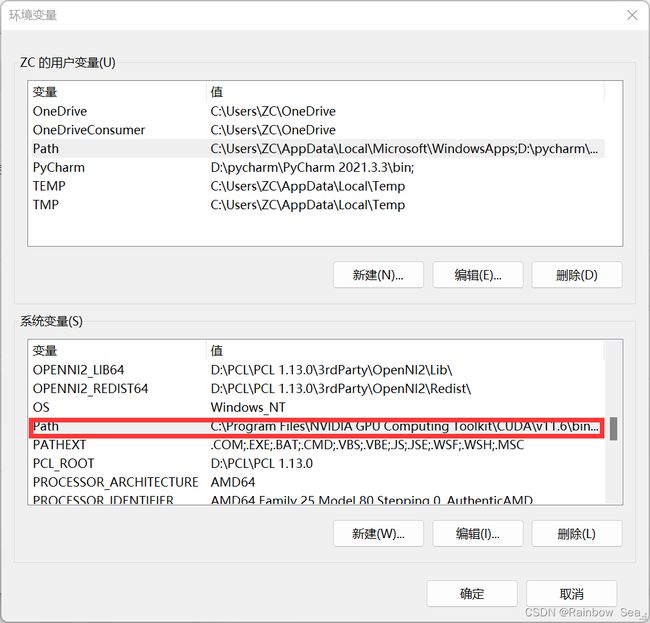
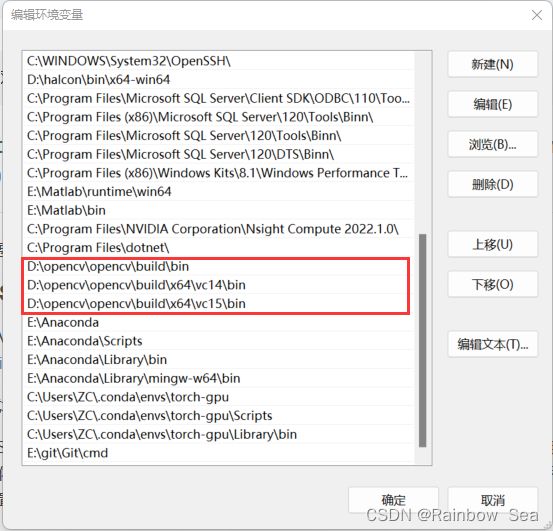
打开属性管理器,有的版本VS2022属性管理器在视图最下边,并不在其他窗口中
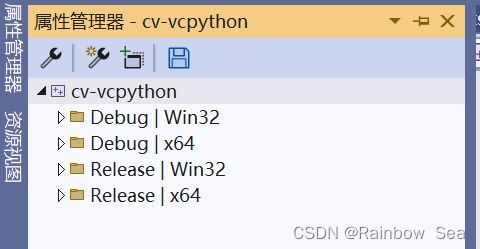
我是在release下,所以选择最后一个,根据很多教程,C++和Python交互都是在release下,右键选择新建项目属性表
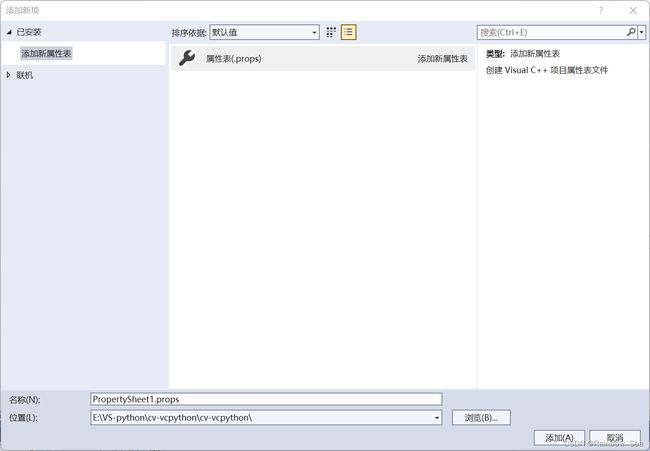
新建完成后可在release下找到自己刚刚新建的项目属性表,双击打开即可
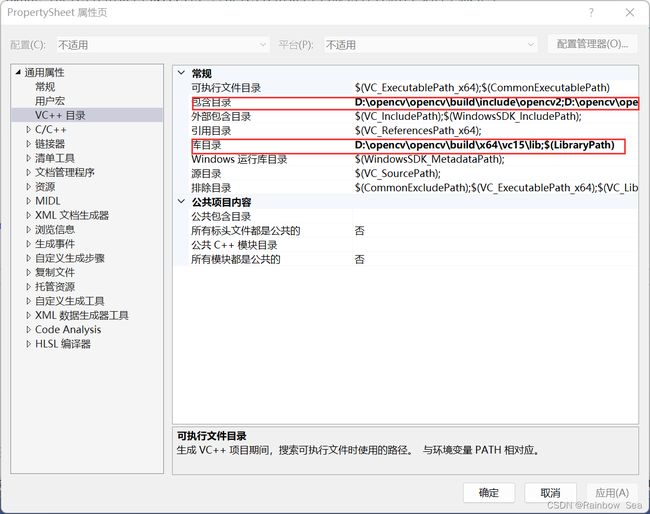


以上三步完成后opencv+VS2022已经配置完成,可以随便找个测试代码测试一下,有两个点,环境变量配置好后可能需要重启才能生效,附加依赖项根据不同环境添加,release下opencv_world460.lib即可,但是debug模式下需要opencv_world460d.lib,配置完成后的项目属性表可以复制到另一个项目中 使用省去了再次配置的麻烦
(二)yolov5源码的下载+环境配置
可以参考其他博客
(三)使用VS调用py脚本文件
主要是环境配置的问题,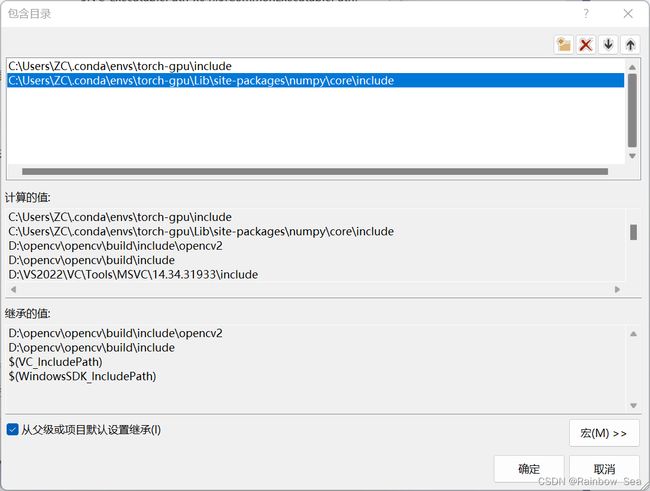
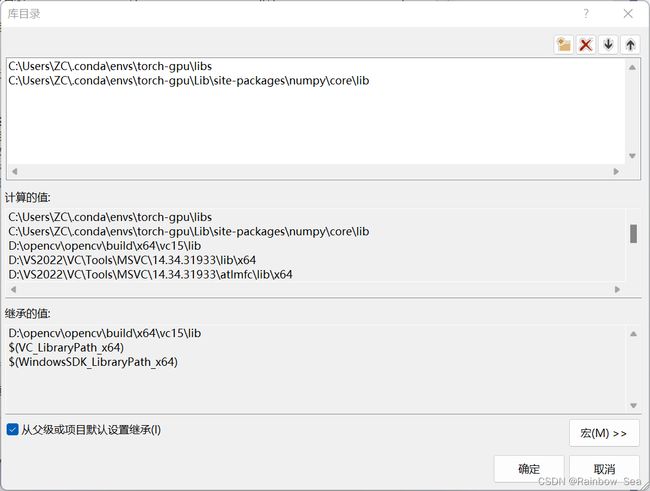
torch-gpu是我的虚拟环境,如果读者使用的是其他环境浏览对应路径即可,由于项目中涉及到Mat和numpy数据的相互转换,所以也要添加numpy文件
还是老三步,配置完成后添加头文件#include
但是还没有结束,还有几个关键步骤需要配置,PYTHONHOME和PYTHONPATH,如果不添加这两个环境变量会报错,PYTHONHOME(not set)等等
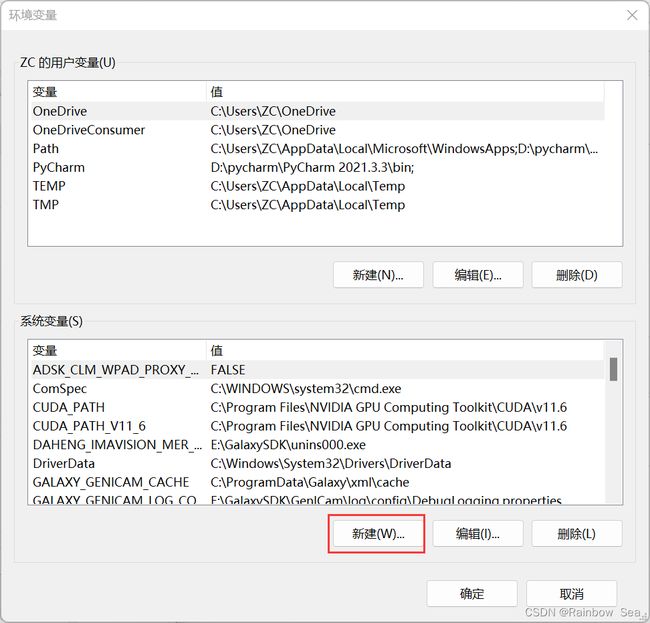
点击新建按钮,
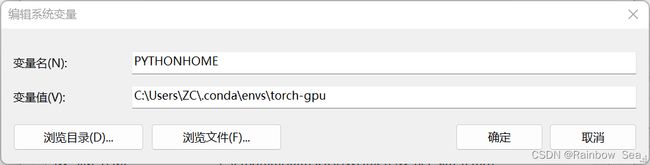
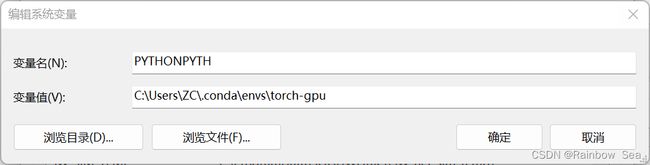
变量值一定要是对应虚拟环境的目录,如果盲目使用anaconda安装目录会报错,fatal error
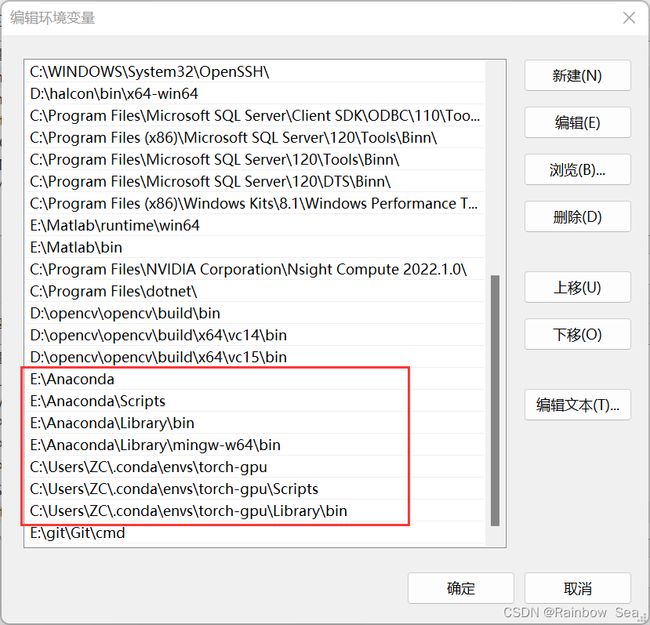
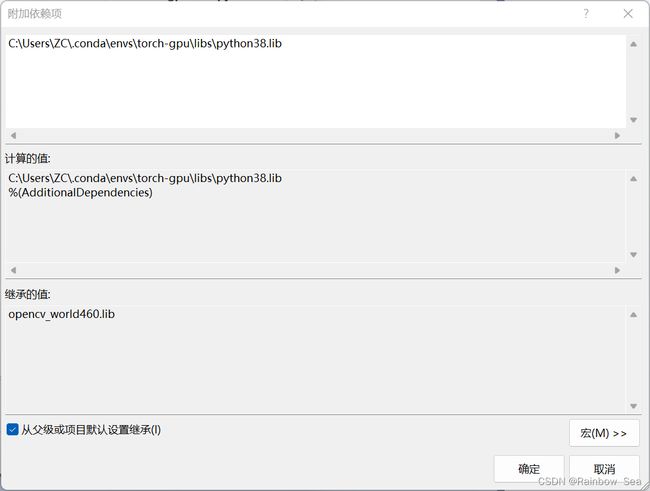
需要添加的环境变量挺多的,一定把虚拟环境的目录添加进去,不然会报错找不到Python38.dll
接下来就是新建项目文件,调用py脚本,注释掉的也是一个示例程序,主要是无参调用,没有注释掉的是将C++mat数据类型传递给Python函数
#include
#include
#include
#include
#include
#include
//添加好头文件不报错
#include
#include
using namespace cv;
using namespace std;
//int main()
//{
//	Py_Initialize();
//	import_array();
//	PyObject* pModule = NULL;//声明变量
//	PyObject* pFunc3 = NULL;// 声明变量
//	PyRun_SimpleString("import sys");
//	PyRun_SimpleString("sys.path.append('./')");
//	pModule = PyImport_ImportModule("main123");//要放在.cpp同目录下
//	if (pModule == NULL)
//	{
//		cout << "没找到文件" << endl;
//		return 0;
//	}
//	pFunc3 = PyObject_GetAttrString(pModule, "showimage");//这里是要调用的函数名
//	PyObject* pim=PyObject_CallObject(pFunc3,NULL);//调用函数
//	if (pim == NULL)
//	{
//		cout << "没找到函数" << endl;
//		return 0;
//	}
//	PyArrayObject* array_value;
//	PyArray_OutputConverter(pim, &array_value);
//	npy_intp* shape = PyArray_SHAPE(array_value);
//	Mat img(shape[0], shape[1], CV_8UC3, PyArray_DATA(array_value));
//	imshow("test", img);
//	waitKey(6000);
//	Py_Finalize();
//	system("pause");
//	return 0;
//}
// for the references to all the functions
PyObject* m_PyDict, * m_PyFooBar;

// for the reference to the Pyhton module
PyObject* m_PyModule;

int main() {

    Py_Initialize();
    //  PySys_SetArgv(argc, (wchar_t**)argv);
    PyRun_SimpleString("import sys");
    PyRun_SimpleString("sys.path.append('./')");
    m_PyModule = PyImport_ImportModule("main123");

    // this macro is defined be NumPy and must be included
    import_array();

    if (m_PyModule != NULL)
    {
        // get dictionary of available items in the module
        m_PyDict = PyModule_GetDict(m_PyModule);

        // grab the functions we are interested in
        m_PyFooBar = PyDict_GetItemString(m_PyDict, "img_to_gray");

        // execute the function
        if (m_PyFooBar != NULL)
        {
            // take a cv::Mat object from somewhere (we'll just create one)
            cv::Mat img = cv::imread("lena.png");
            int r = img.rows;
            int c = img.cols;
            int chnl = img.channels();
            // total number of elements (here it's an RGB image of size 640x480)
            int nElem = r * c * chnl;

            // create an array of apropriate datatype
            uchar* m = new uchar[nElem];

            // copy the data from the cv::Mat object into the array
            std::memcpy(m, img.data, nElem * sizeof(uchar));

            // the dimensions of the matrix
            npy_intp mdim[] = { r, c, chnl };

            // convert the cv::Mat to numpy.array
            PyObject* mat = PyArray_SimpleNewFromData(chnl, mdim, NPY_UINT8, (void*)m);

            // create a Python-tuple of arguments for the function call
            // "()" means "tuple". "O" means "object"
            PyObject* args = Py_BuildValue("(O)", mat);

            // execute the function
            PyObject* result = PyEval_CallObject(m_PyFooBar, args);

            // decrement the object references
            Py_XDECREF(mat);
            Py_XDECREF(result);
            Py_XDECREF(args);

            delete[] m;
        }
    }
    else
    {
        std::cerr << "Failed to load the Python module!" << std::endl;
        PyErr_Print();
    }

    return 0;
}
main123.py文件如下
import cv2
import numpy as np
import ctypes
def showimage():
    im = cv2.imread('lena.png')
    cv2.imshow('test',im)
    cv2.waitKey(0)
showimage()
还有一个点要注意,main123.py文件要放在.cpp同目录的文件下: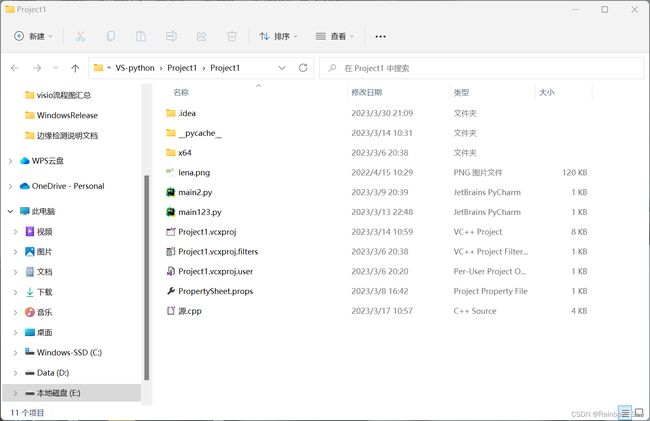
如果正确显示图片后表示整个过程已经完成。
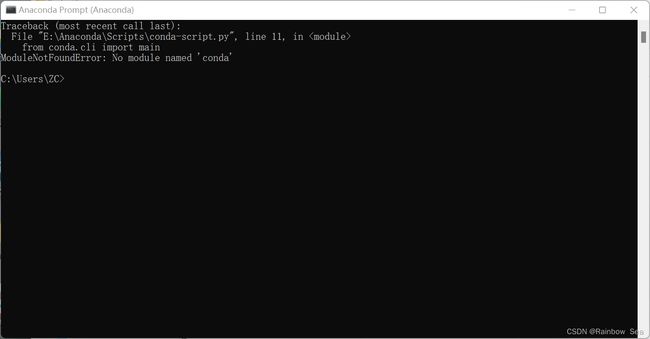
但是有个疑问我配置完成后打开anaconda prompt会报错,暂时不明白为什么,同组其他同学使用base环境就不会这样?????
使用yolov5的话需要更改源码以便实现与C++的交互。