具有标记和笔记功能的文件管理器TagSpaces(续)
熟悉老苏的读者都知道,老苏通常只是推荐软件,并简单介绍如何运行它们,而具体的功能则需要读者自行研究。这种方式让老苏能够在工作之余,还能保持每周发布 4 篇的更新。
然而,这种方式也存在明显的缺点。由于老苏没有深入使用过大部分软件,所以会遗留下很多问题。在本文中,我们将重点讨论 TagSpaces 的遗留问题。
文章传送门:具有标记和笔记功能的文件管理器TagSpaces
问题
提出问题
朋友最近在用 TagSpaces,但是发现添加 管理新的位置 后,虽然能创建笔记,可是刷新页面之后,新建的位置和笔记就都没了
解决问题
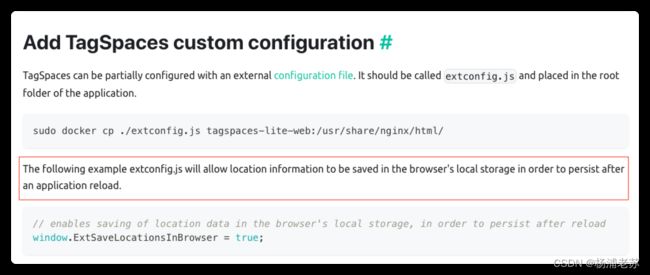
想了各种可能,包括换浏览器等等,但都无济于事,直到老苏看了官方文档
没理解这是什么脑回路,居然默认是不保存的。只能按官方的说明,通过 extconfig.js 进行自定义设置了
因为不清楚 extconfig.js 的内容,所以老苏先从容器中拷贝了一个模板搬出来
# 进入 tagspaces 目录
cd /volume1/docker/tagspaces

# 从容器中拷贝模板文件到群晖
docker cp tagspaces-web:/usr/share/nginx/html/extconfig.tmpl.js ./extconfig.js
发现配置文件很简单,有用的其实就最后一行
// Options available in extconfig.js are documented here: https://docs.tagspaces.org/dev/external-config

// Uncomment the following line to enable saving the location data in the browser's local storage
//window.ExtSaveLocationsInBrowser = true;
所以上面这一步不需要大家执行,因为拷出来的文件,要修改会涉及到权限问题,不如新建一个更简单
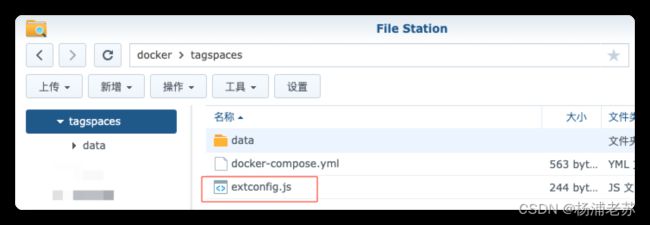
在 tagspaces 目录中新建一个 extconfig.js 文件,内容如下:
window.ExtSaveLocationsInBrowser = true;
然后执行下面的命令,将 extconfig.js 文件拷贝进容器内
# 确保自己在 tagspaces 目录
cd /volume1/docker/tagspaces

# 将 extconfig.js 文件拷贝回容器内
docker cp ./extconfig.js tagspaces-web:/usr/share/nginx/html/
现在问题就解决了,但是因为设置是保存在浏览器的本地存储(Local Storage)中,所以如果你换了机器或者浏览器,还是需要再设置一次的
其他
添加认证
默认情况下, TagSpaces 是没有登录认证的,在不添加反代的情况下,我们也可以给内置的 nginx 服务添加简单的基本身份验证
# 进入 tagspaces 目录
cd /volume1/docker/tagspaces

# 从容器中拷贝模板文件到群晖
docker cp tagspaces-web:/etc/nginx/conf.d/default.conf ./default.conf
这一步也不是必须的,主要是为看看原始的 default.conf 文件的内容,方便我们修改
# 创建密码文件和第一个用户,账号为 laosu,密码为 123456
printf "laosu:$(openssl passwd -crypt 123456)\n" >> ./htpasswd

# 查看文件内容
cat htpasswd
在当前目录下,新建一个 default.conf 文件,内容如下
server {
    listen       80;
    listen  [::]:80;
    server_name  localhost;

    location / {
        root   /usr/share/nginx/html;
        index  index.html index.htm;
        auth_basic "Please enter your username and password";
        auth_basic_user_file /home/htpasswd;
        autoindex on;
    }

    error_page   500 502 503 504  /50x.html;
    location = /50x.html {
        root   /usr/share/nginx/html;
    }
}
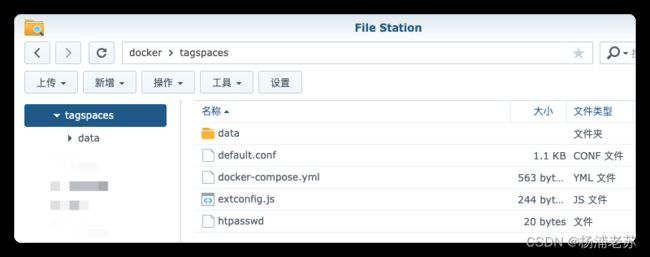
现在的目录结构是这样的
接下来要将 default.conf 和 htpasswd 拷贝到容器内
# 确保自己在 tagspaces 目录
cd /volume1/docker/tagspaces

# 删除容器内的 default.conf 文件
docker exec -it --user root tagspaces-web rm -rf /etc/nginx/conf.d/default.conf

# 将 default.conf 文件拷贝到容器内 /etc/nginx/conf.d 目录
docker cp ./default.conf tagspaces-web:/etc/nginx/conf.d/

# 将 htpasswd 文件拷贝到容器内 /home 目录
docker cp ./htpasswd tagspaces-web:/home/
容器 tagspaces-web 需要重启一次,才能让设置生效
# 重启容器
docker-compose restart
再次在浏览器中输入 http://群晖IP:9012 ,就会看到弹出的登录界面了
参考文档
具有标记和笔记功能的文件管理器TagSpaces | 老苏的blog
地址:https://laosu.cf/2023/10/14/具有标记和笔记功能的文件管理器TagSpaces/
Install with Docker | TagSpaces Docs
地址:https://docs.tagspaces.org/tutorials/tagspaces-web-docker/
Nginx给网站添加用户认证配置( Basic HTTP authentication)-腾讯云开发者社区-腾讯云
地址:https://cloud.tencent.com/developer/article/1157921


