在iOS开发过程中,我们会经常遇到画线的功能,比如线性图。
目前iOS画线有两大类方法 (我所知道的)。
1、基于CoreGraphics.framework的CGContext;
2、基于UIKit.framework、QuartzCore.framework的UIBezierPath、CAShapeLayer。
方法一、CGContext
CGContext是一个结构体。
下面列举与画线相关的方法:
//绘制直线
CGContextAddLineToPoint(CGContextRef cg_nullable c, CGFloat x, CGFloat y)
//绘制三次贝塞尔曲线
CGContextAddCurveToPoint(CGContextRef cg_nullable c, CGFloat cp1x, CGFloat cp1y, CGFloat cp2x, CGFloat cp2y, CGFloat x, CGFloat y)
//绘制二次贝塞尔曲线
CGContextAddQuadCurveToPoint(CGContextRef cg_nullable c, CGFloat cpx, CGFloat cpy, CGFloat x, CGFloat y)
//绘制矩形
CGContextAddRect(CGContextRef cg_nullable c, CGRect rect)
//绘制多个矩形
CGContextAddRects(CGContextRef cg_nullable c, const CGRect * __nullable rects, size_t count)
//绘制多个点连接的直线
CGContextAddLines(CGContextRef cg_nullable c, const CGPoint * __nullable points, size_t count)
//绘制椭圆
CGContextAddEllipseInRect(CGContextRef cg_nullable c, CGRect rect)
//绘制弧或圆
CGContextAddArc(CGContextRef cg_nullable c, CGFloat x, CGFloat y, CGFloat radius, CGFloat startAngle, CGFloat endAngle, int clockwise)
//绘制两点之间指定半径的弧(如果指定的位置、大小不合适,会绘制不出来)
CGContextAddArcToPoint(CGContextRef cg_nullable c, CGFloat x1, CGFloat y1, CGFloat x2, CGFloat y2, CGFloat radius)
//根据指定路径绘制
CGContextAddPath(CGContextRef cg_nullable c, CGPathRef cg_nullable path)
代码示例:
// Only override drawRect: if you perform custom drawing.
// An empty implementation adversely affects performance during animation.
- (void)drawRect:(CGRect)rect {
    // Drawing code
    //当前绘制区域(上下文)
    CGContextRef context = UIGraphicsGetCurrentContext();
    //开启一个新路径,放弃旧路径
    CGContextBeginPath(context);
    //设置线条粗细
    CGContextSetLineWidth(context, 1.0);
    //设置描边颜色
    UIColor *strokeColor = [UIColor redColor];
    CGContextSetStrokeColorWithColor(context, strokeColor.CGColor);
    //设置起始点
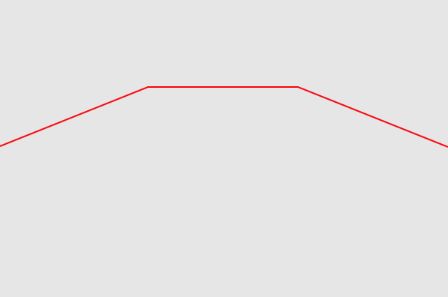
    CGContextMoveToPoint(context, 0.0, 100.0);
    CGContextAddLineToPoint(context, 100.0, 60.0);
    CGContextAddLineToPoint(context, 200.0, 60.0);
    CGContextAddLineToPoint(context, 300.0, 100.0);
    //路径描边
    CGContextStrokePath(context);
}
效果图:
注意
CGContextClosePath方法!
有很多人在使用这个方法时,会遇到
: CGContextClosePath: no current point. 这是因为再执行
CGContextClosePath方法时,当前已经没有可用点了。比如执行
CGContextStrokePath、
CGContextFillPath 、
CGContextEOFillPath后,都会置空当前点,所以
CGContextClosePath方法一般在这些方法之前执行。
方法二、UIBezierPath和CAShapeLayer
UIBezierPath继承NSObject;CAShapeLayer继承CALayer,CALayer继承NSObject。
下面列举与画线相关的方法:
//绘制直线(从上一个点到point)
- (void)addLineToPoint:(CGPoint)point;
//绘制三次贝塞尔曲线(从上一个点到endPoint)
- (void)addCurveToPoint:(CGPoint)endPoint controlPoint1:(CGPoint)controlPoint1 controlPoint2:(CGPoint)controlPoint2;
//绘制二次贝塞尔曲线(从上一个点到endPoint)
- (void)addQuadCurveToPoint:(CGPoint)endPoint controlPoint:(CGPoint)controlPoint;
//绘制弧或圆
- (void)addArcWithCenter:(CGPoint)center radius:(CGFloat)radius startAngle:(CGFloat)startAngle endAngle:(CGFloat)endAngle clockwise:(BOOL)clockwise
代码示例:
// Only override drawRect: if you perform custom drawing.
// An empty implementation adversely affects performance during animation.
- (void)drawRect:(CGRect)rect {
    // Drawing code
    //设置颜色
    [[UIColor orangeColor] set];

    UIBezierPath *path = [UIBezierPath bezierPath];
    path.lineWidth = 1.0;
    path.lineCapStyle = kCGLineCapRound;
    path.lineJoinStyle = kCGLineCapRound;

    CGPoint p0 = CGPointMake(0.0, 100.0);
    CGPoint p1 = CGPointMake(100.0, 120.0);
    CGPoint p2 = CGPointMake(200.0, 120.0);
    CGPoint p3 = CGPointMake(300.0, 100.0);

    [path moveToPoint:p0];
    [path addLineToPoint:p1];
    [path addLineToPoint:p2];
    [path addLineToPoint:p3];

    [path stroke];
}
效果图:
当然你也可以借助使用CAShapeLayer,示例如下:
// Only override drawRect: if you perform custom drawing.
// An empty implementation adversely affects performance during animation.
- (void)drawRect:(CGRect)rect {

    // Drawing code
    //设置颜色
    UIBezierPath *path = [UIBezierPath bezierPath];

    CGPoint p0 = CGPointMake(0.0, 100.0);
    CGPoint p1 = CGPointMake(100.0, 120.0);
    CGPoint p2 = CGPointMake(200.0, 120.0);
    CGPoint p3 = CGPointMake(300.0, 100.0);

    //
    [path moveToPoint:p0];
    [path addLineToPoint:p1];
    [path addLineToPoint:p2];
    [path addLineToPoint:p3];

    //
    CAShapeLayer *shapeLayer = [CAShapeLayer layer];
    shapeLayer.frame = CGRectMake(0.0, 0.0, rect.size.width, rect.size.height);
    shapeLayer.lineWidth = 1.0;
    shapeLayer.lineCap = @"round";
    shapeLayer.strokeColor = [[UIColor redColor] CGColor];
    shapeLayer.fillColor = [[UIColor clearColor] CGColor];
    shapeLayer.path = [path CGPath];
    shapeLayer.strokeStart = 0.0;
    shapeLayer.strokeEnd = 1.0;
    [self.layer addSublayer:shapeLayer];
}
效果图:
看上去效果是不是和UIBezierPath一样?
注意CAShapeLayer的strokeStart和strokeEnd!这两个参数配合动画,会有不错的效果。
上面说了那么多,都还没介绍绘制曲线方法。
其实上面有说明,比如二次贝塞尔曲线、三次贝塞尔曲线、圆弧都是曲线的绘制方法。
可是这些都不是我这次要介绍的,首先贝塞尔曲线需要添加控制点,说实话,这些控制点在实际项目中很不好找,其次圆弧不能满足所有曲线类型。
那怎么办呢?
答案是使用Catmull-Rom算法。
这个算法思想,大家可以在网上搜索。
这里我直接给出iOS下,我的处理方式。
直接上代码:
/**
 Catmull-Rom算法
 根据四个点计算中间点
 */
- (CGPoint)getPoint:(CGFloat)t p0:(CGPoint)p0 p1:(CGPoint)p1 p2:(CGPoint)p2 p3:(CGPoint)p3 {
    CGFloat t2 = t*t;
    CGFloat t3 = t2*t;

    CGFloat f0 = -0.5*t3 + t2 - 0.5*t;
    CGFloat f1 = 1.5*t3 - 2.5*t2 + 1.0;
    CGFloat f2 = -1.5*t3 + 2.0*t2 + 0.5*t;
    CGFloat f3 = 0.5*t3 - 0.5*t2;

    CGFloat x = p0.x*f0 + p1.x*f1 + p2.x*f2 +p3.x*f3;
    CGFloat y = p0.y*f0 + p1.y*f1 + p2.y*f2 +p3.y*f3;

    return CGPointMake(x, y);
}
// Only override drawRect: if you perform custom drawing.
// An empty implementation adversely affects performance during animation.
- (void)drawRect:(CGRect)rect {
    //
    UIBezierPath *path = [UIBezierPath bezierPath];
    //
    CGPoint p0 = CGPointMake(0.0, 100.0);
    CGPoint p1 = CGPointMake(100.0, 120.0);
    CGPoint p2 = CGPointMake(200.0, 120.0);
    CGPoint p3 = CGPointMake(300.0, 100.0);
    //
    NSValue *v0 = [NSValue valueWithCGPoint:p0];
    NSValue *v1 = [NSValue valueWithCGPoint:p1];
    NSValue *v2 = [NSValue valueWithCGPoint:p2];
    NSValue *v3 = [NSValue valueWithCGPoint:p3];
    //
    NSArray *array = [NSArray arrayWithObjects:v0, v0, v1, v2, v3, v3, nil];
    //
    [path moveToPoint:p0];
    //
    for (NSInteger i=0; i
效果图:
注意
1、NSArray *array = [NSArray arrayWithObjects:v0, v0, v1, v2, v3, v3, nil];这里为什么我多加了一个v0和v3,因为Catmull-Rom需要四个点!为了能画出v0到v1之间的线和v2直接的线v3,所以我加了这两个点。
2、在第二层for循环中for (int i=0; i<100; i++),这里i我为什么取100为最大值?因为两个点之间的距离是100。当然这个值,可以根据实际需要,由自己来设定。
好了,到这里基本就要结束了。
离散点画曲线,我采用的是Catmull-Rom算法,在离散点之间插入中间点。
基础是两点之间画直线,关于Catmull-Rom算法可以进行封装,这点我在接下来的文章中会有介绍。


