深度学习入门---Numpy图像处理
在Python的学习过程中,我们实际上有各种图像处理库可以使用,比如opencv,Matplotlib,Scipy等等,这里我们使用Numpy来实现图像处理算法,以此来加深Numpy和图像算法的学习。
我们使用Matplotlib来读取和显示图像,如下:
import numpy as np
import  matplotlib.pyplot as plt
import matplotlib.image as img

im = img.imread("data/test/2.bmp")#图像读取
print(im.shape)
plt.imshow(im)#图像显示
img.imsave(“data/test/save.jpg”,im)#图像保存
有了图像读取、显示、保存之后,可以开始numpy图像处理编程了(本文只为了解numpy的使用和图像处理的一些算法,并无其他目的)。
1.图像裁剪
#图像裁剪
def imgCrop(im, x, y, w, h):
    """
    image crop function.
    im: source image
    x: x of crop position
    y: y of crop position
    w: width of crop
    h: height of crop
    Return cropped image.
    """
    img = im[x:np.clip(x+w,0,im.shape[0]),y:np.clip(y+h,0,im.shape[1])]
return img
#test
im = img.imread("data/test/6.bmp")
im = imgCrop(im,20,10,250,90)
print(im.shape)
plt.imshow(im)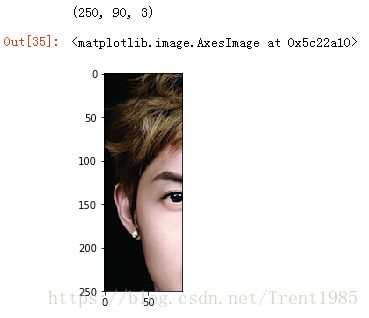
2.图像灰度化
def imgGray(im):
    """
    image gray
    im: source image
    Return gray image.
    """
    imgarray = np.array(im)
    rows = im.shape[0]
    cols = im.shape[1]
    for i in range(rows):
        for j in range(cols):
            imgarray[i, j, :] = (imgarray[i, j, 0] * 0.299 + imgarray[i, j, 1] * 0.587 + imgarray[i, j, 2] * 0.114)
return imgarray
#test
im = img.imread("data/test/6.bmp")
im = imgGray(im)
plt.imshow(im)
plt.show()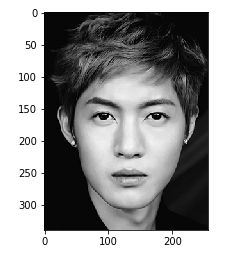
3.图像二值化
def imgThreshold(im, threshold):
    """
    im: source image
    threshold: 0-255
    Return blackwhite image.
    """
    imgarray = np.array(im)
    rows = im.shape[0]
    cols = im.shape[1]
    for i in range(rows):
        for j in range(cols):
            gray = (imgarray[i, j, 0] * 0.299 + imgarray[i, j, 1] * 0.587 + imgarray[i, j, 2] * 0.114)
            if gray <= threshold :
                imgarray[i,j,:] = 0
            else:
                imgarray[i,j,:] = 255
    return imgarray

#test
im = img.imread("data/test/6.bmp")
im = imgThreshold(im, 128)
plt.imshow(im)
plt.show()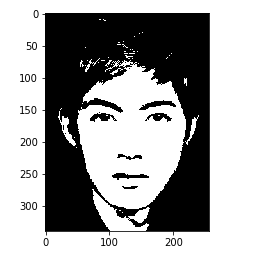
4.图像高斯模糊
def gausskernel(radius, sigma):
    length = 2 * radius + 1
    kernel = np.zeros(length)
    print("kernel size: ", str(kernel.shape))
    sum = 0.0
    for i in range(length):
        kernel[i] = float(np.exp(-(i - radius) * (i - radius) / (2.0 * sigma * sigma)))
        sum += kernel[i]
    for i in range(length):
        kernel[i] = kernel[i] / sum
return kernel

def imgGaussFilter(im, sigma):
    """
    Gauss filter.
    """

    imarray = np.array(im)
    res = np.array(im)
    radius = sigma
    kernel = gausskernel(radius, sigma*3.0)
    print(str(kernel))
    tempb = 0.0
    tempg = 0.0
    tempr = 0.0
    rem = 0.0
    t = 0.0
    v = 0.0
    K = 0.0
    rows = im.shape[0]
    cols = im.shape[1]
    for y in range(rows):
        for x in range(cols):
            tempb = 0.0
            tempg = 0.0
            tempr = 0.0
            for k in range(-radius, radius + 1):
                rem = np.abs(x + k) % cols
                K = kernel[k+radius]
                tempr = tempr + imarray[y,rem,0] * K
                tempg = tempg + imarray[y,rem,1] * K
                tempb = tempb + imarray[y,rem,2] * K
            res[y,x,0] = tempr
            res[y,x,1] = tempg
            res[y,x,2] = tempb

    for x in range(cols):
        for y in range(rows):
            tempb = 0.0
            tempg = 0.0
            tempr = 0.0
            for k in range(-radius, radius + 1):
                rem = np.abs(y + k) % rows
                K = kernel[k+radius]
                tempr = tempr + res[rem,x,0] * K
                tempg = tempg + res[rem,x,1] * K
                tempb = tempb + res[rem,x,2] * K
            imarray[y,x,0] = tempr
            imarray[y,x,1] = tempg
            imarray[y,x,2] = tempb
return imarray

#test
im = img.imread("data/test/6.bmp")
im = imgGaussFilter(im, 3)
plt.imshow(im)
plt.show()
上面就是使用Numpy进行图像处理的一些简单示例,关于具体的算法原理,可以参考本人博客图像处理基础。