简要介绍
Wildfly是一个开源的基于JavaEE的轻量级应用服务器,最新版本是Wildfly 10,遵循LGPL许可,意味着可以在任何商业应用中免费使用。具有启动速度快、轻量、强大的管理界面、支持JavaEE7(Wildfly 10)、易于测试等特性。
但是一旦说起Wildfly,我们一定要提到JBoss,Wildfly既是JBoss改名而来。2006年,JBoss被Redhat公司收购。 JBoss AS目前作为Redhat公司的商业产品JBoss Enterprise Application Platform的上游基础,为了使这两个产品有差异化,避免用户混淆,因此该公司在去年10月份就寻求为JBoss AS找一个新名字。
RedHat公司称,新名称WildFly反映了服务器“非常灵活、轻量、不羁、自由”的特性。**其实就是更新会快些,可以不再那么束缚开发者,而且商业版本还能有钱赚。但是不管怎么说,对于JBoss、开发者、使用者都是好的! **
本文仅仅是介绍基础操作和安装配置,更详细、准确、进阶的,请查看官方文档:
https://docs.jboss.org/author/display/WFLY9/Documentation
基础知识 & 操作说明
以下内容将使用网页端控制台,没有安装好Wildfly的请先安装和配置。
Wildfly Deployments
Deployments是指server相关的项目部署,server与deployments是分开的,一个server可以有多个deployments,一个deployments可以指向多个server。这点与Weblogic是一样的。
新增deployment
这里只讲解unmanaged deployment,这样可以指定一个部署路径(需要指向的Server所在Host的部署路径),而不需要上传项目EAR文件。
在deployments中配置的路径,是指此deployments所要分配的server所在host的路径,而并非Domain主机的路径。
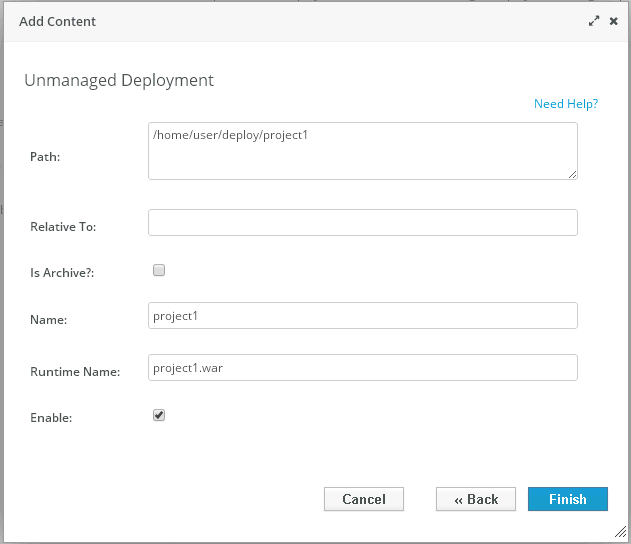
选择 Create an unmanaged deployment
Path填写项目部署文件路径, 注意这里的Runtime Name必需以.war结尾
分配deployment
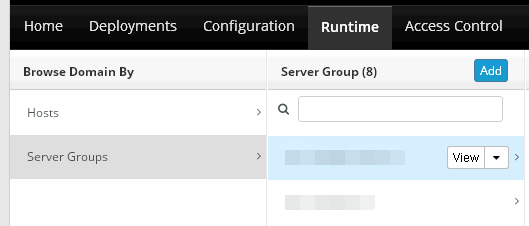
新增deployments之后,需要分配到已创建的server group,以运行此deployment
注意这里是分配给server group,而不能直接分配给server,这是因为Wildfly注重可扩展、易管理的操作方式。这点在之后的Profiles、Groups会讲到。
Wildfly Configuration
Configuration 中可以配置Profiles、Socket Binding,这是运行一个server基本的配置项。
Wildfly Profiles
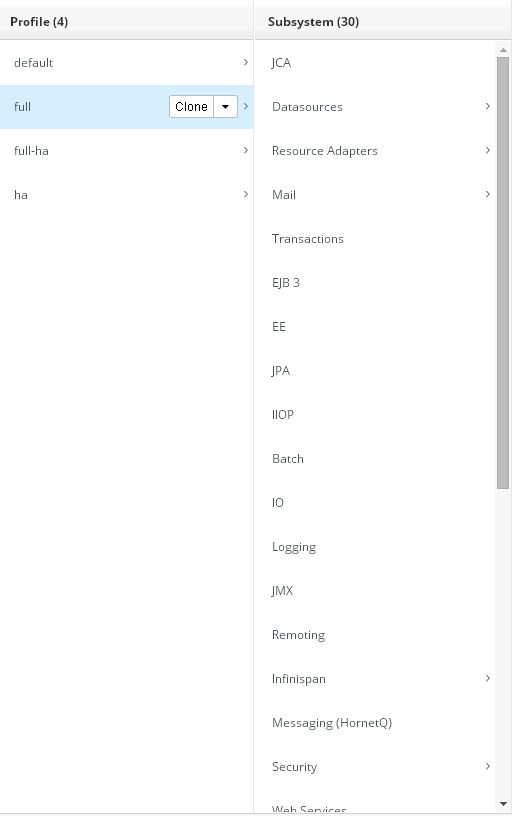
Profiles是一个定义ServerGroup配置的集合,你可以配置所有关于应用容器相关的内容,例如Datasources、Logging、Web Services等等。Wildfly内置了default/full/full-ha/ha四个Profile。
Basically,你的项目用不到这其中的任何配置,最常见的是使用Datasources,这需要你在项目中支持Wildfly的框架,比如你怎么连接到Wildfly提供的JNDI的代码段。
这里我们直接使用内置的任何一个都可以,并不会对我们的项目产生影响。
Wildfly Socket Binding
Socket binding定义了在指定的网络接口启用HTTP/HTTPS等方式的 起始端口的配置,支持MuiltCast方式,但是暂时没有用到。
注意,这里的Socket binding是用于Server Group的,在此Server Group中的Server根据需要,指定端口偏移值,才是Server的端口。
例如,Socket Binding中的standard-sockets定义了http端口是8080,如果test-group应用了standard-sockets,test-group其中的test-server-1在创建时,必需设定8080的偏移值,如果是1,则test-server-1的http访问方式为IP:8081。
更改起始端口
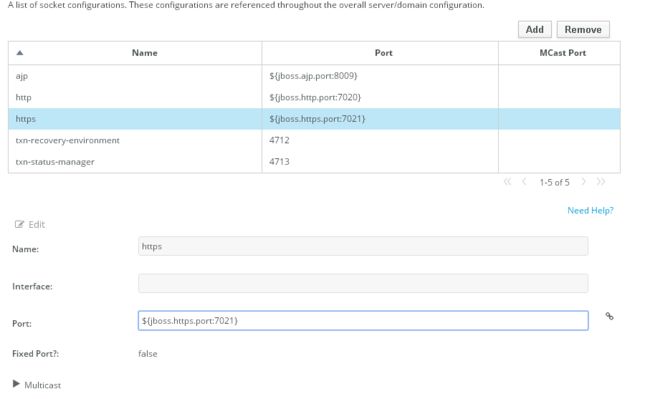
选择需要更改的Socket类型,例如https,点击edit修改起始端口
Wildfly Runtime
Runtime,运行时。用于管理应用容器的运行时生命周期,例如新增、启动、停止等等。
Wildfly Host
Host即主机,你需要一个用于运行Server的host,这个就是domain/configuration/host.xml中配置的主机。每个主机的wildfly服务在启动之后,将连接到Domain,由Domain统一管理。
包括Domain自身也属于一个host,只不过同时是管理Domain的入口。
所有的Host在Domain看来都是一致的,每个Host中运行的Wildfly版本应该一致,而且Domain可以访问他们任何一个Host。
Wildfly Server Group
Server Group是同一业务类型的Server的集合,可以批量的管理在该集合之下的所有server,
Wildfly中使用了Server Group强制代替了直接管理Server的方式,也就是说,在创建Server之前,你必须要创建Server Group,再在这个Server Group中创建Server。
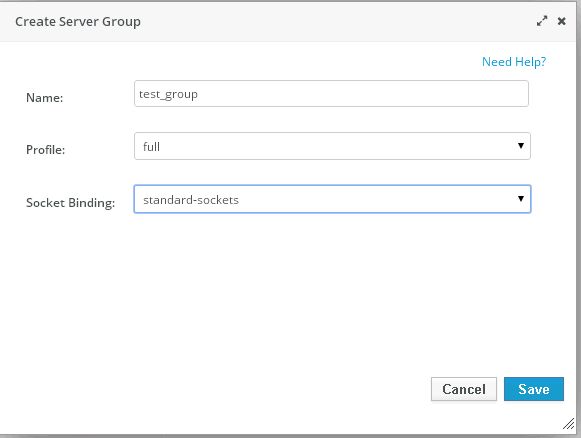
创建 Server Group
指定需要使用的Profile、Socket Binding,从而基本定义了这个Server Group。
Wildfly Server
这里的Server才是最终运行的服务,但是Server自身只能定义自己的端口偏移值,JVM参数,System Properties等信息,其他的都由Server Group使用的Profiles和Socket Binding配置。
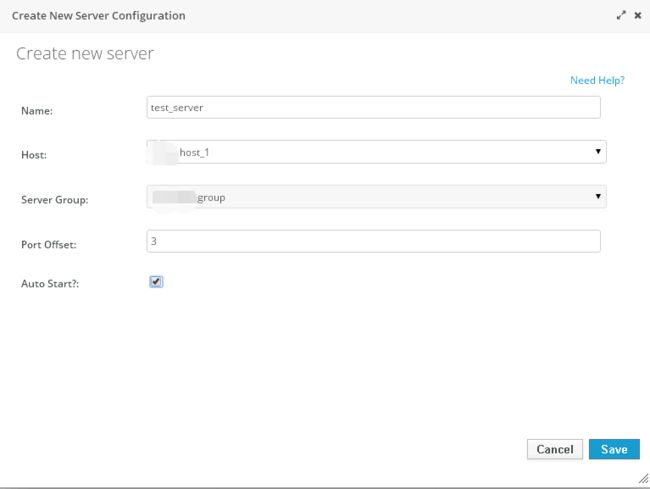
创建 Server
你需要指定此Server运行于哪个Host,属于哪个Server Group,端口偏移值和是否需要自启动等信息。
更新 Server JVM
安装和配置
这里开始讲解如何以Domain方式安装和配置Wildfly,在配置并启动后,所有其他操作尽量在网页控制台中进行,不要随意更改domain.xml或者host.xml
Domain的方式即一个管理节点(domain),多个受控节点(slave)。
DOMAIN & SLAVE: 安装JDK
[root@localhost opt]# ll
total 138892
-rw-r--r--. 1 root root 142216602 Jun  1 17:31 jdk-7u71-linux-x64.tar.gz
drwxr-xr-x. 2 root root      4096 May 10  2012 rh
[root@localhost opt]# tar zxf jdk-7u71-linux-x64.tar.gz
DOMAIN & SLAVE: 安装Wildfly
## 将wildfly的安装包放置在用户目录下
[irm@localhost ~]$ tar zxf wildfly-9.0.2.Final.tar.gz
DOMAIN & SLAVE: 配置环境变量
[irm@localhost ~]$ vi .bash_profile
# .bash_profile

# Get the aliases and functions
if [ -f ~/.bashrc ]; then
        . ~/.bashrc
fi

# User specific environment and startup programs

JAVA_HOME=/opt/jdk1.7.0_71
export JBOSS_HOME=/home/irm/wildfly-9.0.2.Final
PATH=$PATH:$HOME/bin:$JAVA_HOME/bin
export PATH
DOMAIN : 创建Wildfly管理用户
[irm@localhost ~]$ wildfly-9.0.2.Final/bin/add-user.sh
What type of user do you wish to add?
 a) Management User (mgmt-users.properties)
 b) Application User (application-users.properties)
# 输入a,以添加管理用户
(a): a

Enter the details of the new user to add.
Using realm 'ManagementRealm' as discovered from the existing property files.
# 输入用户名
Username : test
Password recommendations are listed below. To modify these restrictions edit the add-user.properties configuration file.
 - The password should be different from the username
 - The password should not be one of the following restricted values {root, admin, administrator}
 - The password should contain at least 8 characters, 1 alphabetic character(s), 1 digit(s), 1 non-alphanumeric symbol(s)
# 输入用户密码
Password :
WFLYDM0099: Password should have at least 8 characters!
# 确认则输入yes
Are you sure you want to use the password entered yes/no? yes
# 重新输入密码
Re-enter Password :
# 留空即可
What groups do you want this user to belong to? (Please enter a comma separated list, or leave blank for none)[  ]:
About to add user 'test' for realm 'ManagementRealm'
# 继续则输入yes
Is this correct yes/no? yes
Added user 'test' to file '/home/irm/wildfly-9.0.2.Final/standalone/configuration/mgmt-users.properties'
Added user 'test' to file '/home/irm/wildfly-9.0.2.Final/domain/configuration/mgmt-users.properties'
Added user 'test' with groups  to file '/home/irm/wildfly-9.0.2.Final/standalone/configuration/mgmt-groups.properties'
Added user 'test' with groups  to file '/home/irm/wildfly-9.0.2.Final/domain/configuration/mgmt-groups.properties'
Is this new user going to be used for one AS process to connect to another AS process?
e.g. for a slave host controller connecting to the master or for a Remoting connection for server to server EJB calls.
# 继续则输入yes
yes/no? yes
这里需要注意,用户添加完毕后,将回馈给你此用户的secret value,可在domain与slave 的通信中用到,下文中会讲到
To represent the user add the following to the server-identities definition
DOMAIN: 配置Wildfly Domain
[irm@localhost ~]$ cd wildfly-9.0.2.Final/domain/configuration/
[irm@localhost configuration]$ vi host.xml
....


....


....


....
SLAVE: 配置Wildfly Slave
[irm@localhost ~]$ cd wildfly-9.0.2.Final/domain/configuration/
#### 删除domain.xml,或者重命名
[irm@localhost configuration]$ mv domain.xml domain.xml_bak
#### 编辑slave配置文件
[irm@localhost configuration]$ vi host.xml
.....


....
DOMAIN & SLAVE: 配置系统服务
#### 编辑Wildfly服务所需的配置文件
[root@localhost /]# vi /etc/default/wildfly.conf
## JDK目录
JAVA_HOME="/opt/jdk1.7.0_71"

## JBOSS_HOME是Wildfly的安装根目录
JBOSS_HOME="/home/irm/wildfly-9.0.2.Final"

## 这里需要改为执行wildfly的用户
JBOSS_USER=irm

## 指定运行模式为domain
JBOSS_MODE=domain

## 指定domain的配置文件为domain.xml,slave的配置文件为host.xml
JBOSS_DOMAIN_CONFIG=domain.xml
JBOSS_HOST_CONFIG=host.xml
# 安装和启用服务,先启动Domain的服务,再启动各个Slave
[root@localhost /]# cp wildfly-9.0.2.Final/bin/init.d/wildfly-init-redhat.sh /etc/init.d/wildfly
[root@localhost /]# chmod +x /etc/init.d/wildfly
[root@localhost /]# chkconfig --add wildfly
[root@localhost /]# chkconfig wildfly on
[root@localhost /]# service wildfly start
访问Wildfly
在浏览器中访问http://DomainIP:9990/console/App.html 以管理Wildfly,这里的用户名和密码是在运行add-user.sh时配置的。
需注意的问题
- Wildfly 9 的控制台对IE浏览器支持不佳,尽量使用Chrome或者其他浏览器代替
- deployments的runtime name必需以.war结尾
- 如果项目中使用了slf4j,或者项目中包含log4j.properties,则需要禁用Wildfly自身的日志功能,因为这会产生冲突
在项目的WEB-INF目录中,编辑或新增jboss-deployment-structure.xml文件,内容如下:
- 如果需要禁用Wildfly的欢迎页面,需在项目的WEB-INF目录中,编辑或新增jboss-deployment-structure.xml文件,内容如下:
- 指定项目需要使用的URL后缀,即location,需编辑或新增项目中的WEB-INF/jboss-web.xml,内容如下:
/test


