使用摄像头运行ORB SLAM2---使用视频运行ORB-SLAM2
可以使用自己的笔记本的摄像头来读取周围的环境以运行ORB SLAM2。
如果你的笔记本恰好没有摄像头,你也可以外接一个USB摄像头。
相机标定:
myslam.yaml
%YAML:1.0

#--------------------------------------------------------------------------------------------
# Camera Parameters. Adjust them!
#--------------------------------------------------------------------------------------------

# Camera calibration and distortion parameters (OpenCV)
Camera.fx: 500.0
Camera.fy: 500.0
Camera.cx: 320.0
Camera.cy: 240.0

Camera.k1: 0
Camera.k2: 0
Camera.p1: 0
Camera.p2: 0
Camera.k3: 0

# Camera frames per second
Camera.fps: 30.0

# Color order of the images (0: BGR, 1: RGB. It is ignored if images are grayscale)
Camera.RGB: 0

#--------------------------------------------------------------------------------------------
# ORB Parameters
#--------------------------------------------------------------------------------------------

# ORB Extractor: Number of features per image
ORBextractor.nFeatures: 1000

# ORB Extractor: Scale factor between levels in the scale pyramid
ORBextractor.scaleFactor: 1.2

# ORB Extractor: Number of levels in the scale pyramid
ORBextractor.nLevels: 8

# ORB Extractor: Fast threshold
# Image is divided in a grid. At each cell FAST are extracted imposing a minimum response.
# Firstly we impose iniThFAST. If no corners are detected we impose a lower value minThFAST
# You can lower these values if your images have low contrast
ORBextractor.iniThFAST: 10
ORBextractor.minThFAST: 5

#--------------------------------------------------------------------------------------------
# Viewer Parameters
#--------------------------------------------------------------------------------------------
Viewer.KeyFrameSize: 0.05
Viewer.KeyFrameLineWidth: 1
Viewer.GraphLineWidth: 0.9
Viewer.PointSize: 2
Viewer.CameraSize: 0.08
Viewer.CameraLineWidth: 3
Viewer.ViewpointX: 0
Viewer.ViewpointY: -0.7
Viewer.ViewpointZ: -1.8
Viewer.ViewpointF: 500
接下来,我们新建一个myslam.cpp文件,这段代码定义了一个SLAM对象,然后会打开你⾃带的摄像头(或视频),读取图像,并交给ORB-SLAM2 处理。。
// 该文件将打开你电脑的摄像头,并将图像传递给ORB-SLAM2进行定位

// opencv
#include

// ORB-SLAM的系统接口
#include "System.h"
#include
#include    // for time stamp
#include

using namespace std;

// 参数文件与字典文件
// 如果你系统上的路径不同,请修改它
string parameterFile = "./myslam.yaml";
string vocFile = "./Vocabulary/ORBvoc.txt";

int main(int argc, char **argv) {

    // 声明 ORB-SLAM2 系统
    ORB_SLAM2::System SLAM(vocFile, parameterFile, ORB_SLAM2::System::MONOCULAR, true);

    // 获取相机图像代码
    cv::VideoCapture cap(0);    // change to 1 if you want to use USB camera.

    // 分辨率设为640x480
    cap.set(CV_CAP_PROP_FRAME_WIDTH, 640);;//设置采集视频的宽度
    cap.set(CV_CAP_PROP_FRAME_HEIGHT, 480);//设置采集视频的高度

    // 记录系统时间
    auto start = chrono::system_clock::now();

    while (1) {
        cv::Mat frame;
        cap >> frame;   // 读取相机数据
        auto now = chrono::system_clock::now();
        auto timestamp = chrono::duration_cast(now - start);
        SLAM.TrackMonocular(frame, double(timestamp.count())/1000.0);
    }

    return 0;
}
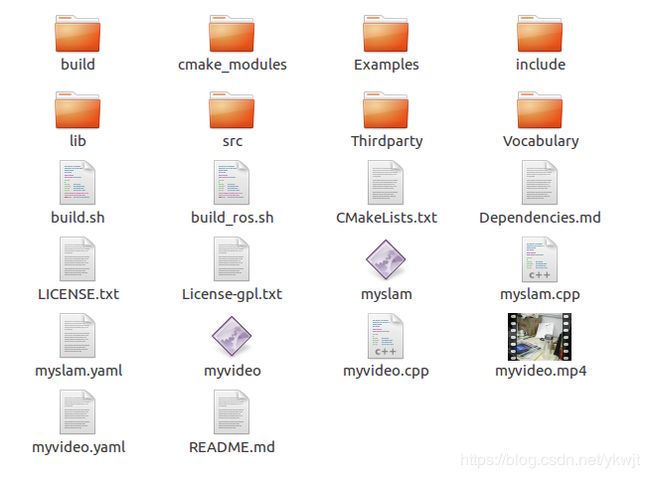
这是一个Cmake工程,接下来我们需要讲这个文件与ORB SLAM2进行结合。把这些代码文件放在ORB SLAM2/目录下,在ORB SLAM2对应的CMakeLists.txt文件的末尾加入一下代码:
#生成调用摄像头可执行文件
set(CMAKE_RUNTIME_OUTPUT_DIRECTORY ${PROJECT_SOURCE_DIR})
add_executable(myslam myslam.cpp)
target_link_libraries(myslam ${PROJECT_NAME})
进入ORBSLAM2下
mkdir build
cd build
cmake ..
make
./myslam          (执行)
现在你应该可以运行起来了。注意:当ORB SLAM2初始化的时候,请不要直接开始旋转或者运动速度过猛烈,先左右平移运动让SLAM系统成功初始化然后进行的。
可以使用自己的视频以运行ORB SLAM2。
相机标定:
myvideo.yaml
%YAML:1.0

#--------------------------------------------------------------------------------------------
# Camera Parameters. Adjust them!
#--------------------------------------------------------------------------------------------

# Camera calibration and distortion parameters (OpenCV)
Camera.fx: 500.0
Camera.fy: 500.0
Camera.cx: 320.0
Camera.cy: 240.0

Camera.k1: 0
Camera.k2: 0
Camera.p1: 0
Camera.p2: 0
Camera.k3: 0

# Camera frames per second
Camera.fps: 30.0

# Color order of the images (0: BGR, 1: RGB. It is ignored if images are grayscale)
Camera.RGB: 0

#--------------------------------------------------------------------------------------------
# ORB Parameters
#--------------------------------------------------------------------------------------------

# ORB Extractor: Number of features per image
ORBextractor.nFeatures: 1000

# ORB Extractor: Scale factor between levels in the scale pyramid
ORBextractor.scaleFactor: 1.2

# ORB Extractor: Number of levels in the scale pyramid
ORBextractor.nLevels: 8

# ORB Extractor: Fast threshold
# Image is divided in a grid. At each cell FAST are extracted imposing a minimum response.
# Firstly we impose iniThFAST. If no corners are detected we impose a lower value minThFAST
# You can lower these values if your images have low contrast
ORBextractor.iniThFAST: 10
ORBextractor.minThFAST: 5

#--------------------------------------------------------------------------------------------
# Viewer Parameters
#--------------------------------------------------------------------------------------------
Viewer.KeyFrameSize: 0.05
Viewer.KeyFrameLineWidth: 1
Viewer.GraphLineWidth: 0.9
Viewer.PointSize: 2
Viewer.CameraSize: 0.08
Viewer.CameraLineWidth: 3
Viewer.ViewpointX: 0
Viewer.ViewpointY: -0.7
Viewer.ViewpointZ: -1.8
Viewer.ViewpointF: 500
接下来,我们新建一个myvideo.cpp文件,这段代码定义了一个SLAM对象,然后会打开你的视频,读取图像,并交给ORB-SLAM2 处理。。
#include "System.h"
#include
#include    // for time stamp
#include
using namespace std;
// 参数文件与字典文件
// 如果你系统上的路径不同,请修改它
string parameterFile = "./myvideo.yaml";
string vocFile = "./Vocabulary/ORBvoc.txt";
// 视频文件
string videoFile = "./myvideo.mp4";
int main(int argc, char **argv) {
 // 声明 ORB-SLAM2 系统
 ORB_SLAM2::System SLAM(vocFile, parameterFile, ORB_SLAM2::System::MONOCULAR, true);
 // 获取视频图像
  cv::VideoCapture cap(videoFile);    // change to 1 if you want to use USB camera.
  // 记录系统时间
  auto start = chrono::system_clock::now();
while (1) {
        cv::Mat frame;
        cap >> frame;   // 读取相机数据
        if ( frame.data == nullptr )
            break;
        // rescale because image is too large
        cv::Mat frame_resized;
        cv::resize(frame, frame_resized, cv::Size(640,360));
        auto now = chrono::system_clock::now();
        auto timestamp = chrono::duration_cast(now - start);
        SLAM.TrackMonocular(frame_resized, double(timestamp.count())/1000.0);
        cv::waitKey(30);
    }
   SLAM.Shutdown();
    return 0;

}
这是一个Cmake工程,接下来我们需要讲这个文件与ORB SLAM2进行结合。把这些代码文件放在ORB SLAM2/目录下,在ORB SLAM2对应的CMakeLists.txt文件的末尾加入一下代码:
#生成调用myvideo.mp4 可执行文件
set(CMAKE_RUNTIME_OUTPUT_DIRECTORY ${PROJECT_SOURCE_DIR})
add_executable(myvideo myvideo.cpp)
target_link_libraries(myvideo ${PROJECT_NAME})
进入ORBSLAM2下
mkdir build
cd build
cmake ..
make
./myvideo          (执行)