【Aladdin-Unity3D-Shader编程】之八-2D图常用的Shader效果
前言
Shader效果常用于3D模型,但2D图也有不少常用的效果,例如:圆角头像,图片灰态,边缘着色等等,下面我就依次做一个介绍。
图片灰态
效果
核心思路
在片元着色器里面对每个图元进行采样,将图元的颜色x,y,z分别乘上灰度系数然后赋值给片源颜色,就将彩色变成了灰色了。
代码
//-----------------------------------------------【Shader说明】--------------------------------------------------------
//     Shader功能:   2D图片变灰  核心思路: 采样之后的图元xyz分别各自乘以灰度系数0.299,0.518,0.184之后的值就是灰色的
//     使用语言:   Shaderlab
//     开发所用IDE版本:Unity2018.3.6 、Visual Studio 2017
//     2016年9月16日  Created by Aladdin(阿拉丁)
//     更多内容或交流请访问我的博客:http://blog.csdn.net/s10141303/article/category/6670402
//---------------------------------------------------------------------------------------------------------------------


Shader "阿拉丁Shader编程/4-1.2D图片变灰"
{
   Properties
    {
        _MainTex ("Sprite Texture", 2D) = "white" {}
        _Color ("Tint", Color) = (1,1,1,1)
        _GrayScale ("GrayScale", Float) = 1
		[Toggle]_Open("Open", Int) = 1	//Toggle控制是否开启
    }

    SubShader
    {
        Tags
        {
            "Queue"="Transparent"
            "IgnoreProjector"="True"
            "RenderType"="Transparent"
            "PreviewType"="Plane"
            "CanUseSpriteAtlas"="True"
        }

        Cull Off
        Lighting Off
        ZWrite Off
        Blend One OneMinusSrcAlpha

        Pass
        {
        CGPROGRAM
            #pragma vertex vert
            #pragma fragment frag
            #pragma multi_compile _ PIXELSNAP_ON	  //告诉Unity编译不同版本的Shader,这里和后面vert中的PIXELSNAP_ON对应
            #include "UnityCG.cginc"

            struct appdata_t
            {
                float4 vertex   : POSITION;
                float4 color    : COLOR;
                float2 texcoord : TEXCOORD0;
            };

            struct v2f
            {
                float4 vertex   : SV_POSITION;
                fixed4 color    : COLOR;
                half2 texcoord  : TEXCOORD0;
            };

            fixed4 _Color;
			fixed _Open;
            v2f vert(appdata_t IN)
            {
                v2f OUT;
                OUT.vertex = UnityObjectToClipPos(IN.vertex);
                OUT.texcoord = IN.texcoord;
                OUT.color = IN.color * _Color;
                #ifdef PIXELSNAP_ON
                OUT.vertex = UnityPixelSnap (OUT.vertex);
                #endif

                return OUT;
            }

            sampler2D _MainTex;
            float _GrayScale;

            fixed4 frag(v2f IN) : SV_Target
            {
				if(_Open > 0)
				{
					fixed4 c = tex2D(_MainTex, IN.texcoord) * IN.color;
				   float cc = (c.r * 0.299 + c.g * 0.518 + c.b * 0.184);  //乘以一个灰度系数
					cc *= _GrayScale;
					c.r = c.g = c.b = cc;

					c.rgb *= c.a;
					return c;
				}
                else
				{
				   return tex2D(_MainTex, IN.texcoord) * IN.color;
				}
            }
        ENDCG
        }
    }
}
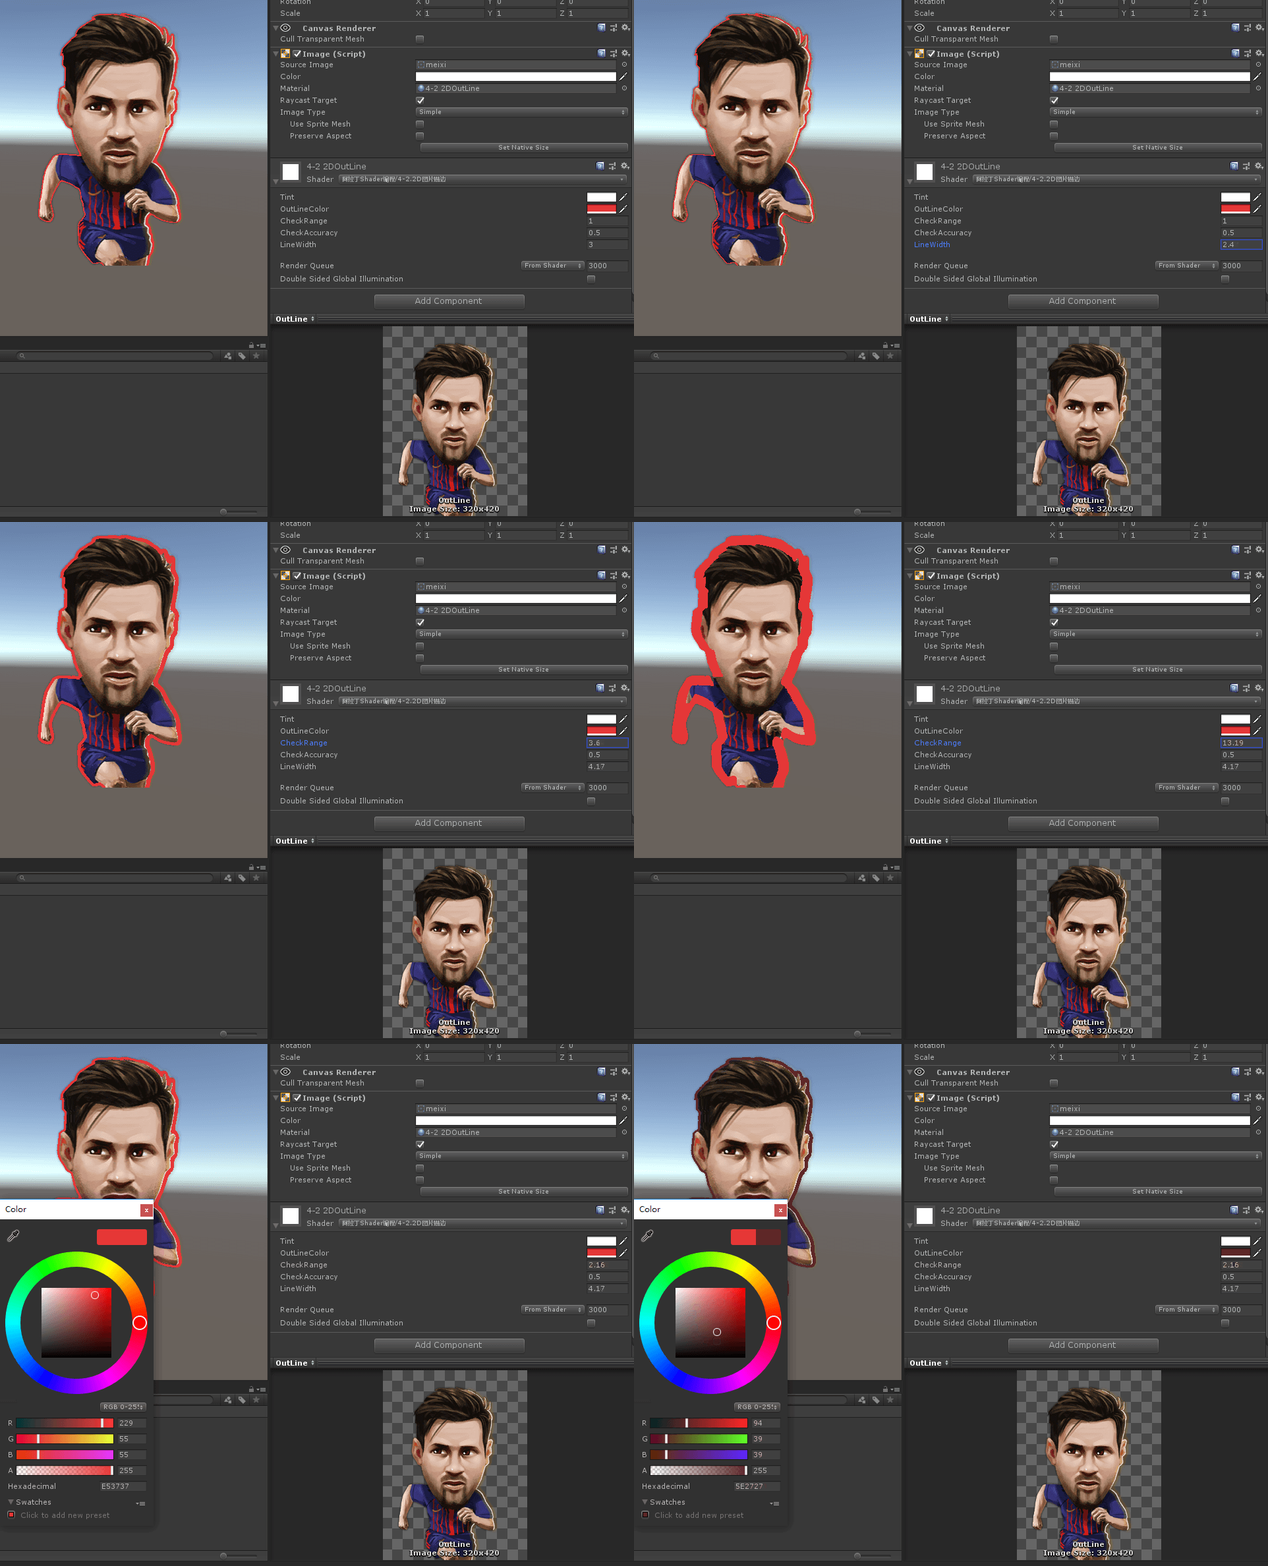
边缘着色
效果
核心思路
在片源 着色器中每个图元检测alpha跟阀值进行对比就能找到边缘
代码
//-----------------------------------------------【Shader说明】--------------------------------------------------------
//     Shader功能:   2D图片描边	 核心思路:检测某个图元的alpha值是否在某个阀值之间
//     使用语言:   Shaderlab
//     开发所用IDE版本:Unity2018.3.6 、Visual Studio 2017
//     2016年9月16日  Created by Aladdin(阿拉丁)
//     更多内容或交流请访问我的博客:http://blog.csdn.net/s10141303/article/category/6670402
//---------------------------------------------------------------------------------------------------------------------


Shader "阿拉丁Shader编程/4-2.2D图片描边"
{
	Properties
	{
		[PerRendererData] _MainTex ("Sprite Texture", 2D) = "white" {}
		_Color ("Tint", Color) = (1,1,1,1) //图像回合颜色
		_OutLineColor("OutLineColor", Color) = (1,1,1,1) //边缘颜色
		_CheckRange("CheckRange",Float) = 1	  //检测的范围
		_CheckAccuracy("CheckAccuracy",Float) = 0.5
		_LineWidth("LineWidth",Float) = 2	   //边缘宽度
	}

	SubShader
	{
		Tags
		{
			"Queue"="Transparent"
			"IgnoreProjector"="True"
			"RenderType"="Transparent"
			"PreviewType"="Plane"
			"CanUseSpriteAtlas"="True"
		}

		Cull Off         //关闭背面剔除
		Lighting Off     //关闭灯光
		ZWrite Off       //关闭Z缓冲
		Blend One OneMinusSrcAlpha     //混合源系数one(1)  目标系数OneMinusSrcAlpha(1-one=0)

		Pass
		{
		CGPROGRAM
			#pragma vertex vert
			#pragma fragment frag
			#pragma multi_compile _ PIXELSNAP_ON       //告诉Unity编译不同版本的Shader,这里和后面vert中的PIXELSNAP_ON对应
			#include "UnityCG.cginc"
			sampler2D _MainTex;
			float4 _MainTex_TexelSize;

			fixed4 _Color;
			fixed4 _OutLineColor;
			float _CheckAccuracy;
			float _LineWidth;
			float _CheckRange;
			struct appdata_t                           //vert输入
			{
				float4 vertex   : POSITION;
				float4 color    : COLOR;
				float2 texcoord : TEXCOORD0;
			};

			struct v2f                                 //vert输出数据结构
			{
				float4 vertex   : SV_POSITION;
				fixed4 color    : COLOR;
				float2 texcoord  : TEXCOORD0;
			};

			v2f vert(appdata_t IN)
			{
				v2f OUT;
				OUT.vertex = UnityObjectToClipPos(IN.vertex);
				OUT.texcoord = IN.texcoord;
				OUT.color = IN.color * _Color;
				#ifdef PIXELSNAP_ON
				OUT.vertex = UnityPixelSnap (OUT.vertex);
				#endif

				return OUT;
			}

			fixed4 SampleSpriteTexture (float2 uv)
			{
				fixed4 color = tex2D (_MainTex, uv);
				return color;
			}

			fixed4 frag(v2f IN) : SV_Target
			{
				fixed4 c = SampleSpriteTexture (IN.texcoord) * IN.color;
				c.rgb *= c.a;
				float isOut = step(abs(1/_LineWidth),c.a);	//检测每个图元的aplha是否在某个值 那么他就是边缘	  //step(a, x) Returns (x >= a) ? 1 : 0	   abs(x) 返回绝对值
				if(isOut != 0)
				{
					fixed4 pixelUp = tex2D(_MainTex, IN.texcoord + fixed2(0, _MainTex_TexelSize.y*_CheckRange));
					fixed4 pixelDown = tex2D(_MainTex, IN.texcoord - fixed2(0, _MainTex_TexelSize.y*_CheckRange));
					fixed4 pixelRight = tex2D(_MainTex, IN.texcoord + fixed2(_MainTex_TexelSize.x*_CheckRange, 0));
					fixed4 pixelLeft = tex2D(_MainTex, IN.texcoord - fixed2(_MainTex_TexelSize.x*_CheckRange, 0));
					float bOut = step((1-_CheckAccuracy),pixelUp.a*pixelDown.a*pixelRight.a*pixelLeft.a);
					c = lerp(_OutLineColor,c,bOut);
					return c;
				}
				return c;
			}
		ENDCG
		}
	}
}
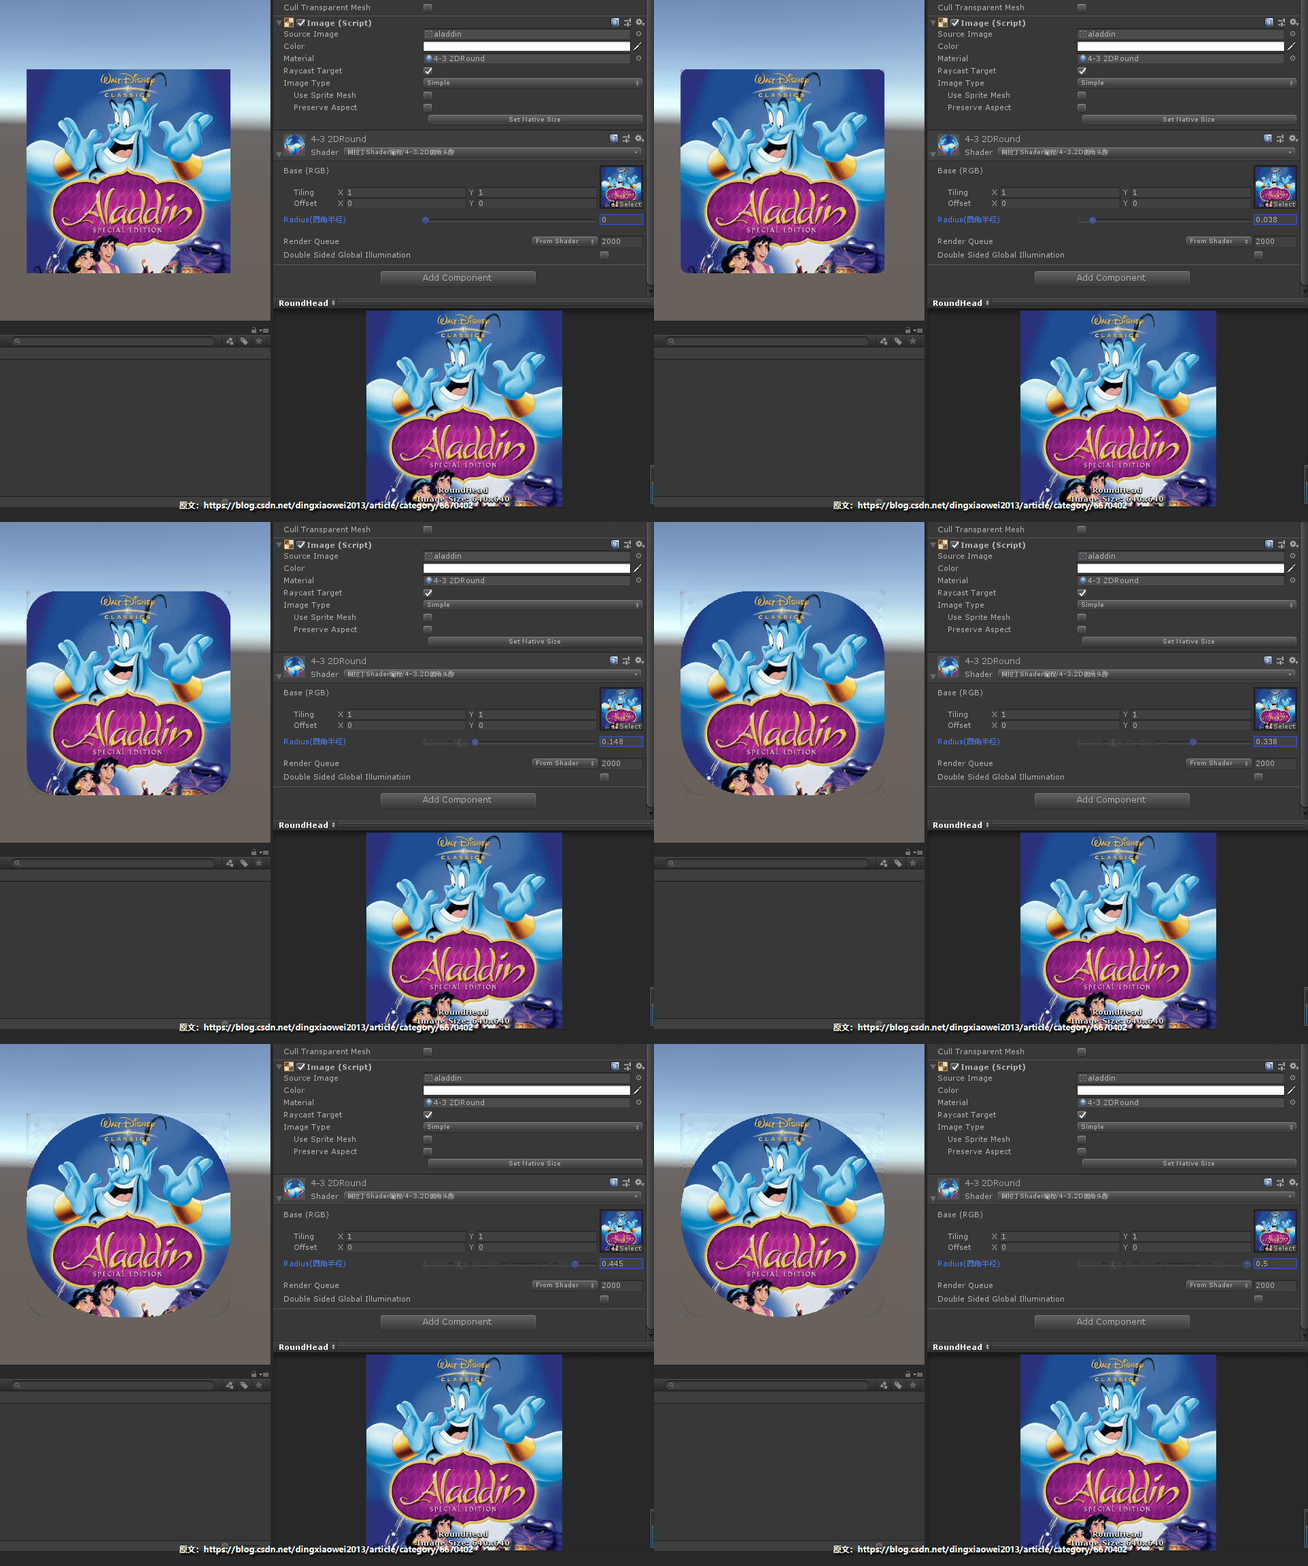
圆角头像
效果
核心思路

根据圆相关的知识,将正方形图分成四块象限区域然后每个象限一个最大的半径为0.5的圆,计算像素是否在圆角之内是关键核心,首先计算四个圆心中间的像素,然后在根据像素距离圆心的长度是否交于半径,小于则在圆角之内,否则舍弃。
代码
//-----------------------------------------------【Shader说明】--------------------------------------------------------
//     Shader功能:   2D圆角头像
//	   核心思路:根据圆相关的知识,将正方形图分成四块象限区域然后每个象限一个最大的半径为0.5的圆,计算像素是否在圆角
//     之内是关键核心,首先计算四个圆心中间的像素,然后在根据像素距离圆心的长度是否交于半径,小于则在圆角之内,否则舍弃
//     使用语言:   Shaderlab
//     开发所用IDE版本:Unity2018.3.6 、Visual Studio 2017
//     2016年9月16日  Created by Aladdin(阿拉丁)
//     更多内容或交流请访问我的博客:http://blog.csdn.net/s10141303/article/category/6670402
//---------------------------------------------------------------------------------------------------------------------

Shader "阿拉丁Shader编程/4-3.2D圆角头像" {
	Properties {
		_MainTex ("Base (RGB)", 2D) = "white" {}
		_RADIUSBUCE("Radius(圆角半径)",Range(0,0.5))= 0.2   //圆角半径
	}
	SubShader
	{
		pass
		{
			CGPROGRAM
			#pragma exclude_renderers gles
			#pragma vertex vert
			#pragma fragment frag
			#include "unitycg.cginc"
			float _RADIUSBUCE;
			sampler2D _MainTex;

			struct v2f
			{
				float4 pos : SV_POSITION;
				float2 ModeUV: TEXCOORD0;
				float2 RadiusBuceVU : TEXCOORD1;
			};
			v2f vert(appdata_base v)
			{
				v2f o;
				o.pos=UnityObjectToClipPos(v.vertex); //v.vertex;
				o.ModeUV=v.texcoord;
				o.RadiusBuceVU=v.texcoord-float2(0.5,0.5);       //将模型UV坐标原点置为中心原点,为了方便计算  原本坐标原点在左下角
				return o;
			}


			fixed4 frag(v2f i):COLOR
			{
				fixed4 col;
				col=(0,1,1,0);

				if(abs(i.RadiusBuceVU.x)<0.5-_RADIUSBUCE||abs(i.RadiusBuceVU.y)<0.5-_RADIUSBUCE)   //像素点坐标在中间一块	不在四个角落	渲染原本的图元颜色
				{
					col=tex2D(_MainTex,i.ModeUV);
				}
				else //如果在四个角落
				{
					if(length(abs(i.RadiusBuceVU)-float2(0.5-_RADIUSBUCE,0.5-_RADIUSBUCE)) <_RADIUSBUCE)  //在圆角的内的像素 坐标到圆心的距离是否小于半径 小于则在圆角之内
					{
						col=tex2D(_MainTex,i.ModeUV);
					}
					else
					{
						discard;  //舍弃图元 相当于clip
					}
				}
				return col;
			}
			ENDCG
		}
	}
}
图片模糊
前言
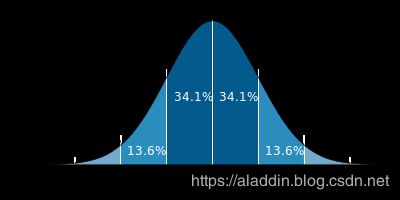
图片模糊是比较常用的效果,想必我们都听过高斯模糊,模糊常用于屏幕后期处理,还有UI为了凸显某个窗体然后将背景图模糊等。
效果
核心思路
对片源着色器里对单个图元的颜色叠加混合周边的颜色然后再取平均,最典型的应当属于高斯模糊,涉及到高斯正态分布公式。
代码
//-----------------------------------------------【Shader说明】--------------------------------------------------------
//     Shader功能:   2D模糊
//	   核心思路:  在片源着色器里对单个图元累加周边的颜色然后再取平均,高斯模糊涉及到高斯公式(高斯正太分布公式)
//     使用语言:   Shaderlab
//     开发所用IDE版本:Unity2018.3.6 、Visual Studio 2017
//     2016年9月16日  Created by Aladdin(阿拉丁)
//     更多内容或交流请访问我的博客:http://blog.csdn.net/s10141303/article/category/6670402
//---------------------------------------------------------------------------------------------------------------------

Shader "阿拉丁Shader编程/4-4.2D模糊"
{
    Properties
	{
		_MainTex ("Texture", 2D) = "white" {}
		_BlurRadius ("BlurRadius", Range(2, 15)) = 5  //模糊半径
		_TextureSize ("TextureSize", Float) = 640
	}
	SubShader
	{
		Cull Off ZWrite Off ZTest Always

		Pass
		{
			CGPROGRAM
			#pragma vertex vert
			#pragma fragment frag

			#include "UnityCG.cginc"

			struct appdata
			{
				float4 vertex : POSITION;
				float2 uv : TEXCOORD0;
			};

			struct v2f
			{
				float2 uv : TEXCOORD0;
				float4 vertex : SV_POSITION;
			};

			v2f vert (appdata v)
			{
				v2f o;
				o.vertex = UnityObjectToClipPos(v.vertex);
				o.uv = v.uv;
				return o;
			}

			sampler2D _MainTex;
			int _BlurRadius;
			float _TextureSize;

			//这一步其实可以用计算出来的常量来替代,不需要在循环中每一步计算
			float GetGaussWeight(float x, float y, float sigma)
			{
				float sigma2 = pow(sigma, 2.0f);		//pow 次方公式 这里是平方
				float left = 1 / (2 * sigma2 * 3.1415926f);
				float right = exp(-(x*x+y*y)/(2*sigma2));	 //e的指数幂
				return left * right;
			}

			fixed4 GaussBlur(float2 uv)		 //高斯模糊 根据高斯公式计算出的颜色值
			{
				//因为高斯函数中3σ以外的点的权重已经很小了,因此σ取半径r/3的值
				float sigma = (float)_BlurRadius / 3.0f;
				float4 col = float4(0, 0, 0, 0);
				for (int x = - _BlurRadius; x <= _BlurRadius; ++x)
				{
					for (int y = - _BlurRadius; y <= _BlurRadius; ++y)
					{
						//获取周围像素的颜色
						//因为uv是0-1的一个值,而像素坐标是整形,我们要取材质对应位置上的颜色,需要将整形的像素坐标
						//转为uv上的坐标值
						float4 color = tex2D(_MainTex, uv + float2(x / _TextureSize, y / _TextureSize));
						//获取此像素的权重
						float weight = GetGaussWeight(x, y, sigma);
						//计算此点的最终颜色
						col += color * weight;	//颜色乘以权重
					}
				}
				return col;
			}

			fixed4 SimpleBlur(float2 uv)
			{
				float4 col = float4(0, 0, 0, 0);
				for (int x = - _BlurRadius; x <= _BlurRadius; ++x)
				{
					for (int y = - _BlurRadius; y <= _BlurRadius; ++y)
					{
						float4 color = tex2D(_MainTex, uv + float2(x / _TextureSize, y / _TextureSize));
						//简单的进行颜色累加
						col += color;
					}
				}
				//取平均数,所取像素为边长为(半径*2+1)的矩阵
				col = col / pow(_BlurRadius * 2 + 1, 2.0f);
				return col;
			}

			fixed4 frag (v2f i) : SV_Target
			{
				//float4 col = GaussBlur(i.uv);
				float4 col = SimpleBlur(i.uv);
				return col;
			}
			ENDCG
		}
	}
    FallBack "Diffuse"
}
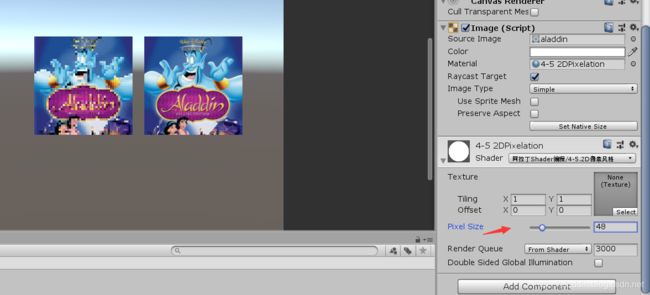
像素风格
效果
核心思路
对UV进行放大,然后截取整数部分,然后再缩回原大小,UV精度丢失,就形成马赛克效果
代码
//-----------------------------------------------【Shader说明】--------------------------------------------------------
//     Shader功能:   2D像素风格
//	   核心思路:   对UV进行放大,然后截取整数部分,然后再缩回原大小,UV精度丢失,就形成马赛克效果
//     使用语言:   Shaderlab
//     开发所用IDE版本:Unity2018.3.6 、Visual Studio 2017
//     2016年9月16日  Created by Aladdin(阿拉丁)
//     更多内容或交流请访问我的博客:http://blog.csdn.net/s10141303/article/category/6670402
//---------------------------------------------------------------------------------------------------------------------

Shader "阿拉丁Shader编程/4-5.2D像素风格" {
	Properties
	{
		_MainTex("Texture", 2D) = "white" {}
		_PixelSize("Pixel Size", Range(1,256)) = 64
	}
		SubShader
		{
			Tags { "Queue" = "Transparent" }
			Blend SrcAlpha OneMinusSrcAlpha

			Pass
			{
				CGPROGRAM
				#pragma vertex vert
				#pragma fragment frag

				#include "UnityCG.cginc"

				struct appdata
				{
					float4 vertex : POSITION;
					float2 uv : TEXCOORD0;
				};

				struct v2f
				{
					float2 uv : TEXCOORD0;
					float4 vertex : SV_POSITION;
				};

				sampler2D _MainTex;
				float4 _MainTex_ST;
				float _PixelSize;

				v2f vert(appdata v)
				{
					v2f o;
					o.vertex = UnityObjectToClipPos(v.vertex);
					o.uv = TRANSFORM_TEX(v.uv, _MainTex);
					return o;
				}

				fixed4 frag(v2f i) : SV_Target
				{
					fixed4 col;

					float ratioX = (int)(i.uv.x * _PixelSize) / _PixelSize;
					float ratioY = (int)(i.uv.y * _PixelSize) / _PixelSize;

					col = tex2D(_MainTex, float2(ratioX, ratioY));

					if (col.a < 0.5)
					{
						col.a = 0;
					}

					return col;
				}
				ENDCG
			}
		}
}
更多效果待添加。。。
更多优质文章:[Aladdin的博客](http://dingxiaowei.cn)
工程地址
https://github.com/dingxiaowei/AladdinShader
Shader交流群
316977780
更多精品文章
Aladdin的博客


