Ubuntu16.04 + CUDA + cuDNN + virtualenv + Tensorflow
Prerequirement:
HardWare:
motherboard: Support extended independent graphics card(GPU)
CPU: i7-7* or better
Memory: 16G or more
SSD: 256G or more
GPU: NVIDIA GTX1080Ti
Power: 550W(one GPU)
System:
Ubuntu 16.04
CUDA:
Download
cuDNN:
Download(must login first)
GCC:
Verify the System Has gcc installed:
gcc --version1. Install the driver of GPU:
 Type [Apply Changes] then wait some minutes, last restart computer.
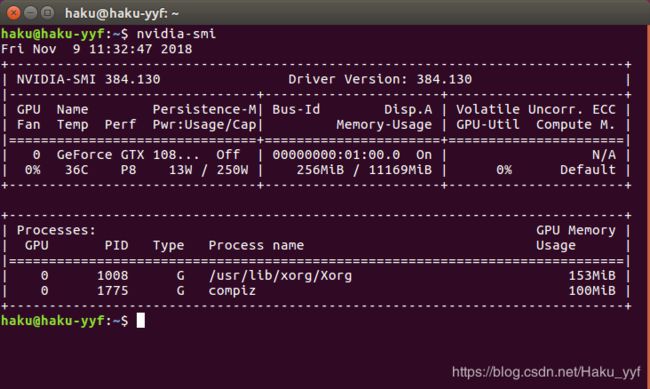
last open a terminal,run the following bash code,then if the following figure appears, the driver installation is successful.
nvidia-smi
2. Install CUDA
Type [Legacy Releases] choose the version you want, Here I choose cuda9.0
start install the file with the extension deb:(Once you've downloaded it, follow the installation instructions on the website.)
After installation, we must declare the enviroment variable and write it to the end of '~/.bashrc':
export CUDA_HOME=/usr/local/cuda
export PATH=$PATH:$CUDA_HOME/bin
export LD_LIBRARY_PATH=/usr/local/cuda-9.0/lib64${LD_LIBRARY_PATH:+:${LD_LIBRARY_PATH}}
save and quit then run the following code:
source ~/.bashrcIf no any error reports , it's OK!
3. Install cuDNN
After downloading the cuDNN package(.tgz) on the official website, then decompressing it with `tar`
tar -xvf cudnn-9.0-linux-x64-v7.4.1.5.tgzthen copy the corresponding file to the cuda directory.
sudo cp cuda/include/cudnn.h /usr/local/cuda/include/
sudo cp cuda/lib64/libcudnn* /usr/local/cuda/lib64/
sudo chmod a+r /usr/local/cuda/include/cudnn.h
sudo chmod a+r /usr/local/cuda/lib64/libcudnn*
then establish the soft connection of cuDNN,
cd /usr/local/cuda/lib64/
sudo rm -rf libcudnn.so libcudnn.so.7
sudo ln -s libcudnn.so.7.4.1 libcudnn.so.7
sudo ln -s libcudnn.so.7 libcudnn.so
sudo ldconfig
that's OK!
4. Install virtual environment of python3
apt install python-pip
apt install python3-pip
check:
pip -V
pip3 -V
Then:
pip install virtualenv
pip install virtualenvwrapper
pip3 install virtualenv
pip3 install virtualenvwrapper
declare the enviroment variable and write it to the end of '~/.bashrc':
export VIRTUALENVWRAPPER_PYTHON=/usr/bin/python3
export WORKON_HOME=$HOME/.virtualenvs
source ~/.local/bin/virtualenvwrapper.sh
then run
source ~/.bashrcif no any error report, it's OK!
now create a virtual environment yyf(the name of your virtual environment):
mkvirtualenv yyfEnter the virtual environment, execute the command,
workon yyfExit the virtual environment, execute the command,
deactivate yyfit's OK!
5. Install Tensorflow-GPU with pip
first enter the virtual environment
workon yyfthen
pip install tensorflow-gpuwait some minutes
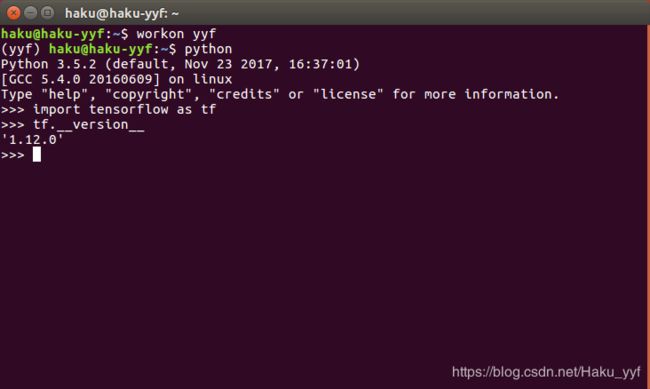
then , check
That's All , Thank you !
Reference:
cudnn
virtualenv


