ROS下单目和双目相机的标定
参考:http://wiki.ros.org/camera_calibration
ROS下相机标定
标定方法:
可以通过matlab,OpenCV,ROS三种方式进行相机标定。
ROS提供了camera_calibration Package:image_pipeline,通过这个Package可以使用棋盘标定板对单目和双目相机进行标定。
另外推荐一个标定工具Kalibr:Kalibr,可以实现Multiple camera calibration、Camera-IMU calibration、Rolling Shutter Camera calibration。
ROS官方提供了用于单目或者双目标定的camera_calibration包。这个包是使用opencv里的张正友标定法。
环境配置
- 安装相机驱动 usb_cam
cd catkin_ws/src
git clone https://github.com/bosch-ros-pkg/usb_cam.git
cd ..
catkin_make
- 安装编译image_pipeline包
cd catkin_ws/src
git clone  https://github.com/ros-perception/image_pipeline.git
cd ..
rosdep install --from-paths src --ignore-src   # 安装image_pipeline 所需的依赖
catkin_make
编译报错:Project ‘eigen_conversion’ specifies ’ /usr/locate/eigen3’ as an include dir, which is not found.
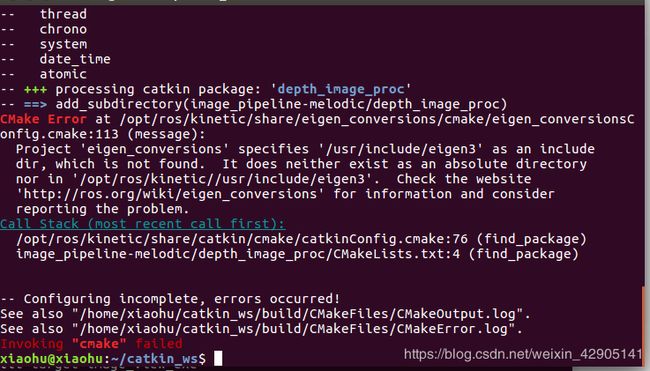
解决:
sudo cp -r usr/locate/eigen3 usr/include
eigen3被默认安装到了usr/include里了(系统默认的路径)
1. 单目标定
本次标定用笔记本电脑自带的摄像头
启动相机
roslaunch usb_cam usb_cam-test.launch
查看相机话题名称
用rostopic list命令查看
如下:
/usb_cam/camera_info
/usb_cam/image_raw
启动标定程序
rosrun camera_calibration cameracalibrator.py --size 6x7 --square 0.108 image:=/usb_cam/image_raw camera:=/usb_cam
此命令运行标定结点的python脚本,其中 :
(1)–size 6x7 为当前标定板的大小
(2)–square 0.108为每个棋盘格的边长
(3)image:=/camera/image_raw标定当前订阅图像来源自名为/camera/image_raw的topic
(4)camera:=/camera为摄像机名,(即在/image_raw前面部分)
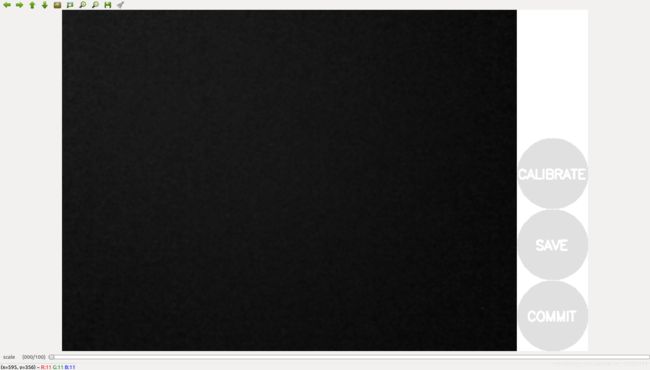
这将打开标定窗口,如图所示。
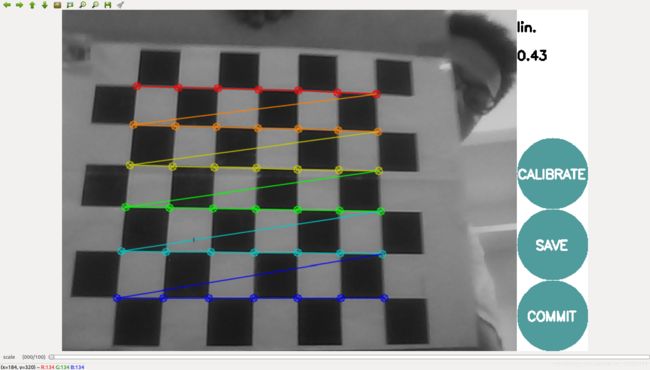
 当calibration按钮亮起时,代表已经有足够的数据进行摄像头的标定,此时请按下calibration并等待一分钟左右。如图所示。
**** Calibrating ****
('D = ', [-0.05651230673613042, 0.05365333789734001, 0.011954617047270473, -0.007954085488820484, 0.0])
('K = ', [563.3143134843859, 0.0, 309.5068045388687, 0.0, 564.0055491490933, 241.35221521036223, 0.0, 0.0, 1.0])
('R = ', [1.0, 0.0, 0.0, 0.0, 1.0, 0.0, 0.0, 0.0, 1.0])
('P = ', [559.8577880859375, 0.0, 304.33687100739917, 0.0, 0.0, 561.94921875, 246.2792387874797, 0.0, 0.0, 0.0, 1.0, 0.0])
None
# oST version 5.0 parameters


[image]

width
640

height
480

[narrow_stereo]

camera matrix
563.314313 0.000000 309.506805
0.000000 564.005549 241.352215
0.000000 0.000000 1.000000

distortion
-0.056512 0.053653 0.011955 -0.007954 0.000000

rectification
1.000000 0.000000 0.000000
0.000000 1.000000 0.000000
0.000000 0.000000 1.000000

projection
559.857788 0.000000 304.336871 0.000000
0.000000 561.949219 246.279239 0.000000
0.000000 0.000000 1.000000 0.000000
When you click on the “Save” button after a succesfull calibration, the data (calibration data and images used for calibration) will be written to /tmp/calibrationdata.tar.gz.
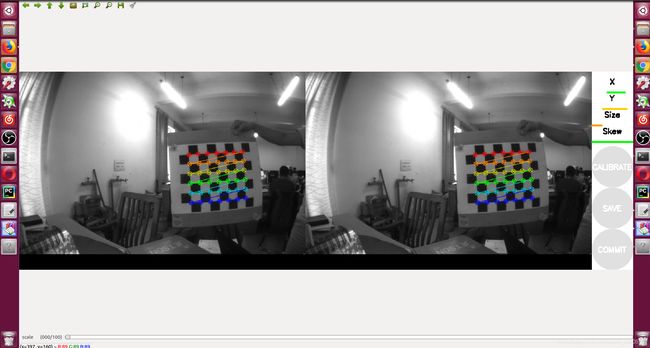
2. 双目标定
使用小觅的双目摄像头
运行节点:
roslaunch mynt_eye_ros_wrapper mynteye.launch
查看相机topic
rostopic list
如下:
/mynteye/right/image_raw
/mynteye/left/image_raw
启动标定程序
rosrun camera_calibration cameracalibrator.py --size 7x6 --square 0.108 --no-service-check --approximate=0.1 right:=/right/image_raw_color left:=/left/image_raw_color right_camera:=/mynteye/right left_camera:=/mynteye/left
Left:
('D = ', [-0.3153135896494001, 0.08922897369815266, -0.0002901905072099891, 0.0013458912791125815, 0.0])
('K = ', [360.8622464893198, 0.0, 388.85768685450614, 0.0, 362.6297239043804, 266.69728029954047, 0.0, 0.0, 1.0])
('R = ', [0.8780352507831123, -0.47856253594806547, 0.005656639390464657, 0.47856253594806547, 0.8777728998218779, -0.022195394235022585, 0.005656639390464657, 0.022195394235022585, 0.9997376490387657])
('P = ', [1099.5137871406264, 0.0, 376.4960060119629, 0.0, 0.0, 1099.5137871406264, 271.408206820488, 0.0, 0.0, 0.0, 1.0, 0.0])

Right:
('D = ', [-0.3153135896494001, 0.08922897369815266, -0.0002901905072099891, 0.0013458912791125815, 0.0])
('K = ', [360.8622464893198, 0.0, 388.85768685450614, 0.0, 362.6297239043804, 266.69728029954047, 0.0, 0.0, 1.0])
('R = ', [0.8780352507831123, -0.47856253594806547, 0.005656639390464657, 0.47856253594806547, 0.8777728998218779, -0.022195394235022585, 0.005656639390464657, 0.022195394235022585, 0.9997376490387657])
('P = ', [1099.5137871406264, 0.0, 376.4960060119629, 0.0, 0.0, 1099.5137871406264, 271.408206820488, -4.2339274257936083e-10, 0.0, 0.0, 1.0, 0.0])
('self.T ', [-1.8428136778322234e-13, -3.380063804237598e-13, 8.546840383179693e-15])
('self.R ', [1.0, -9.875948024418507e-14, 9.330047922141889e-14, 9.875948024418507e-14, 1.0, 1.4596901161827484e-13, -9.330047922141889e-14, -1.4596901161827484e-13, 1.0])
None
# oST version 5.0 parameters


[image]

width
752

height
480

[narrow_stereo/left]

camera matrix
360.862246 0.000000 388.857687
0.000000 362.629724 266.697280
0.000000 0.000000 1.000000

distortion
-0.315314 0.089229 -0.000290 0.001346 0.000000

rectification
0.878035 -0.478563 0.005657
0.478563 0.877773 -0.022195
0.005657 0.022195 0.999738

projection
1099.513787 0.000000 376.496006 0.000000
0.000000 1099.513787 271.408207 0.000000
0.000000 0.000000 1.000000 0.000000

# oST version 5.0 parameters


[image]

width
752

height
480

[narrow_stereo/right]

camera matrix
360.862246 0.000000 388.857687
0.000000 362.629724 266.697280
0.000000 0.000000 1.000000

distortion
-0.315314 0.089229 -0.000290 0.001346 0.000000

rectification
0.878035 -0.478563 0.005657
0.478563 0.877773 -0.022195
0.005657 0.022195 0.999738

projection
1099.513787 0.000000 376.496006 0.000000
0.000000 1099.513787 271.408207 -0.000000
0.000000 0.000000 1.000000 0.000000
When you click on the “Save” button after a succesfull calibration, the data (calibration data and images used for calibration) will be written to /tmp/calibrationdata.tar.gz.