Ansible
[TOC]
1 安装
Ansible默认通过 SSH 协议管理机器
#检查python是否安装
$python --version
#使用yum安装
$yum -y install ansible
$ansible --version
将管理节点的public SSH key scp到远程的主机上
#为了避免在建立SSH连接时,重复输入密码你可以这么做
$ssh-agent bash
$ssh-add ~/.ssh/id_rsa
ssh-agent
ssh-agent是密钥管理器,是一种控制用来保存公钥身份验证所使用的私钥的程序
运行ssh-agent以后,使用ssh-add将私钥交给ssh-agent保管,其他程序需要身份验证的时候可以将验证申请交给ssh-agent来完成整个认证过程
ssh-agent是管理多个ssh key的代理,受管理的私钥通过ssh-add来添加
#编辑/etc/ansible/hosts, 添加hosts
$vi /etc/ansible/hosts
#ping你的所有节点
$ansible all -m ping
#对你的所有节点运行一个命令
$ansible all -a "/bin/echo hello"
Ansible 可同时操作属于一个组的多台主机,组和主机之间的关系通过 inventory 文件配置. 默认的文件路径为 /etc/ansible/hosts
ex
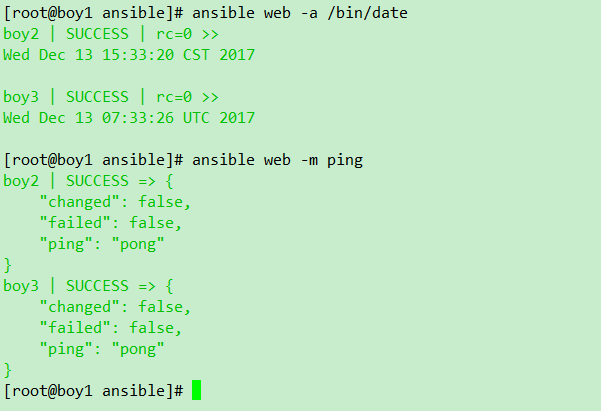
$ansible web -a /bin/date
$ansible web -m ping
$ansible web -s -m yum -a "name=openssl state=latest"
$ansible boy3 -m yum -a "name=httpd state=installed"
2 Playbooks
Playbooks学习笔记
Playbooks 是 Ansible的配置,部署,编排语言.他们可以被描述为一个需要希望远程主机执行命令的方案,或者一组IT程序运行的命令集合
3 ansible.cfg
主配置文件,可以根据实际应用自行修改
cat /etc/ansible/ansible.cf
[defaults]
# some basic default values...
hostfile       = /etc/ansible/hosts   //指定默认hosts配置的位置
# library_path = /usr/share/my_modules/
remote_tmp     = $HOME/.ansible/tmp
pattern        = *
forks          = 5
poll_interval  = 15
sudo_user      = root  //远程sudo用户
#ask_sudo_pass = True  //每次执行ansible命令是否询问ssh密码
#ask_pass      = True  //每次执行ansible命令时是否询问sudo密码
transport      = smart
remote_port    = 22
module_lang    = C
gathering = implicit
host_key_checking = False    //关闭第一次使用ansible连接客户端是输入命令提示
log_path    = /var/log/ansible.log //需要时可以自行添加。chown -R root:root ansible.log
system_warnings = False    //关闭运行ansible时系统的提示信息,一般为提示升级

# set plugin path directories here, separate with colons
action_plugins     = /usr/share/ansible_plugins/action_plugins
callback_plugins   = /usr/share/ansible_plugins/callback_plugins
connection_plugins = /usr/share/ansible_plugins/connection_plugins
lookup_plugins     = /usr/share/ansible_plugins/lookup_plugins
vars_plugins       = /usr/share/ansible_plugins/vars_plugins
filter_plugins     = /usr/share/ansible_plugins/filter_plugins
fact_caching = memory

[accelerate]
accelerate_port = 5099
accelerate_timeout = 30
accelerate_connect_timeout = 5.0
# The daemon timeout is measured in minutes. This time is measured
# from the last activity to the accelerate daemon.
accelerate_daemon_timeout = 30
4 hosts
Ansible 可同时操作属于一个组的多台主机,组和主机之间的关系通过 inventory 文件配置. 默认的文件路径为 /etc/ansible/hosts
这个主机清单信息配置文件,可以自定义主机,支持IP,域名,支持分组
cat /etc/ansible/hosts
[host01]  //分组名,[]表示主机的分组名,可以按照功能、系统等进行分类,便于对某些主机或者某一组功能相同的主机进行操作
10.11.8.21 ansible_ssh_user=root ansible_ssh_pass=Passwd    //远程ip,ssh登录用户,密码
10.11.8.28 ansible_ssh_user=root ansible_ssh_pass=GxwLaXOs&1SK
10.10.30.50                //若主机间进行的秘钥通信,则只需要添加主机 ip 就行了
[host02]
10.11.2.28

[web]
10.11.0.25
10.11.0.26
[web:var]            //统一对web组设置变量
ansible_ssh_port=22
ansible_ssh_user=root
ansible_ssh_pass=123456

[db]
10.11.1.10
test ansible_ssh_port=5555 ansible_ssh_host=10.11.15    //设置主机别名为 test
10.11.1.11:2156                   //指定ssh端口
www[001:006].example.com          //支持通配符 www001 www002 ..
new-[a:f]-node.example.com        //支持字母匹配 new-a-node.example.com new-b-node.example.com ...

[server:children]   //组可以包含其它组
web
db
[test]
host01
host02
hosts 文件支持一些特定指令,所有支持的指令如下
ansible_ssh_host:指定主机别名对应的真实 IP,如:251 ansible_ssh_host=183.60.41.251,随后连接该主机无须指定完整 IP,只需指定 251 就行

ansible_ssh_port:指定连接到这个主机的 ssh 端口,默认 22

ansible_ssh_user:连接到该主机的 ssh 用户

ansible_ssh_pass:连接到该主机的 ssh 密码(连-k 选项都省了),安全考虑还是建议使用私钥或在命令行指定-k 选项输入

ansible_sudo_pass:sudo 密码

ansible_sudo_exe(v1.8+的新特性):sudo 命令路径

ansible_connection:连接类型,可以是 local、ssh 或 paramiko,ansible1.2 之前默认为 paramiko

ansible_ssh_private_key_file:私钥文件路径

ansible_shell_type:目标系统的 shell 类型,默认为 sh,如果设置 csh/fish,那么命令需要遵循它们语法

ansible_python_interpreter:python 解释器路径,默认是/usr/bin/python,但是如要要连*BSD系统的话,就需要该指令修改 python 路径

ansible_*_interpreter:这里的"*"可以是 ruby 或 perl 或其他语言的解释器,作用和 ansible_python_interpreter 类似

例子:
  some_host ansible_ssh_port=2222 ansible_ssh_user=manager
  aws_host ansible_ssh_private_key_file=/home/example/.ssh/aws.pem
  freebsd_host ansible_python_interpreter=/usr/local/bin/python
  ruby_module_host ansible_ruby_interpreter=/usr/bin/ruby.1.9.3
5 建立互信
建立互信:减少每次输入密码的麻烦
$ansible all -m copy -a "src=/root/.ssh/id_rsa.pub dest=/root" -k
$ansible all -m shell -a "cat /root/id_rsa.pub >> /root/.ssh/authorized_keys"
$ansible all -m shell -a "rm -f /root/id_rsa.pub"
6 ansible 命令语法
#ansible命令最常用的用法
$ansible  [-f forks] [-m module_name] [-a args]
$ansible  -m MOE -a 'MOD_ARV' 所支持的模块可以使用ansible-doc -l来查看
每个模块的用法可以使用 ansible-doc MOD 来查看
#查看所有模块信息
$ansible-doc -l
#查看command模块的信息
$ansible-doc command
注意:如果运行ansible报错:"msg": "Error: ansible requires a json module, none found!", 需要在被控机上安装python``-``simplejson
$yum install -y python-simplejson`
7 ansible例子
#ping 所有的节点
$ansible all -m ping
$ansible 127* -m ping
$ansible -i /etc/ansible/hosts -m command -a "uptime"
$ansible all -m ping -u test
$ansible all -m ping -u test --sudo
$ansible all -m ping -u test --sudo --sudo-user tom

#使用 filter 过滤信息
$ansible testhost -m setup -a "filter=ansible_all_ipv4_addresses"

#重启testhosts组的所有机器,每次重启10台
$ansible testhosts -a "/sbin/reboot" -f 10

#ansible testhosts -m copy -a "src=/etc/hosts dest=/tmp/hosts" \\拷贝本地hosts 文件到testhosts组所有主机的/tmp/hosts

#ansible webservers -m file -a "dest=/srv/foo/a.txt mode=600" \\file 模块允许更改文件的用户及权限
#ansible webservers -m file -a "dest=/srv/foo/b.txt mode=600 owner=mdehaan group=mdehaan"
#ansible webservers -m file -a "dest=/path/to/c mode=755 owner=mdehaan group=mdehaan state=directory" \\使用 file 模块创建目录,类似 mkdir -p
#ansible webservers -m file -a "dest=/path/to/c state=absent" \\file 模块允许更改文件的用户及权限

#ansible testhosts -a 'cal'  \\默认是使用 command 模块,所以使用command的命令时不用添加 -m
#ansible webhosts -m command -a 'date' \\在 hosts 文件中的 webhosts 组下的所有主机都使用 date 命令
#ansible webhosts -m command -a 'ping' \\在 hosts 文件中的 webhosts 组下的所有主机都使用 date 命令
#ansible testhosts -m service -a "name=ntpd state=restarted"

使用 user 模块对于创建新用户和更改、删除已存在用户非常方便:
ansible all -m user -a "name=foo password="
ansible all -m user -a "name=foo state=absent"

服务管理:
  ansible webservers -m service -a "name=httpd state=started"  \\确保 webservers 组所有主机的 httpd 是启动的
  ansible webservers -m service -a "name=httpd state=restarted" \\重启 webservers 组所有主机的 httpd 服务
  ansible webservers -m service -a "name=httpd state=stopped"  \\确保 webservers 组所有主机的 httpd 是关闭的

后台运行:
 长时间运行的操作可以放到后台执行,ansible 会检查任务的状态;在主机上执行的同一个任务会分配同一个 job ID
  ansible all -B 3600 -a "/usr/bin/long_running_operation --do-stuff" \\后台执行命令 3600s,-B 表示后台执行的时间
  ansible all -m async_status -a "jid=123456789"  \\检查任务的状态
  ansible all -B 1800 -P 60 -a "/usr/bin/long_running_operation --do-stuff" \\后台执行命令最大时间是 1800s 即 30 分钟,-P 每 60s 检查下状态默认 15s

搜集系统信息:
  ansible all -m setup \\搜集主机的所有系统信息
  ansible all -m setup --tree /tmp/facts \\搜集系统信息并以主机名为文件名分别保存在/tmp/facts 目录
  ansible all -m setup -a 'filter=ansible_*_mb' \\搜集和内存相关的信息
  ansible all -m setup -a 'filter=ansible_eth[0-2]' \\搜集网卡信息
2017-12-15-Boy

