作者个人网站:http://www.harddone.com
前篇提要
在上一篇中,我们主要介绍了服务器的环境安装。在本文中,我们将就具体的操作步骤加以说明并截图展示。
利用 Hugo 生成静态网站
1. 创建项目目录
在您本地合适的目录下创建一个空文件夹,命名为BlogTest, 为了方便之后的命令行演示,我们假设刚才创建的目录完整路径为:
/xxx/xxx/xxx/BlogTest
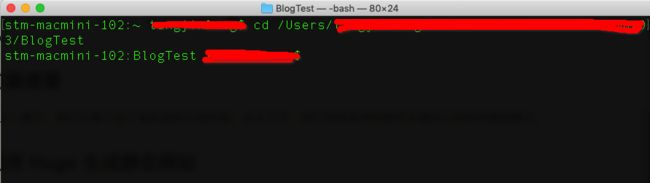
2. 新建网站
- 打开终端执行Hugo命令,新建一个网站:
hugo new site /xxx/xxx/xxx/BlogTest
- 然后进入新建的网站目录,准备后续的命令操作。
cd /xxx/xxx/xxx/BlogTest
-
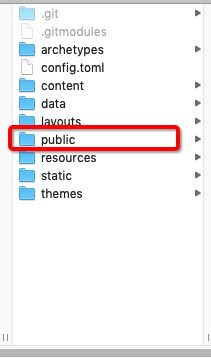
打开刚才创建的目录,我们可以发现,hugo已经自动帮我们生成了很多文件,这些就是跟创建网站相关的资源。执行完
hugo new site xxx命令其实是没有public文件夹,该目录是之后生成静态网站资源用以发布时产生的。
 hugo_1_11.png
 接下来,依次执行下列命令行,详细解释参考注释。
# git 初始化
git init

# 将主题ananke作为外链加入的本地仓库
git submodule add https://github.com/budparr/gohugo-theme-ananke.git themes/ananke

# 修改hugo 配置文件,应用刚才下载的博客主题
echo 'theme = "ananke"' >> config.toml

# 将public 作为外链加入到本地仓库,请注意换成你自己在GitHub所持创建的仓库地址
git submodule add -b master https://github.com/LazyBonesLZ/LazyBonesLZ.github.io.git public

# 本地仓库跟你创建的网站源码GitHub仓库关联
git remote add origin https://github.comazyBonesLZ/BlogTest.git

# 添加你的第一篇博客
hugo new post/firstblog.md
# 创建的第一篇博客在content/post目录下,用熟悉的编辑工具打开该目录下的firstblog.md
open content/post
-
编辑你的第一篇博客内容,跟普通的markdown风格文件操作一样。需要注意的地方如示例截图所示:
 hugo_1_12.png
 保存文本内容后,然后执行hugo提供的调试命令查看效果,检查博客文档效果是否生效:
hugo server -D

# 然后在浏览器访问
http://localhost:1313/
3.正式生成用以发布的网站文件
上一步中的 hugo server -D 是用以调试的命令,不会在public目录下生成文件。要生成用以发布的文件,我们需要先配置好hugo 配置文件。
- 打开
config.toml文件
# 如果已有域名,配置成指向服务器的域名,否则直接配置为服务器的IP
baseURL = "http://blog.harddone.com/"
languageCode = "en-us"
title = "My New Hugo Site"
#  设置博客主题,如果以后要更改,直接改变该值设置
theme = "ananke"
-
配置发布脚本
在完成Hugo网站配置文件后,直接执行hugo命令就可以生成public文件夹下的静态网站资源内容。直接发布到服务器就完成了一个静态网站的部署。记得我们在第一篇提到,public下的内容会被push到GitHub做一个备份,然后服务器通过git 来抓取完成博客的更新。所以为了操作方便,我们把这一系列的操作写成可执行脚本,自动化。
# cd  到项目根目录
cd xx/xx/BlogTest
# 新建脚本文件 deploy.sh
vim deploy.sh
保存以下脚本内容:
echo -e "\033[0;32mDeploying updates to GitHub...\033[0m" # Build the project. hugo # if using a theme, replace with `hugo -t` # Go To Public folder cd public # Add changes to git. git add . # Commit changes. msg="rebuilding site `date`" if [ $# -eq 1 ] then msg="$1" fi git commit -m "$msg" # Push source and build repos. git push origin master # Come Back up to the Project Root cd ..
然后在更新博客后,直接在终端执行:
./deploy.sh "这里填写提交git的log"
是不是感觉简单明了了?到目前为止,我们还只是完成了将本地网站的源码和要发布的网站资源自动push到GitHub仓库。
接下来,服务器还需要一些配置,才能达到我们在第一篇文章中设置的目标:自动化部署。
服务器配置
1. 网站根目录
#  创建网站根目录
mkdir blog2

# cd 到目录blog2
cd blog2

# git 初始化
git init
git remote add origin https://github.com/LazyBonesLZ/LazyBonesLZ.github.io.git

# 从 Github第一次抓取
git pull origin master
2.webhook服务
利用Github提供的webhook功能,我们需要在服务器端启动一个webhook的服务,用以监听来自LazyBonesLZ.github.io仓库的push event。每当收到这样的消息,我们就可以在服务器执行脚本,从该仓库抓取最新资源,达到博客内容实时更新的目的。
2.1 创建webhook目录,创建脚本git_pull.sh
#创建目录
mkdir webhook
#进入目录
cd webhook
# 创建脚本
vim git_pull.sh
在脚本中保存以下内容:
cd /root/blog2
git pull origin master
exit 0
2.2 github_webhook.js脚本
- 我们需要用到nodejs来监听来自GitHub的消息,需要用到中间件 github_webhook_handler, 我们使用npm 来安装:
npm install github_webhook_handler
-
新建
github_webhook.js脚本
该脚本主要参考https://www.xxxlbox.com/posts/2018/hugo-deployment-webhook/,但是我们用到是GitHub仓库而非Gitlab,所以做了细微改动。vim github_webhook.js写入以下脚本内容:
var http = require('http')
var exec = require('child_process').exec
var createHandler = require('github-webhook-handler')
var handler = createHandler({ path: '/webhook', secret: 'myxxxxx' })

http.createServer(function (req, res) {
handler(req, res, function (err) {
    res.statusCode = 404
    res.end('no such location')
  })
}).listen(7777)

handler.on('push', function (event) {
    let currentTime = new Date();
    console.log('\n--> ' + currentTime.toLocaleString());
    console.log('Received a push event for %s to %s', event.payload.repository.name, event.payload.ref);
    exec('sh ./webhook/git_pull.sh', function (error, stdout, stderr) {
        if(error) {
            console.error('error:\n' + error);
            return;
        }
        console.log('stdout:\n' + stdout);
        console.log('stderr:\n' + stderr);
    });
})
这个脚本利用的是Node.js的
child_process模块来执行shell脚本。上面的path: '/webhook'你可以任意设置,secret_key验证为myxxxxx。我们在购买服务器的时候,安全组配置时添加了7777端口,所以端口用的是7777,你可以随意设置,总之不要过于明显,但是要记得在阿里云控制台安全组添加端口。这样下来最终的监听地址就是http://0.0.0.0:7777/webhook了,0.0.0.0表示该http服务监听本机的所有ip上收到的请求,说白了就是0.0.0.0可以换成服务器的ip或者指向服务器的所有域名。拿我自己的服务器作例子就是http://blog.harddone.com:7777/webhook。 -
pm2启动脚本
我们用pm2来启动:pm2 start github-webhook.js,使用pm2 startup命令来设置脚本开机启动。pm2的更多高级用法还请查看文档。
3. Nginx配置更新
再次重申,本人菜鸟。对于nginx不甚了解。接下来给出所有的相关配置。更高级的玩儿法请自行深入。
- default.conf
vim /etc/nginx/conf.d/default.conf
#
# The default server
#

server {
#    listen       80 default_server;
#   listen       [::]:80 default_server;
  listen       80;
  server_name  _;
    root         /usr/share/nginx/html;

    # Load configuration files for the default server block.
    include /etc/nginx/default.d/*.conf;

    location / {

    }

    error_page 404 /404.html;
        location = /40x.html {
    }

    error_page 500 502 503 504 /50x.html;
        location = /50x.html {
    }

}
- blog.conf
新建blog.conf,重新指定nginx 根目录,否则网站很可能出现404.
cd /etc/nginx/conf.d/
vim blog.conf
server {
#    listen       80 default_server;
#   listen       [::]:80 default_server;
    listen     80;
    server_name  blog.harddone.com;
    root         /root/blog2; # 重新指定根目录

    # Load configuration files for the default server block.
    # include /etc/nginx/default.d/*.conf;

    location / {
       index index.html index.htm index.php;
       autoindex on;
    }

    # NodeJS 将 Web 服务跑在了 7777 端口,我们可以用 Nginx 反向代理到 80 端口
    location /webhook {
      alias /root/webhook;
      proxy_pass http://127.0.0.1:7777;
    }
    error_page 404 /404.html;
        location = /40x.html {
    }

    error_page 500 502 503 504 /50x.html;
        location = /50x.html {
    }

}
- 403 Forbidden
由于我的启动用户和nginx工作用户不一致。
解决方案:参考https://blog.csdn.net/reblue520/article/details/52799500
vim /etc/nginx/nginx.conf
#user nginx;  #将nginx改为root
user root;
- 重启Nginx
/etc/init.d/nginx restart
然后在浏览器输入http://blog.harddone.com验证服务是否正常。如果可以看到我们的网站示例,
恭喜,服务器端验证无误。
4. Github配置
到目前为止,我们已经完成了90%的工作。但是,我们还不能简单的完成自动化部署。为啥呢?因为Github的webhook功能还没激活呢。
登录Github,进入LazyBonesLZ.github.io仓库,点击Setting


注意事项:
第2步:'webhook'即 ‘github_webhook.js’ 中配置的path
第3步:必须选择‘application/json’,否则不起作用
第4步:‘Secret’即 ‘github_webhook.js’中配置的‘ secret_key’
一定要和脚本中设置一致,否则,你懂的!
好了,到目前为止,配置工作都已完成。
剩下的只是我们日常的简单操作了,如果我们某天又心血来潮,想写篇博客消遣消遣,该怎么做呢?
辛苦这么久的配置,就是为了这个时刻。
cd /xxx/xxx/BlogTest
hugo new post/MySecondBlog.md
# 呃~~编辑博客:想用什么编辑工具都可以, Markdown语法
# 编辑完了?嗯!
./deploy.sh
# 执行完后,不出意外的话,服务器已经已经更新了! 完美!

# ------------------
# 这样就完了? ~~
# nooooo~~
# 细心的你肯定已经发现,我们的脚本只是把网站相关的东西push到了xxx.github.io这个仓库
# 源码还没提交备份呢?!!!
git add .
git commit -m '备注:要提交源码啊!'
git push -u origin master
# ALL DONE, 这下服务器也更新了,github源码也提交了,新更新的内容也备份到另一个github仓库。
#再也不怕了。
总结一下
你肯定发现,其实我们根本就不用这么麻烦的,人家github pages就可以搭建博客的啊。为啥还要费这劲?
~~,敲黑板!刚开始的时候就说了,这是一次冲动和闲来无事的蛋疼。。。就这!
后期计划:
- ? 找个好看的网站主题吧?
- ?把新赶的几篇稿子搬到自己的网站吧?
- ?加个广告吧?!
- ?加个https吧?!
- 还是看时间吧!!!
感谢:
https://gohugo.io/getting-started/quick-start/
https://www.xxxlbox.com/posts/2018/hugo-deployment-webhook/
https://www.lovelucy.info/auto-deploy-website-by-webhooks-of-github-and-gitlab.html
https://blog.csdn.net/hanshileiai/article/details/54571028
https://tecadmin.net/install-latest-nodejs-and-npm-on-centos/
https://blog.csdn.net/reblue520/article/details/52799500
https://github.com/SixQuant/gitlab-webhook-handler/blob/master/gitlab-webhook-handler.js
https://github.com/rvagg/github-webhook-handler