pytorch F.affine_grid F.grid_sample探究
在pytorch框架中, F.affine_grid 与 F.grid_sample(torch.nn.functional as F)联合使用来对图像进行变形。
F.affine_grid 根据形变参数产生sampling grid,F.grid_sample根据sampling grid对图像进行变形。
需要注意,pytorch中的F.grid_sample是反向采样,这就导致了形变参数与直觉是相反的(后面有实验验证)(例如放射矩阵中的缩放因子是0.5,会使目标图像扩大两倍;平移为正会使目标图像往左上角移动)
【反向采样】:定义的sampling grid尺寸即输出图像的尺寸,而sampling grid其中每一个位置内的数值x,y,例如sampling_grid[i,j]=[x,y], 则表示输出图像在(i,j)点的像素值应该在原图(x,y)处取值,若x,y都恰好为整数且在原图范围内,则直接取原图在x,y点的像素值;若x,y不是都为整数但都在原图范围内,则需要用插值算法计算该点的像素值;超出图像范围的则为0。
实验一:
目的:验证F.affine_grid的形变参数与直觉是相反的
def blog_test():
    img = cv2.imread(r'C:\Users\dell7920\Desktop\box.png')
    out_h = img.shape[0]
    out_w = img.shape[1]
    img = np.moveaxis(img, -1, 0)
    print(img.shape)
    img_batch = torch.from_numpy(img).unsqueeze(0).float()
    # -30 表示正向采样中的30(但为顺时针,实际旋转矩阵的角度定义的是逆时针转的度数)
    angle = -30 * math.pi / 180  # 顺时针旋转30度,一定要加pi!
    #D = np.diag([1.5, 1.5])
    A = np.array([[np.cos(angle), -np.sin(angle)],
                  [np.sin(angle), np.cos(angle)]])
    print('A', A)
    tx = 0
    ty = 0
    theta = np.array(
        [[A[0, 0], A[0, 1], tx], [A[1, 0], A[1, 1], ty]])
    theta = torch.from_numpy(theta).float().unsqueeze(0)

    batch_size = theta.size()[0]
    out_size = torch.Size(
        (batch_size, 3, out_h, out_w))
    # 结论!!
    # 需要注意,这个theta与一般见到的theta不一样,这个是反着来的
    grid = F.affine_grid(theta, out_size)
    warped_image_batch = F.grid_sample(img_batch, grid)
    print(warped_image_batch.shape)
    output = warped_image_batch[0, :, :,
                                :].cpu().detach().numpy().astype('uint8')
    print(output.shape)
    output = np.moveaxis(output, 0, -1)
    cv2.imshow('out', output)
    cv2.waitKey(0)
    cv2.destroyAllWindows()
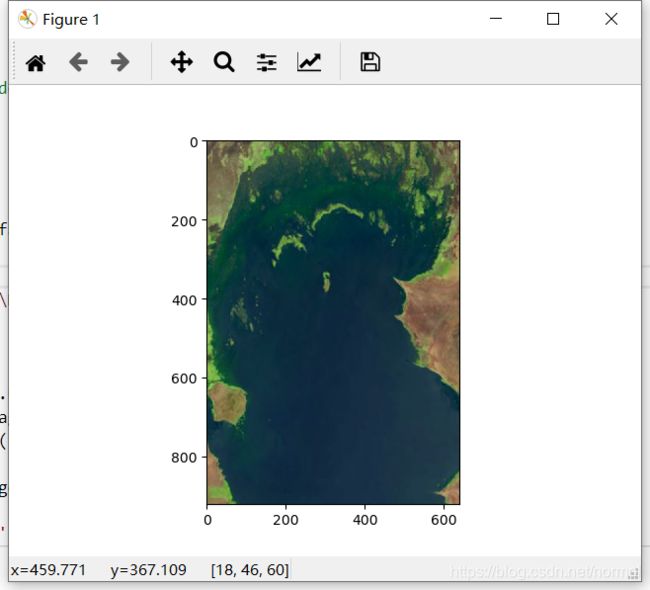
原图:

变形后的结果

实验二:
目的:验证对sampling grid做乘法,可以实现crop, padding等操作
from skimage import io
import pandas as pd
import numpy as np
import torch
from torch.autograd import Variable
import torch.nn.functional as F
import matplotlib.pyplot as plt


def grid2contour(grid):
    '''
    ref: https://zhuanlan.zhihu.com/p/147062836
    grid--image_grid used to show deform field
    type: numpy ndarray, shape: (h, w, 2), value range:(-1, 1)
    '''
    assert grid.ndim == 3
    x = np.arange(-1, 1, 2 / grid.shape[1])
    y = np.arange(-1, 1, 2 / grid.shape[0])
    X, Y = np.meshgrid(x, y)
    Z1 = grid[:, :, 0] + 1  # remove the dashed line
    Z1 = Z1[::-1]  # vertical flip
    Z2 = grid[:, :, 1] + 1

    plt.figure()
    plt.contour(X, Y, Z1, 15, colors='k')
    plt.contour(X, Y, Z2, 15, colors='k')
    plt.xticks(()), plt.yticks(())  # remove x, y ticks
    plt.title('deform field')
    plt.show()


class AffineGridGen(Module):
	#out_h,out_w都是原图大小
    def __init__(self, out_h=920, out_w=640, out_ch=3, use_cuda=True):
        super(AffineGridGen, self).__init__()
        self.out_h = out_h
        self.out_w = out_w
        self.out_ch = out_ch

    def forward(self, theta):
        b = theta.size()[0]
        if not theta.size() == (b, 2, 3):
            theta = theta.view(-1, 2, 3)
        theta = theta.contiguous()
        batch_size = theta.size()[0]
        out_size = torch.Size(
            (batch_size, self.out_ch, self.out_h, self.out_w))
        # F.affine_grid是得到output image中每个点在input image中对应的坐标
        # output shape: (batch,h,w,2)
        # 一定要注意,theta的batch要与outsize的batch一致
        # 生成的gird会归一化到[-1,1之间]
        return F.affine_grid(theta, out_size)


theta_identity = torch.Tensor(np.expand_dims(
    np.array([[1, 0, 0], [0, 1, 0]]), 0).astype(np.float32))

grid_gen = AffineGridGen()
grid = grid_gen(theta_identity)
# torch.Size([1, 240, 240, 2])
print(grid.shape)
# 测试,看grid是否正确
#grid2contour(grid[0, :, :, :].cpu().detach().numpy())

#padding_factor = 0.5
padding_factor = 1
crop_factor = 9 / 16
#crop_factor = 1
grid = grid * (padding_factor * crop_factor)


image = io.imread(r'C:\Users\dell7920\Desktop\1b.jpg')
# c,h,w->h,w,c
image = np.moveaxis(image, -1, 0)
print(image.shape)
image_batch = torch.from_numpy(image).unsqueeze(0).float()
warped_image_batch = F.grid_sample(image_batch, grid)
output_image = warped_image_batch.cpu().detach().numpy()[0, :, :, :]
# h,w,c -> c,h,w
output_image = np.moveaxis(output_image, 0, -1)
plt.figure()
plt.imshow(output_image.astype('uint8'))
plt.show()

