图像到图像的映射(实验三)
目录
1、单应性变换
1.1 直接线性变换算法
1.2 仿射变换
2、图像扭曲
2.1 图像中的图像
2.2 分段仿射扭曲
2.3 图像配准
3、创建全景图
3.1 RANSAC
3.2 稳健的单应性矩阵估计
3.3 拼接图像
1、单应性变换
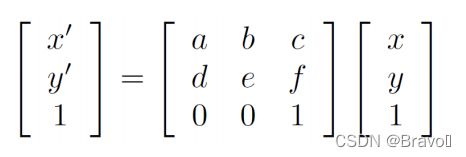
单应性变换是将一个平面内的点映射到另一个平面内的二维投影变换。平面是指图像或者三维中的平面表面。单应性变换具有很强的实用性,比如图像配准、图像纠正和纹理扭曲,以及创建全景图像。 本质上,单应性变换 H,按照下面的方程映射二维中的点(齐次坐标意义下):
1.1 直接线性变换算法
算法代码如下:
def H_from_points(fp,tp):
    """ 使用线性 DLT 方法,计算单应性矩阵 H,使 fp 映射到 tp。点自动进行归一化 """

    if fp.shape != tp.shape:
        raise RuntimeError('number of points do not match')
    # 对点进行归一化(对数值计算很重要)
    # --- 映射起始点 ---
    m = mean(fp[:2], axis=1)
    maxstd = max(std(fp[:2], axis=1)) + 1e-9
    C1 = diag([1/maxstd, 1/maxstd, 1])
    C1[0][2] = -m[0]/maxstd
    C1[1][2] = -m[1]/maxstd
    fp = dot(C1,fp)

    # --- 映射对应点 ---
    m = mean(tp[:2], axis=1)
    maxstd = max(std(tp[:2], axis=1)) + 1e-9
    C2 = diag([1/maxstd, 1/maxstd, 1])
    C2[0][2] = -m[0]/maxstd
    C2[1][2] = -m[1]/maxstd
    tp = dot(C2,tp)

    # 创建用于线性方法的矩阵,对于每个对应对,在矩阵中会出现两行数值
    nbr_correspondences = fp.shape[1]
    A = zeros((2*nbr_correspondences,9))
    for i in range(nbr_correspondences):
        A[2*i] = [-fp[0][i],-fp[1][i],-1,0,0,0,
            tp[0][i]*fp[0][i],tp[0][i]*fp[1][i],tp[0][i]]
        A[2*i+1] = [0,0,0,-fp[0][i],-fp[1][i],-1,
            tp[1][i]*fp[0][i],tp[1][i]*fp[1][i],tp[1][i]]
    U,S,V = linalg.svd(A)
    H = V[8].reshape((3,3))

    # 反归一化
    H = dot(linalg.inv(C2),dot(H,C1))

    # 归一化,然后返回
    return H / H[2,2]
1.2 仿射变换
仿射变换(Affine Transformation或 Affine Map)是一种二维坐标到二维坐标之间的线性变换,它保持了二维图形的“平直性”(即:直线经过变换之后依然是直线)和“平行性”(即:二维图形之间的相对位置关系保持不变,平行线依然是平行线,且直线上点的位置顺序不变)。
仿射变换用矩阵形式可以表示为:
def Haffine_from_points(fp,tp):
    """ 计算 H,仿射变换,使得 tp 是 fp 经过仿射变换 H 得到的 """
    if fp.shape != tp.shape:
        raise RuntimeError('number of points do not match')

    # 对点进行归一化
    # --- 映射起始点 ---
    m = mean(fp[:2], axis=1)
    maxstd = max(std(fp[:2], axis=1)) + 1e-9
    C1 = diag([1/maxstd, 1/maxstd, 1])
    C1[0][2] = -m[0]/maxstd
    C1[1][2] = -m[1]/maxstd
    fp_cond = dot(C1,fp)

    # --- 映射对应点 ---
    m = mean(tp[:2], axis=1)
    C2 = C1.copy() # 两个点集,必须都进行相同的缩放
    C2[0][2] = -m[0]/maxstd
    C2[1][2] = -m[1]/maxstd
    tp_cond = dot(C2,tp)

    # 因为归一化后点的均值为 0,所以平移量为 0
    A = concatenate((fp_cond[:2],tp_cond[:2]), axis=0)
    U,S,V = linalg.svd(A.T)

    # 如 Hartley 和 Zisserman 著的Multiple View Geometry in Computer, Scond Edition 所示,
    # 创建矩阵 B 和 C
    tmp = V[:2].T
    B = tmp[:2]
    C = tmp[2:4]

    tmp2 = concatenate((dot(C,linalg.pinv(B)),zeros((2,1))), axis=1)
    H = vstack((tmp2,[0,0,1]))

    # 反归一化
    H = dot(linalg.inv(C2),dot(H,C1))

return H / H[2,2]2、图像扭曲
transformed_im = ndimage.affine_transform(im,A,b,size)
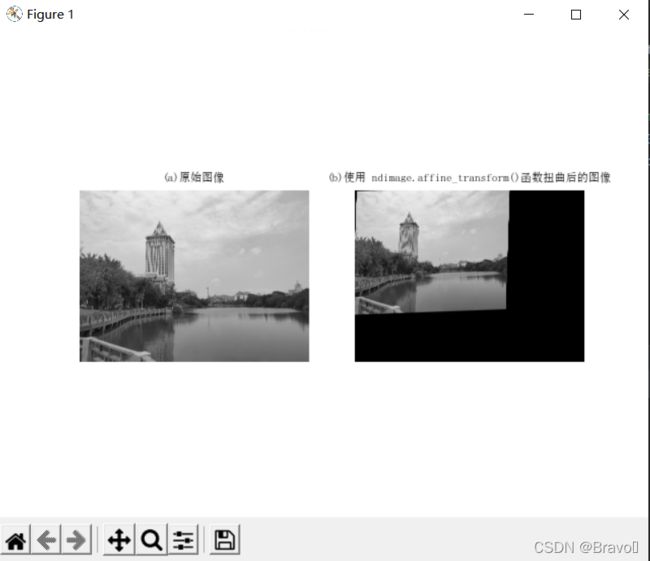
使用一个线性变换 A 和一个平移向量 b 来对图像块应用仿射变换。选项参数size可以用来指定输出图像的大小。默认输出图像设置为和原始图像同样大小。
测试代码如下:
from scipy import ndimage
from PIL import Image
from pylab import *

# 添加中文字体支持
from matplotlib.font_manager import FontProperties
font = FontProperties(fname=r"c:\windows\fonts\SimSun.ttc", size=8)

im = array(Image.open('E:\\Junior_N\\computerVision\\imgTest\\IMG20210426115054.jpg').convert('L'))
H = array([[1.4,0.05,-100],[0.05,1.5,-100],[0,0,1]])
im2 = ndimage.affine_transform(im,H[:2,:2],(H[0,2],H[1,2]))

figure()
gray()
subplot(121)
title(u'(a)原始图像', fontproperties=font)
axis('off')
imshow(im)
subplot(122)
title(u'(b)使用 ndimage.affine_transform()函数扭曲后的图像', fontproperties=font)
axis('off')
imshow(im2)
show()
代码运行效果如下:
可以看到,输出图像结果中丢失的像素用零来补充。
2.1 图像中的图像
def image_in_image(im1,im2,tp):
    """ 使用仿射变换将 im1 放置在 im2 上,使 im1 图像的角和 tp 尽可能的靠近
        tp 是齐次表示的,并且是按照从左上角逆时针计算的 """

    # 扭曲的点
    m,n = im1.shape[:2]
    fp = array([[0,m,m,0],[0,0,n,n],[1,1,1,1]])

    # 计算仿射变换,并且将其应用于图像 im1
    H = homography.Haffine_from_points(tp,fp)
    im1_t = ndimage.affine_transform(im1,H[:2,:2],
            (H[0,2],H[1,2]),im2.shape[:2])
    alpha = (im1_t > 0)

    return (1-alpha)*im2 + alpha*im1_t
将扭曲的图像和第二幅图像融合,创建alpha图像(Alpha是一个8位的灰度图像通道,该通道用256级灰度来记录图像中的透明度信息,定义透明、不透明和半透明区域,其中黑表示透明,白表示不透明,灰表示半透明)。该图像定义了每个像素从各个图像中获取的像素值成分多少。这里基于以下事实,扭曲的图像是在扭曲区域边界之外以 0 来填充的图像,来创建一个二值的 alpha 图像。严格意义上说,需要在第一幅图像中的潜 在 0 像素上加上一个小的数值,或者合理地处理这些 0 像素。注意,这里使用的图像坐标是齐次坐标意义下的。
测试代码:
#图像中的图像
# -*- coding: utf-8 -*-
from scipy.spatial import Delaunay
from PCV.geometry import warp, homography
from PIL import Image
from pylab import *
from scipy import ndimage

# 将im1仿射扭曲到im2的指定位置
im1 = array(Image.open('E:\\Junior_N\\computerVision\\imgTest\\IMG20210511185035.jpg').convert('L'))
im2 = array(Image.open('E:\\Junior_N\\computerVision\\imgTest\\IMG20210426115054.jpg').convert('L'))
# 选定指定的位置,即目标点
tp = array([[264,538,540,264],[40,36,605,605],[1,1,1,1]])
# 调用的warp.py的image_in_image函数,从而实现仿射变换
im3 = warp.image_in_image(im1, im2, tp)
figure()
gray()
subplot(131)
axis('off')
imshow(im1)
subplot(132)
axis('off')
imshow(im2)
subplot(133)
axis('off')
imshow(im3)
axis('off')
show()
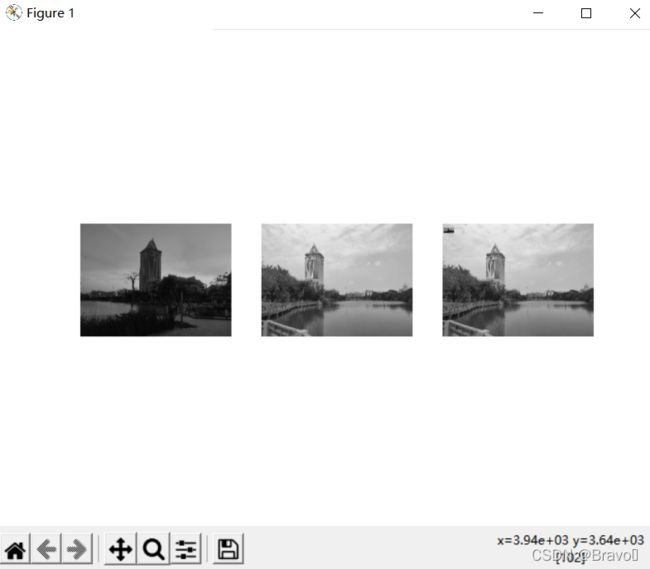
测试图片为:
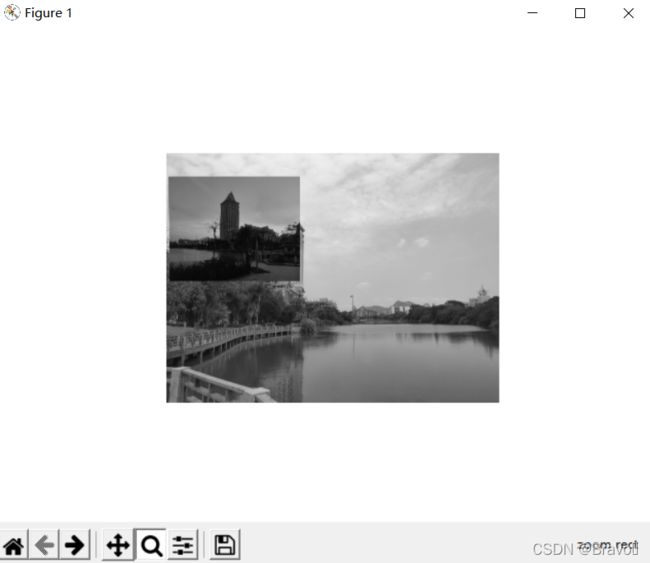
运行效果如下:
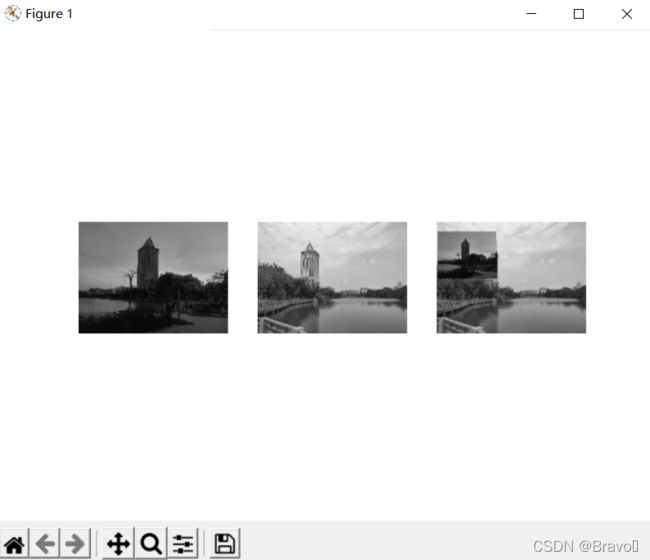
稍微调整目的点:
tp = array([[564,3076,3080,564],[50,80,3210,3210],[1,1,1,1]])运行效果为:
函数 Haffine_from_points() 会返回给定对应点对的最优仿射变换。
def alpha_for_triangle(points,m,n):
    """ 对于带有由 points 定义角点的三角形,创建大小为 (m,n) 的 alpha 图
        (在归一化的齐次坐标意义下)"""
    alpha = zeros((m,n))
    for i in range(min(points[0]),max(points[0])):
        for j in range(min(points[1]),max(points[1])):
            x = linalg.solve(points,[i,j,1])
            if min(x) > 0: # 所有系数都大于零
                alpha[i,j] = 1
    return alpha
对于三个点,仿射变换可以将一幅图像进行扭曲,使这三对对应点对可以完美地匹
from scipy.spatial import Delaunay
from PCV.geometry import warp, homography
from PIL import Image
from pylab import *
from scipy import ndimage

# 将im1仿射扭曲到im2的指定位置
im1 = array(Image.open('E:\\Junior_N\\computerVision\\imgTest\\IMG20210511185035.jpg').convert('L'))
im2 = array(Image.open('E:\\Junior_N\\computerVision\\imgTest\\IMG20210426115054.jpg').convert('L'))
# 选定指定的位置,即目标点
tp = array([[564,3076,3080,564],[50,80,3210,3210],[1,1,1,1]])
# 调用的warp.py的image_in_image函数,从而实现仿射变换
im3 = warp.image_in_image(im1, im2, tp)

# 选定 im1 角上的一些点
m,n = im1.shape[:2]
fp = array([[0,m,m,0],[0,0,n,n],[1,1,1,1]])

# 第一个三角形
tp2 = tp[:,:3]
fp2 = fp[:,:3]

# 计算 H
H = homography.Haffine_from_points(tp2,fp2)
im1_t = ndimage.affine_transform(im1,H[:2,:2],
 (H[0,2],H[1,2]),im2.shape[:2])

# 三角形的 alpha
alpha = warp.alpha_for_triangle(tp2,im2.shape[0],im2.shape[1])
im3 = (1-alpha)*im2 + alpha*im1_t

# 第二个三角形
tp2 = tp[:,[0,2,3]]
fp2 = fp[:,[0,2,3]]

# 计算 H
H = homography.Haffine_from_points(tp2,fp2)
im1_t = ndimage.affine_transform(im1,H[:2,:2],
        (H[0,2],H[1,2]),im2.shape[:2])

# 三角形的 alpha 图像
alpha = warp.alpha_for_triangle(tp2,im2.shape[0],im2.shape[1])
im4 = (1-alpha)*im3 + alpha*im1_t


figure()
gray()
imshow(im4)
axis('equal')
axis('off')
show()
实现效果:
这里只是简单地为每个三角形创建了 alpha 图像,然后将所有的图像合并起来。该三 角形的 alpha 图像可以简单地通过检查像素的坐标是否能够写成三角形顶点坐标的凸 组合来计算得出 1。如果坐标可以表示成这种形式,那么该像素就位于三角形的内部。
2.2 分段仿射扭曲
import numpy as np
from pylab import *
from scipy.spatial import Delaunay
import matplotlib.pyplot as plt

x,y = array(np.random.standard_normal((2,100)))
tri = Delaunay(np.c_[x,y]).simplices
figure()
plt.subplot(121)
plt.plot(x,y,'*')
for t in tri:
 t_ext = [t[0], t[1], t[2], t[0]] # 将第一个点加入到最后
 plt.subplot(122)
 plot(x[t_ext],y[t_ext],'r')
plot(x,y,'*')
axis('off')
show()
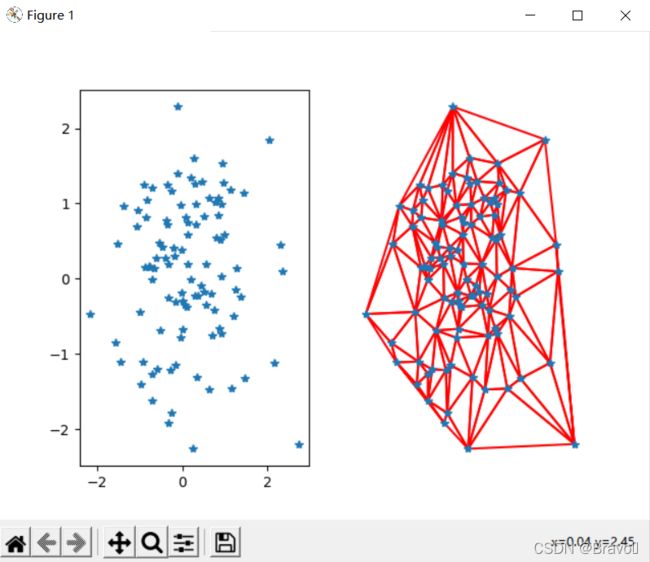
运行效果:(其为一个随机的二维点集)
显示了一些实例点和三角剖分的结果。狄洛克三角剖分选择一些三角形, 使三角剖分中所有三角形的最小角度最大 。在 warp.py 文件中创建用于三角剖分的函数:
def triangulate_points(x,y):
    """ Delaunay triangulation of 2D points. """

    #centers,edges,tri,neighbors = md.delaunay(x,y)
    tri = Delaunay(np.c_[x, y]).simplices
return tri注意:warp.py文件中自带了triangulate_points(x,y),但是由于版本问题需要将centers,edges,tri,neighbors = md.delaunay(x,y)改为tri = Delaunay(np.c_[x, y]).simplices,所以在上面的测试代码中也要做出相应的修改。(例如:导入包改为from scipy.spatial import Delaunay,centers,edges,tri,neighbors = md.delaunay(x,y)改为tri = Delaunay(np.c_[x,y]).simplices)
此外,我这边按照x,y = array(random.standard_normal((2,100)))会发生如下错误:
需要将其改为:x,y = array(np.random.standard_normal((2,100)))
2.3 图像配准
图像配准可以视为源图像和目标图像关于空间和灰度的映射关系。
图像配准问题的关键:最佳空间变换。
图像配准的实质:不同图像中表征同一位置的物理点一一对应。
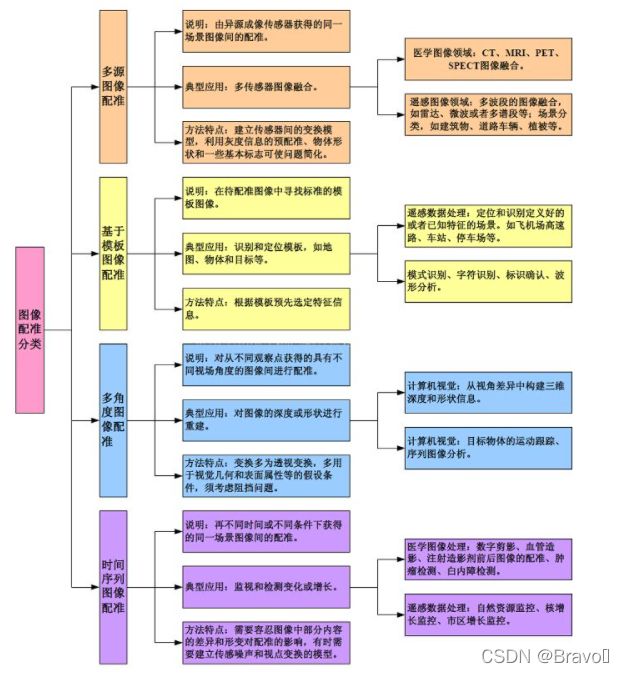
配准算法的一般步骤:
- 特征提取(分别提取两幅图像中共有的图像特征)
- 特征匹配(对特征作描述、利用相似度准则进行特征匹配)
- 估计变换模型(空间变换模型:平移、旋转、刚体变换、仿射变换、投影变换、非线性变换等)
- 图像重采样及变换(插值处理:最近领域法、双线性插值法、立方卷积插值法等)
3、创建全景图
3.1 RANSAC
RANSAC的基本假设是:
(1)数据由“局内点”组成,例如:数据的分布可以用一些模型参数来解释;
(2)“局外点”是不能适应该模型的数据;
(3)除此之外的数据属于噪声。
局外点产生的原因:噪声的极值;错误的测量方法;对数据的错误假设。
RANSAC通过反复选择数据中的一组随机子集来达成目标。被选取的子集被假设为局内点,并用下述方法进行验证:
- 首先我们先随机假设一小组局内点为初始值。然后用此局内点拟合一个模型,此模型适应于假设的局内点,所有的未知参数都能从假设的局内点计算得出。
- 用1中得到的模型去测试所有的其它数据,如果某个点适用于估计的模型,认为它也是局内点,将局内点扩充。
- 如果有足够多的点被归类为假设的局内点,那么估计的模型就足够合理。
- 然后,用所有假设的局内点去重新估计模型,因为此模型仅仅是在初始的假设的局内点估计的,后续有扩充后,需要更新。
- 最后,通过估计局内点与模型的错误率来评估模型。
整个这个过程为迭代一次,此过程被重复执行固定的次数,每次产生的模型有两个结局:
1、要么因为局内点太少,还不如上一次的模型,而被舍弃,
2、要么因为比现有的模型更好而被选用。(对被选中的模型上或者阈值内的点再进行最小二乘找到一条拟合更好的模型)
测试代码:
import numpy
import scipy  # use numpy if scipy unavailable
import scipy.linalg  # use numpy if scipy unavailable

def ransac(data, model, n, k, t, d, debug=False, return_all=False):
    """fit model parameters to data using the RANSAC algorithm

This implementation written from pseudocode found at
http://en.wikipedia.org/w/index.php?title=RANSAC&oldid=116358182

{{{
Given:
    data - a set of observed data points
    model - a model that can be fitted to data points
    n - the minimum number of data values required to fit the model
    k - the maximum number of iterations allowed in the algorithm
    t - a threshold value for determining when a data point fits a model
    d - the number of close data values required to assert that a model fits well to data
Return:
    bestfit - model parameters which best fit the data (or nil if no good model is found)
iterations = 0
bestfit = nil
besterr = something really large
while iterations < k {
    maybeinliers = n randomly selected values from data
    maybemodel = model parameters fitted to maybeinliers
    alsoinliers = empty set
    for every point in data not in maybeinliers {
        if point fits maybemodel with an error smaller than t
             add point to alsoinliers
    }
    if the number of elements in alsoinliers is > d {
        % this implies that we may have found a good model
        % now test how good it is
        bettermodel = model parameters fitted to all points in maybeinliers and alsoinliers
        thiserr = a measure of how well model fits these points
        if thiserr < besterr {
            bestfit = bettermodel
            besterr = thiserr
        }
    }
    increment iterations
}
return bestfit
}}}
"""
    iterations = 0
    bestfit = None
    besterr = numpy.inf
    best_inlier_idxs = None
    while iterations < k:
        maybe_idxs, test_idxs = random_partition(n, data.shape[0])
        maybeinliers = data[maybe_idxs, :]
        test_points = data[test_idxs]
        maybemodel = model.fit(maybeinliers)
        test_err = model.get_error(test_points, maybemodel)
        also_idxs = test_idxs[test_err < t]  # select indices of rows with accepted points
        alsoinliers = data[also_idxs, :]
        if debug:
            print('test_err.min()', test_err.min())
            print('test_err.max()', test_err.max())
            print('numpy.mean(test_err)', numpy.mean(test_err))
            print('iteration %d:len(alsoinliers) = %d' % (
                iterations, len(alsoinliers)))
        if len(alsoinliers) > d:
            betterdata = numpy.concatenate((maybeinliers, alsoinliers))
            bettermodel = model.fit(betterdata)
            better_errs = model.get_error(betterdata, bettermodel)
            thiserr = numpy.mean(better_errs)
            if thiserr < besterr:
                bestfit = bettermodel
                besterr = thiserr
                best_inlier_idxs = numpy.concatenate((maybe_idxs, also_idxs))
        iterations += 1
    if bestfit is None:
        raise ValueError("did not meet fit acceptance criteria")
    if return_all:
        return bestfit, {'inliers': best_inlier_idxs}
    else:
        return bestfit


def random_partition(n, n_data):
    """return n random rows of data (and also the other len(data)-n rows)"""
    all_idxs = numpy.arange(n_data)
    numpy.random.shuffle(all_idxs)
    idxs1 = all_idxs[:n]
    idxs2 = all_idxs[n:]
    return idxs1, idxs2


class LinearLeastSquaresModel:
    """linear system solved using linear least squares

    This class serves as an example that fulfills the model interface
    needed by the ransac() function.

    """

    def __init__(self, input_columns, output_columns, debug=False):
        self.input_columns = input_columns
        self.output_columns = output_columns
        self.debug = debug

    def fit(self, data):
        A = numpy.vstack([data[:, i] for i in self.input_columns]).T
        B = numpy.vstack([data[:, i] for i in self.output_columns]).T
        x, resids, rank, s = numpy.linalg.lstsq(A, B)
        return x

    def get_error(self, data, model):
        A = numpy.vstack([data[:, i] for i in self.input_columns]).T
        B = numpy.vstack([data[:, i] for i in self.output_columns]).T
        B_fit = scipy.dot(A, model)
        err_per_point = numpy.sum((B - B_fit) ** 2, axis=1)  # sum squared error per row
        return err_per_point


def test():
    # generate perfect input data

    n_samples = 500
    n_inputs = 1
    n_outputs = 1
    A_exact = 20 * numpy.random.random((n_samples, n_inputs))
    perfect_fit = 60 * numpy.random.normal(size=(n_inputs, n_outputs))  # the model
    B_exact = scipy.dot(A_exact, perfect_fit)
    assert B_exact.shape == (n_samples, n_outputs)

    # add a little gaussian noise (linear least squares alone should handle this well)
    A_noisy = A_exact + numpy.random.normal(size=A_exact.shape)
    B_noisy = B_exact + numpy.random.normal(size=B_exact.shape)

    if 1:
        # add some outliers
        n_outliers = 100
        all_idxs = numpy.arange(A_noisy.shape[0])
        numpy.random.shuffle(all_idxs)
        outlier_idxs = all_idxs[:n_outliers]
        non_outlier_idxs = all_idxs[n_outliers:]
        A_noisy[outlier_idxs] = 20 * numpy.random.random((n_outliers, n_inputs))
        B_noisy[outlier_idxs] = 50 * numpy.random.normal(size=(n_outliers, n_outputs))

    # setup model

    all_data = numpy.hstack((A_noisy, B_noisy))
    input_columns = range(n_inputs)  # the first columns of the array
    output_columns = [n_inputs + i for i in range(n_outputs)]  # the last columns of the array
    debug = True
    model = LinearLeastSquaresModel(input_columns, output_columns, debug=debug)

    linear_fit, resids, rank, s = numpy.linalg.lstsq(all_data[:, input_columns], all_data[:, output_columns])

    # run RANSAC algorithm
    ransac_fit, ransac_data = ransac(all_data, model,
                                     5, 5000, 7e4, 50,  # misc. parameters
                                     debug=debug, return_all=True)
    if 1:
        import pylab

        sort_idxs = numpy.argsort(A_exact[:, 0])
        A_col0_sorted = A_exact[sort_idxs]  # maintain as rank-2 array

        if 1:
            pylab.plot(A_noisy[:, 0], B_noisy[:, 0], 'k.', label='data')
            pylab.plot(A_noisy[ransac_data['inliers'], 0], B_noisy[ransac_data['inliers'], 0], 'bx',
                       label='RANSAC data')
        else:
            pylab.plot(A_noisy[non_outlier_idxs, 0], B_noisy[non_outlier_idxs, 0], 'k.', label='noisy data')
            pylab.plot(A_noisy[outlier_idxs, 0], B_noisy[outlier_idxs, 0], 'r.', label='outlier data')
        pylab.plot(A_col0_sorted[:, 0],
                   numpy.dot(A_col0_sorted, ransac_fit)[:, 0],
                   label='RANSAC fit')
        pylab.plot(A_col0_sorted[:, 0],
                   numpy.dot(A_col0_sorted, perfect_fit)[:, 0],
                   label='exact system')
        pylab.plot(A_col0_sorted[:, 0],
                   numpy.dot(A_col0_sorted, linear_fit)[:, 0],
                   label='linear fit')
        pylab.legend()
        pylab.show()
if __name__ == '__main__':
    test()
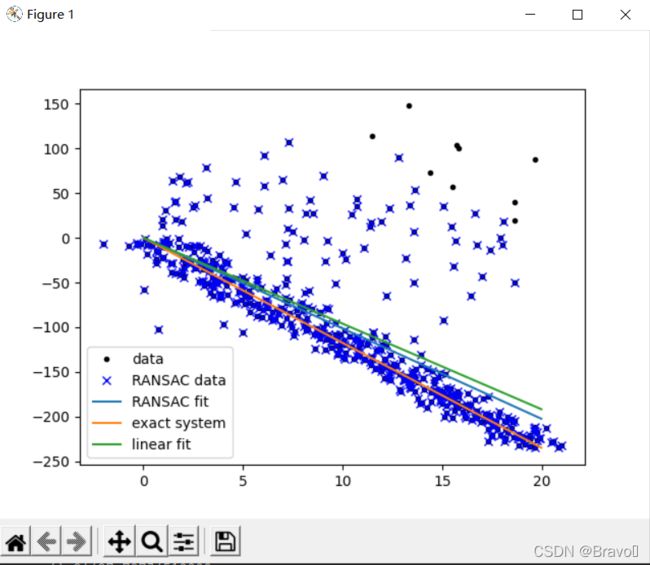
测试结果:(使用RANSAC算法用一条直线来拟合包含噪声数据点集)
之所以RANSAC能在有大量噪音情况仍然准确,主要原因是随机取样时只取一部分可以避免估算结果被离群数据影响。
3.2 稳健的单应性矩阵估计
我们在任何模型中都可以使用 RANSAC 模块。在使用 RANSAC 模块时,我们只需要在相应 Python 类中实现 fit() 和 get_error() 方法,剩下就是正确地使用 ransac.py,我们这里使用可能的对应点集来自动找到用于全景图像的单应性矩阵。
测试代码:
from PCV.localdescriptors import sift

# 设置数据文件夹的路径
featname = ['E:\\Junior_N\\computerVision\\imgTest\\Lab_3\\im' + str(i + 1) + '.sift' for i in range(5)]
imname = ['E:\\Junior_N\\computerVision\\imgTest\\Lab_3\\im' + str(i + 1) + '.jpg' for i in range(5)]

# 提取特征和匹配
l = {}
d = {}
for i in range(5):
    sift.process_image(imname[i], featname[i])  # 处理图像生成sift并保存在文件中
    l[i], d[i] = sift.read_features_from_file(featname[i])  # 读取特征符并以矩阵形式返回

matches = {}
for i in range(4):
    matches[i] = sift.match(d[i + 1], d[i])  # 匹配特征符
3.3 拼接图像
将下列代码添加到warp.py文件中
def panorama(H, fromim, toim, padding=2400, delta=2400):
    """ 使用单应性矩阵H(使用RANSAC稳健性估计得出),协调两幅图像,创建水平全景图。结果
        为一幅和toim具有相同高度的图像。padding指定填充像素的数目,delta指定额外的平移量"""

    # 检查图像是灰度图像,还是彩色图像
    is_color = len(fromim.shape) == 3

    # 用于geometric_transform()的单应性变换
    def transf(p):
        p2 = dot(H, [p[0], p[1], 1])
        return (p2[0] / p2[2], p2[1] / p2[2])

    if H[1, 2] < 0:  # fromim在右边
        print('warp - right')
        # 变换fromim
        if is_color:
            # 在目标图像的右边填充0
            toim_t = hstack((toim, zeros((toim.shape[0], padding, 3))))
            fromim_t = zeros((toim.shape[0], toim.shape[1] + padding, toim.shape[2]))
            for col in range(3):
                fromim_t[:, :, col] = ndimage.geometric_transform(fromim[:, :, col],
                                                                  transf, (toim.shape[0], toim.shape[1] + padding))
        else:
            # 在目标图像的右边填充0
            toim_t = hstack((toim, zeros((toim.shape[0], padding))))
            fromim_t = ndimage.geometric_transform(fromim, transf,
                                                   (toim.shape[0], toim.shape[1] + padding))
    else:
        print('warp - left')
        # 为了补偿填充效果,在左边加入平移量
        H_delta = array([[1, 0, 0], [0, 1, -delta], [0, 0, 1]])
        H = dot(H, H_delta)
        # fromim变换
        if is_color:
            # 在目标图像的左边填充0
            toim_t = hstack((zeros((toim.shape[0], padding, 3)), toim))
            fromim_t = zeros((toim.shape[0], toim.shape[1] + padding, toim.shape[2]))
            for col in range(3):
                fromim_t[:, :, col] = ndimage.geometric_transform(fromim[:, :, col],
                                                                  transf, (toim.shape[0], toim.shape[1] + padding))
        else:
            # 在目标图像的左边填充0
            toim_t = hstack((zeros((toim.shape[0], padding)), toim))
            fromim_t = ndimage.geometric_transform(fromim,
                                                   transf, (toim.shape[0], toim.shape[1] + padding))

    # 协调后返回(将fromim放在toim上)
    if is_color:
        # 所有非黑像素
        alpha = ((fromim_t[:, :, 0] * fromim_t[:, :, 1] * fromim_t[:, :, 2]) > 0)
        for col in range(3):
            toim_t[:, :, col] = fromim_t[:, :, col] * alpha + toim_t[:, :, col] * (1 - alpha)
    else:
        alpha = (fromim_t > 0)
        toim_t = fromim_t * alpha + toim_t * (1 - alpha)

    return toim_t
测试代码:
from pylab import *
from numpy import *
from PIL import Image

from PCV.geometry import homography, warp
from PCV.localdescriptors import sift

# 需要拼接的图片数量
pictureNum = 5

# 设置数据文件夹的路径
featname = ['E:\\Junior_N\\computerVision\\imgTest\\Lab_3\\img\\' + str(i + 1) + '.sift' for i in range(pictureNum)]
imname = ['E:\\Junior_N\\computerVision\\imgTest\\Lab_3\\img\\' + str(i + 1) + '.jpg' for i in range(pictureNum)]

# 提取特征和匹配
l = {}
d = {}
for i in range(pictureNum):
    sift.process_image(imname[i], featname[i])  # 处理图像生成sift并保存在文件中
    l[i], d[i] = sift.read_features_from_file(featname[i])  # 读取特征符并以矩阵形式返回

matches = {}
for i in range(pictureNum - 1):
    matches[i] = sift.match(d[i + 1], d[i])  # 匹配特征符

# 可视化匹配
for i in range(pictureNum - 1):
    im1 = array(Image.open(imname[i]))
    im2 = array(Image.open(imname[i + 1]))
    figure()
    sift.plot_matches(im2, im1, l[i + 1], l[i], matches[i], show_below=True)


# 将匹配转化成齐次坐标点的函数
def convert_points(j):
    ndx = matches[j].nonzero()[0]
    fp = homography.make_homog(l[j + 1][ndx, :2].T)
    ndx2 = [int(matches[j][i]) for i in ndx]
    tp = homography.make_homog(l[j][ndx2, :2].T)  # 将点集转化为齐次坐标表示

    # 转化x和y  -  TODO这应该移动到其他地方
    fp = vstack([fp[1], fp[0], fp[2]])
    tp = vstack([tp[1], tp[0], tp[2]])
    return fp, tp


# 估计单应性矩阵
model = homography.RansacModel()

fp, tp = convert_points(1)
H_12 = homography.H_from_ransac(fp, tp, model)[0]  # im1 到im2 的单应性矩阵

fp, tp = convert_points(0)
H_01 = homography.H_from_ransac(fp, tp, model)[0]  # im0 到im1 的单应性矩阵

tp, fp = convert_points(2)  # 注意:点是反序的
H_32 = homography.H_from_ransac(fp, tp, model)[0]  # im3 到im2 的单应性矩阵

tp, fp = convert_points(3)  # 注意:点是反序的
H_43 = homography.H_from_ransac(fp, tp, model)[0]  # im4 到im3 的单应性矩阵

# 扭曲图像
delta = 2000  # 用于填充和平移

im1 = array(Image.open(imname[1]), "uint8")
im2 = array(Image.open(imname[2]), "uint8")
im_12 = warp.panorama(H_12, im1, im2, delta, delta)

im1 = array(Image.open(imname[0]), "f")
im_02 = warp.panorama(dot(H_12, H_01), im1, im_12, delta, delta)

im1 = array(Image.open(imname[3]), "f")
im_32 = warp.panorama(H_32, im1, im_02, delta, delta)

im1 = array(Image.open(imname[4]), "f")
im_42 = warp.panorama(dot(H_32, H_43), im1, im_32, delta, 2 * delta)

figure()
imshow(array(im_42, "uint8"))
axis('off')
show()
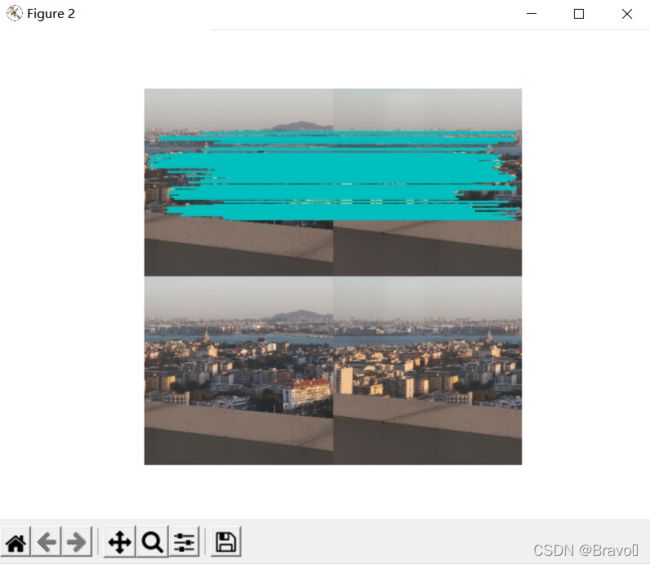
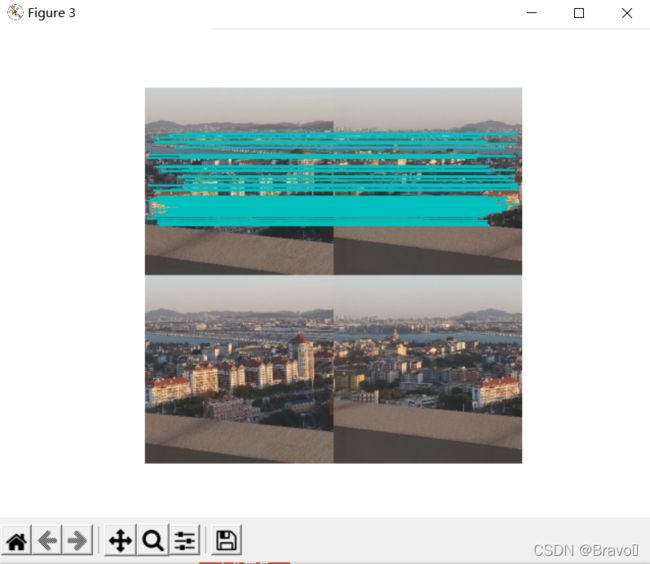
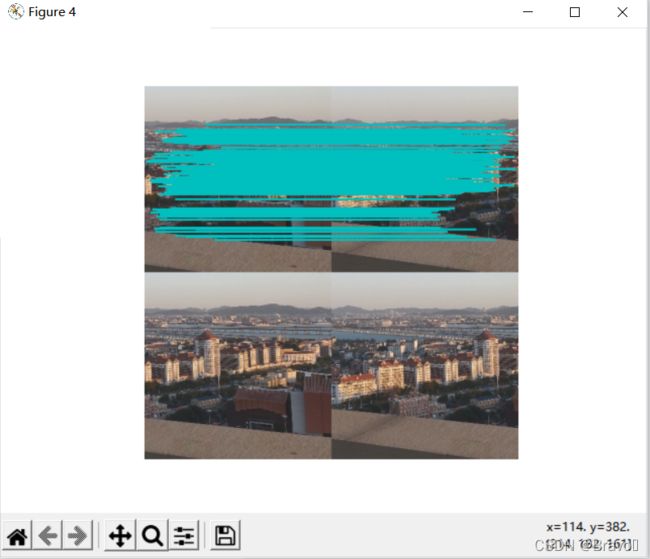
运行结果:
可以看出其效果不是很理想。主要原因是我测试图片的问题,由于手机拍摄像素过大,跑了半天都没出结果,而这组测试数据是从视频中截取的几帧,后续将添加并重新测试别的数据集。
问题:
python OSError: im1.sift not found.解决方法_飘啊飘啊飘啊飘的博客-CSDN博客

