Autoware-开源无人车项目的快速安装配置
Autoware-开源无人车项目的快速安装配置步骤:
- 需要的配置:
- 硬件
- 环境
- 通过源码source进行编译安装:
- 需要你的机器配置有:(请依次检查是否安装有)
- 安装依赖项
- build构建
- 初始化工作空间并编译
- 完成后运行
- 如果报错:
- 运行后,根据此项目提供的几个demo复现一下:
需要的配置:
硬件
工作站/个人电脑/PX2任选其一:
1:
Generic x86
Intel Core i7 (推荐), Core i5, Atom
内存16-32G
超过30G的固态SSD
NVIDIA GTX GeForce GPU (980M或以上)
2:
NVIDIA DRIVE
DRIVE PX2,要求>30G的SSD固态
环境
1 ubuntu16.04(推荐) 或者ubuntu14.04
2 ROS kinetic (对应ubuntu16) 或者ROS indigo (对应ubuntu14)
以上满足要求后,可以开始安装。有两种安装方式:通过docker安装或者通过source源码编译安装。
注意:github上此项目推荐通过docker安装,用过Linux的都知道,包,库之间的依赖关系比较复杂,常常出现不兼容的情况,docker就像是一个容器,把包,库之间的依赖关系隔离开来,而且不必像虚拟机那样固定的分配内存与硬盘空间造成资源浪费。
但是:本文先讲如何通过source安装,因为docker安装autoware涉及docker的其他步骤,以及Nvidia的docker安装,等有时间再另开文章写。
通过源码source进行编译安装:
地址:https://github.com/CPFL/Autoware/wiki/Source-Build
需要你的机器配置有:(请依次检查是否安装有)
1:(必须)ROS indigo (Ubuntu 14.04) or ROS jade (Ubuntu 15.04) or ROS kinetic (Ubuntu 16.04)
2:(必须)OpenCV 2.4.10 或者更新版本
3:(必须)Qt 5.2.1 或更新版本
4:CUDA (可选)
5:FlyCapture2 (optional):
6:Armadillo (optional)
假设你已经满足版本,进入正题:
安装依赖项
ubuntu14.04:
sudo apt-get install -y  python-catkin-pkg python-rosdep python-wstool ros-$ROS_DISTRO-catkin
sudo add-apt-repository ppa:mosquitto-dev/mosquitto-ppa
sudo apt-get update
sudo apt-get install libmosquitto-dev
ubuntu16.04
sudo apt-get update
sudo apt-get install -y python-catkin-pkg python-rosdep python-wstool ros-$ROS_DISTRO-catkin libmosquitto-dev gksu
build构建
1 克隆github仓库
cd $HOME
git clone https://github.com/CPFL/Autoware.git --recurse-submodules
如果你是从github上下载压缩包,解压后,还需要
git submodule update --init --recursive # 在解压后的文件夹下执行
初始化工作空间并编译
cd ~/Autoware/ros/src
catkin_init_workspace
cd ../
rosdep install -y --from-paths src --ignore-src --rosdistro $ROS_DISTRO
./catkin_make_release
完成后运行
如果没出错,就可以运行:
cd $HOME/Autoware/ros
 ./run
如果报错:
1 检查 ROS,opencv,QT是否满足版本要求
2 如果在初始化工作空间并编译 这一步出错,请复制出错信息到github:
https://github.com/CPFL/Autoware/issues

运行后,根据此项目提供的几个demo复现一下:
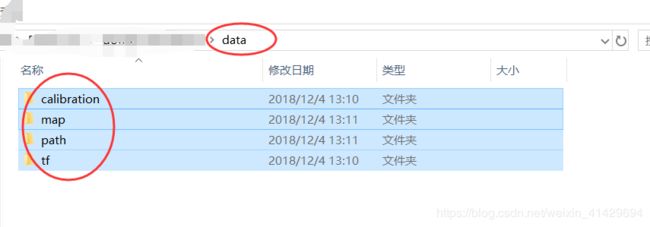
- Download the sample 3D pointcloud/vector map data.
链接:https://www.autoware.ai/sample/sample_moriyama_data.tar.gz
解压后,包含
- Download the sample ROSBAG data (LiDAR: VELODYNE HDL-32E, GNSS:
JAVAD GPS RTK Delta 3).
https://www.autoware.ai/sample/sample_moriyama_150324.tar.gz
解压后有一个.bag文件,文件包括了原始点云数据,原始图片数据,时间点,车辆速度等数据。

注意:在运行demo 1时,参考Autoware_QuickStart_v1.1.pdf 中步骤,有一点错误,会造成无法运行,demo2中播放.Bag文件错误与demo1一样,改过来就是。
在4.1 步骤后:

点击 setup选项卡,选中其中的TF按钮+vehicle 按钮
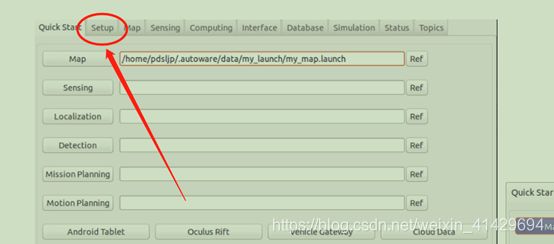
接着继续参照步骤执行,在4.2处,不选择world,因为没有这个选项,选择velodyne这个选项。

接着继续按照步骤执行即可。
欢迎交流,有任何疑问或问题,请在下方留言或者发送邮件:[email protected]